Introduction
This laptop comes with an onboard M2 SATA drive that has a 256GB capacity, with the provision of adding a SATA hard disk internally. Whilst you could add another SSD, I decided to reuse an old HDD I had around for some extra storage.
To prepare, make sure you have the hard disk ready that you would like to install and the SATA cable. The thickness of the SATA drive is important, as you will see later I made the mistake of installing a thicker HDD than the bay is designed for. I would also check and make sure the SATA cable is already shipped inside your laptop, since I assumed I had to purchase one separately.
Opening Up
This was a bit tricky, you have to unscrew the screws, the top three being fastened into place and are non-removable. What this means is that you unscrew then as normal but they do not come out of the case, rather they stay to prevent them from falling out.
Once the screws have been removed or loosened, you will need to pry around the edges of the laptop with either a credit or debit card or a thin plastic tip to loosen it. You may need to pry to get it to loosen, be gentle and apply even gradual pressure.
Removing the caddy
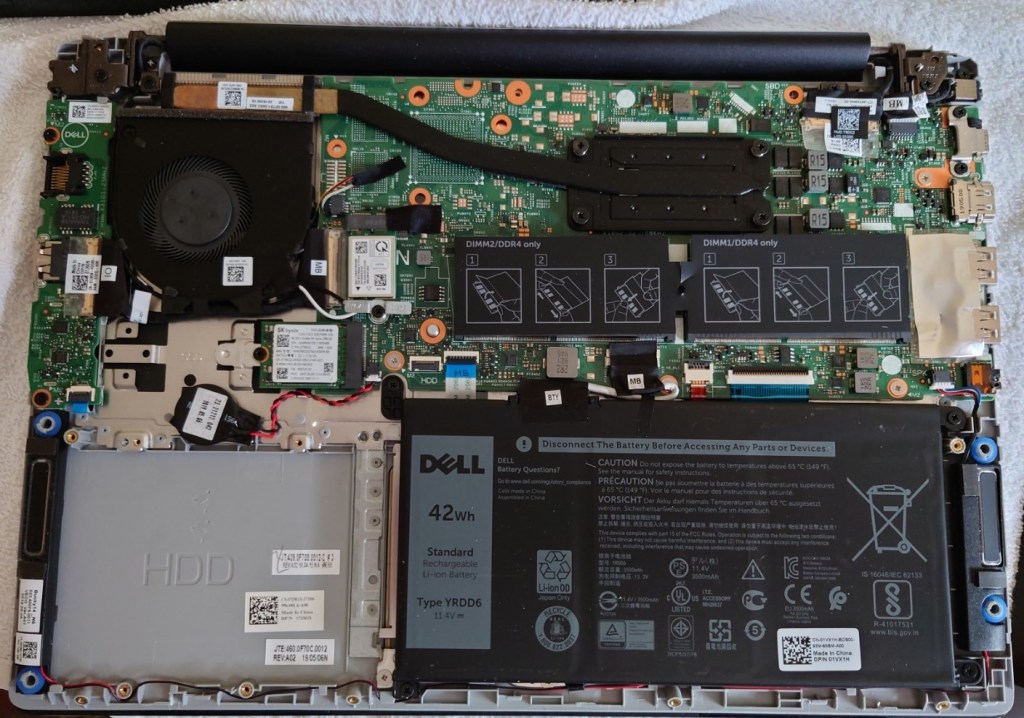
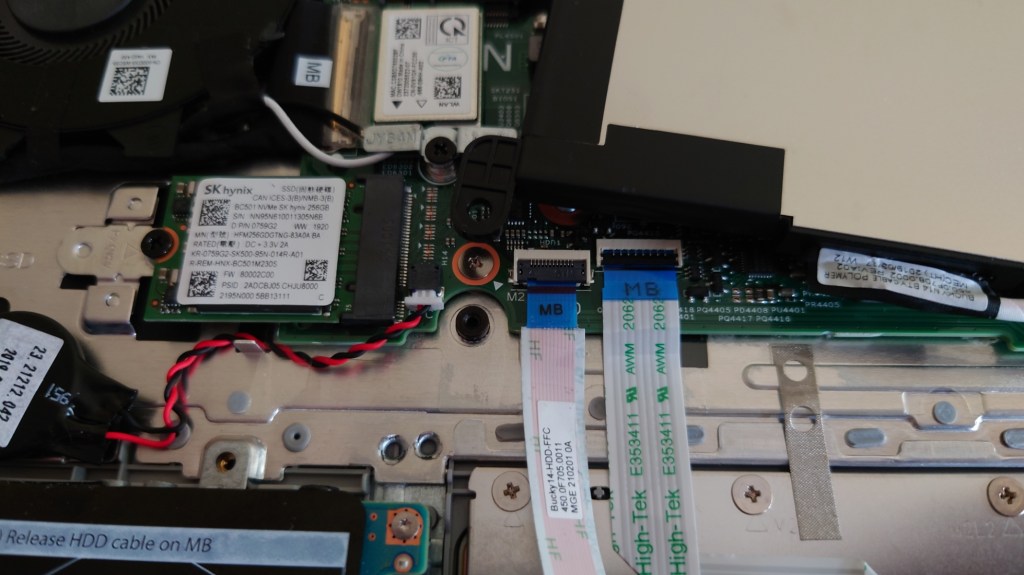
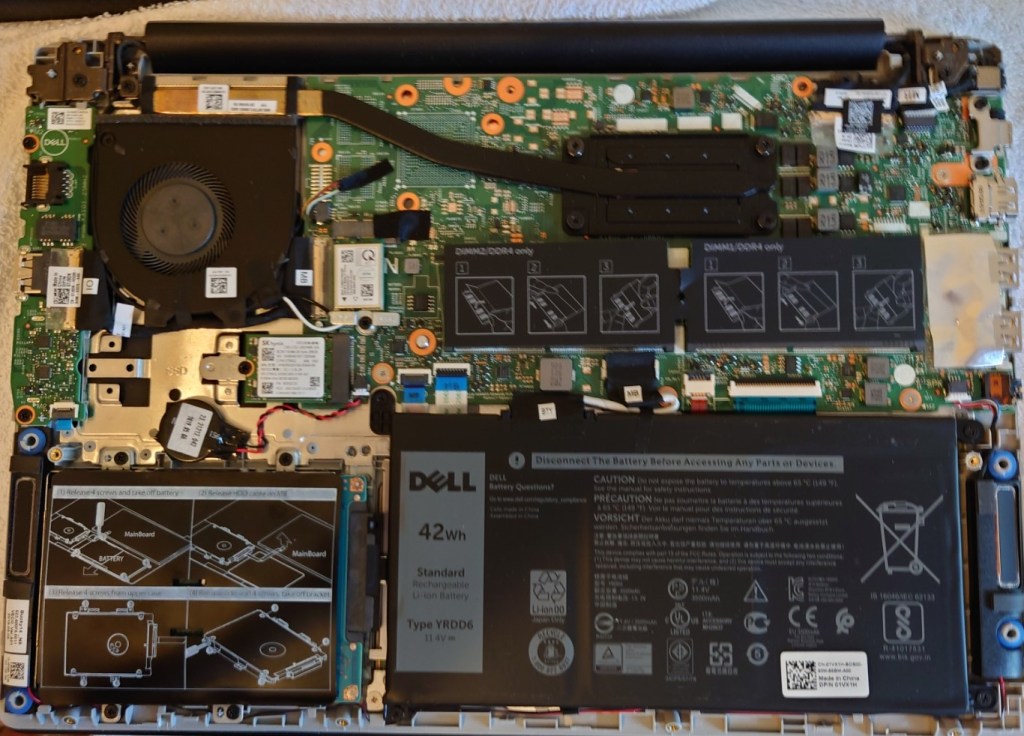
Once opened you will locate the area where the HHD will be installed, alongside the battery that will need to be removed and the socket where the SATA cable will connect to
Removing the battery
The SATA cable will need to route under the internal battery, so we have to temporary remove it, or in my case move it so we can access the area underneath There enough space where you can just place the battery on top of the motherboard whilst you install the SATA cable.
Adding the Hard Drive
Dell have provided a hard disk caddy where the drive can be installed, simply unscrew it (for screws) to take it out.
Unfortunately at this point is where I made my first mistake, since I assumed Dell did not provided you with the SATA cable and had to be purchased separated. Imagine my surprise when I took out the HDD enclosure and saw the SATA cable nestled between the plastic cover, meaning I now have two SATA cables. Well that’s £18 wasted…
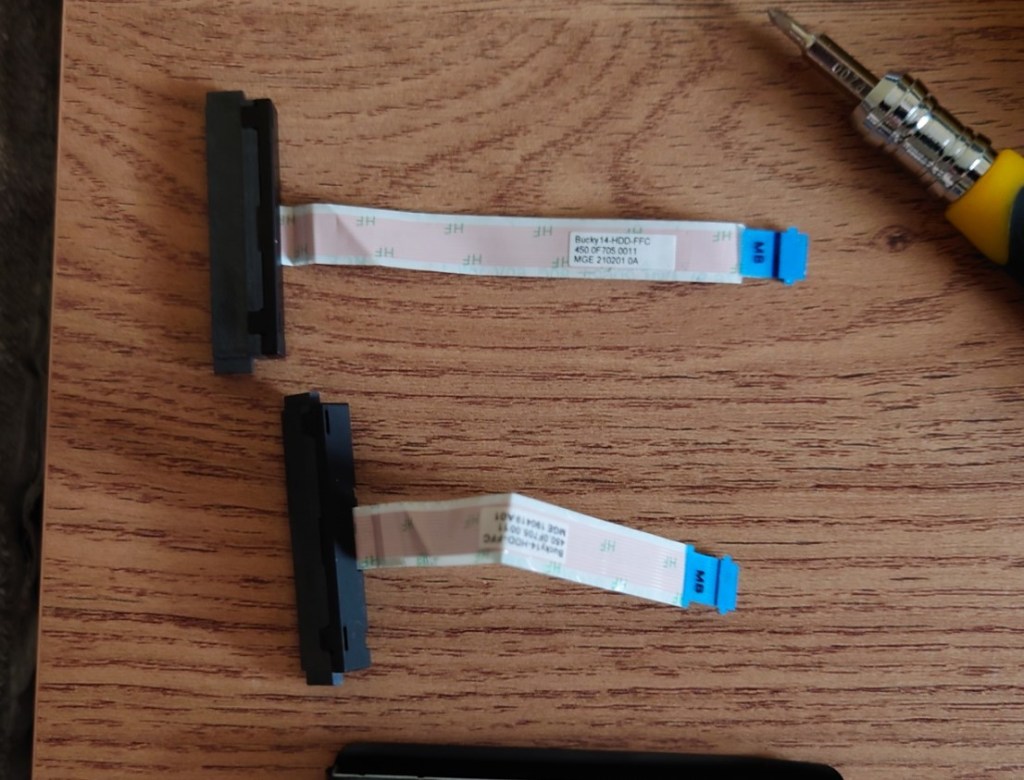
Then again at least I have one spare incase anything was to happen to it. I’m pretty sure the Dell service manual mentioned you had to buy the came separately, or maybe that only applies to certain markets?
Now it is time to screw in the HDD, which is where I ran into the second issue. I noticed the SATA cable wouldn’t reach, At first I thought I had installed the HDD the wrong way round since the connector wasn’t aligning up but from looking at the hole underneath the HDD bay it seemed to fit. Upon closer inspection it seemed the hard drive I was trying to install was too tall for the enclosure and I had installed it upside down. When the hard drive is too THICC for the laptop…
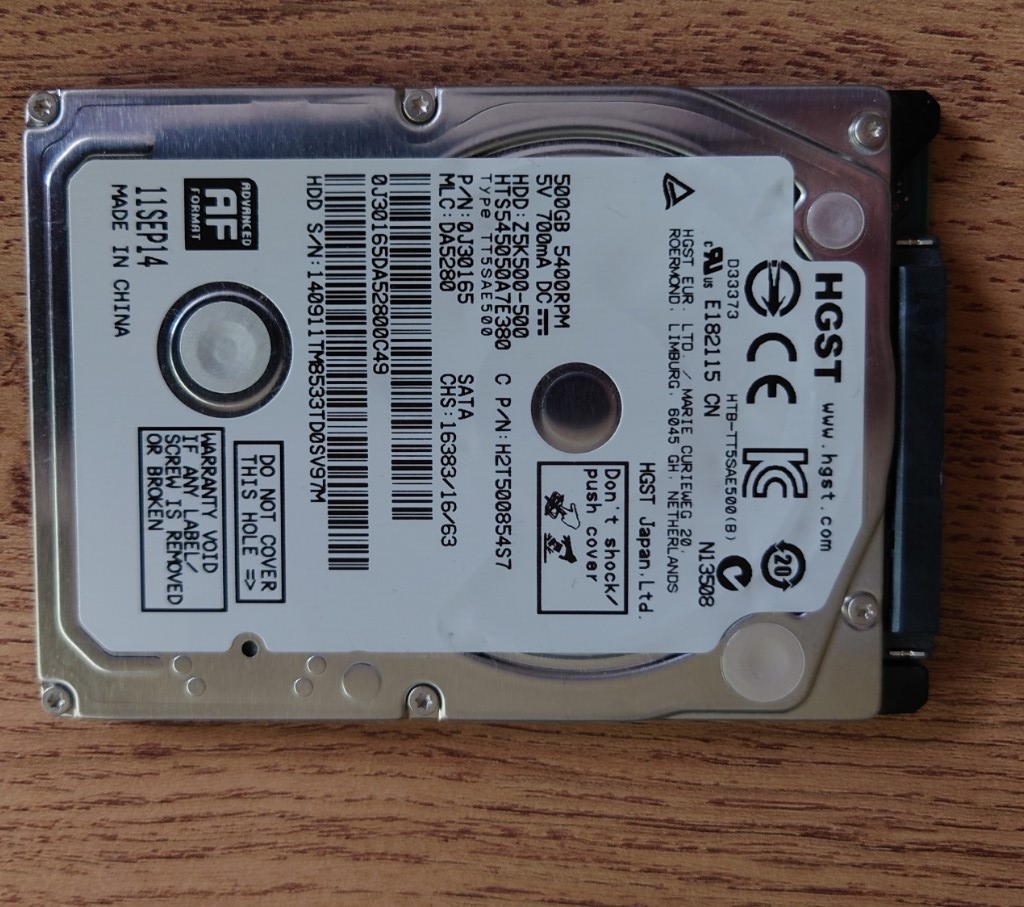
Thankfully I had another hard drive lying around, a HGST that was pulled from my old PS4 when I upgraded its hard disk. This hard drive was thin enough that it would fit inside the bay.
Reassembling
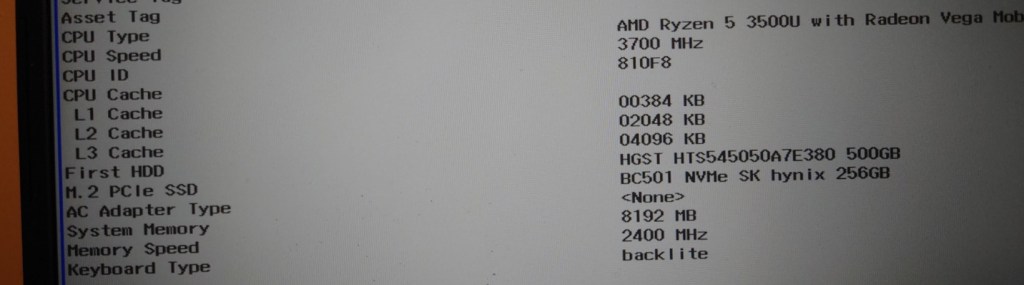
A quick power on test before reassembly to ensure I didn’t fuck anything up. The laptop booted and the HDD was recognised in its BIOS EFI (Still trying to get used to that)