Or an ethernet hub
Despite the Superhub’s remaining property of Virgin Media, when I asked about the return on the Superhub, they advised that the hub didn’t need to be sent back, most likely because they have moved into the Superhub4, and that the old hub can be disposed of.
This seems quite wasteful, since the hub works perfectly. I’m not a fan of disposing electronics needlessly if its in working order. Besides if you need an extra few ethernet ports, why not reuse the equipment you already have?
Starting from Scratch
Probably best to reset the hub back to its factory state. This can be done by holding the reset button down for 10-12 seconds, then waiting for the router to restart

Configuration
Enter 192.168.0.1 into the browser address bar to access the superhub configuration page, you will need to enter the settings password, which can be found on the underside of the superhub.
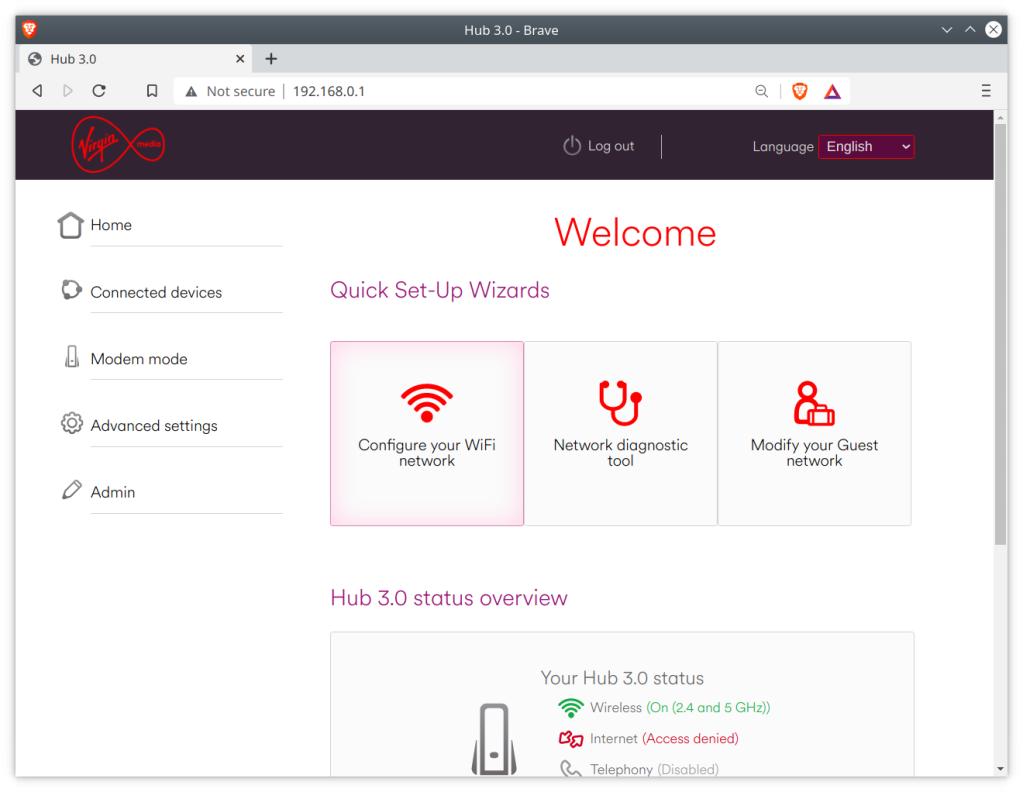
Before we make any major changes, we can configure the basic settings using the interface. Use this to change any settings relation to the Wifi configuration, as it will be harder to change later.

Disabling DHCP
Since you will be using the superhub on a network that already has a DHCP server, you will need to disable the DHCP on the superhub, since your main router will perform the DHCP duties.
What is DHCP? It is responsible for issuing and maintain the IP address on your network, which ties into NAT (Network address translation). You only need one on your network, having multiple DHCP servers is unnecessary unless you have an enterprise network. Also not to be confused with HDCP

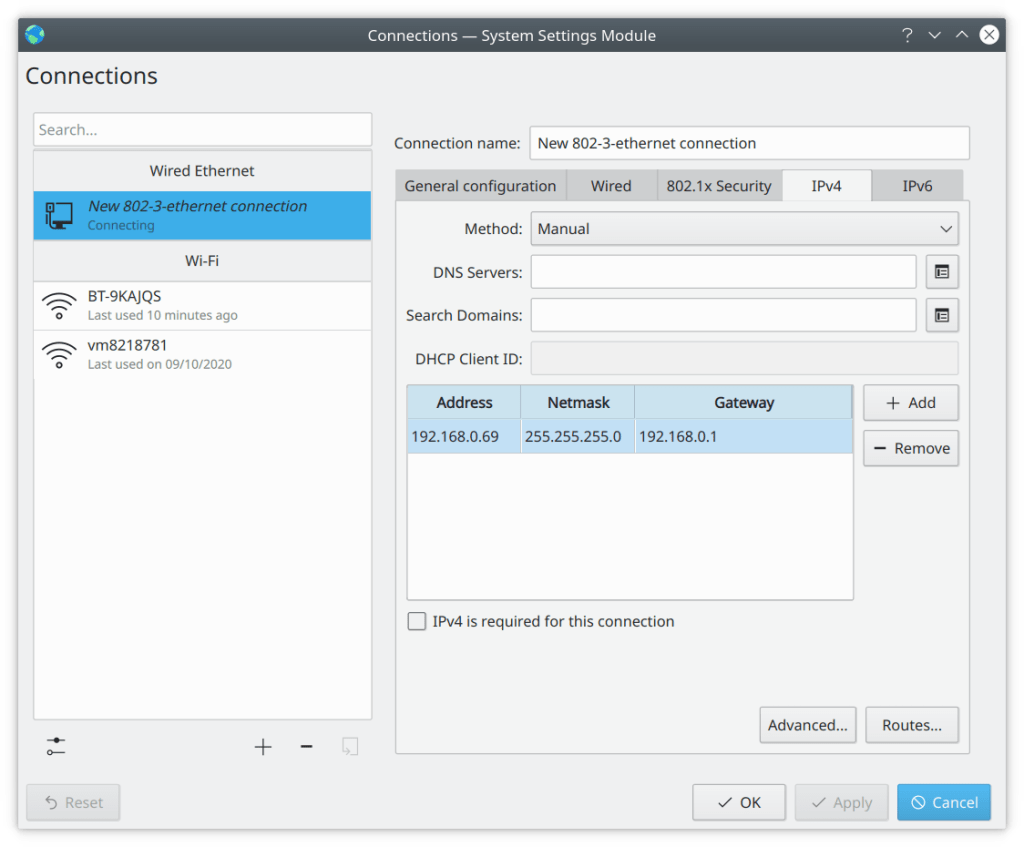
After this you will lose network connectivity with the router, this is because the super hub is no longer assigning IP address. To restore you will need to switch to a static IP temporarily whilst we configure the router. In Kubunu you can configure this in the connections panel in the system settings. For Windows there are various tutorials on how to configure a static IP.
Remember to use 192.168.0.1 for the default gateway, as for the client IP address, you can use 192.168.0.2, You might need to login to the router interface again.
Changing the gateway IP (optional)
You might not need to do this, depending on the IP configuration of your network. By default the super hub uses the address 192.168.0.1 as long as you don’t have any other devices using this address then you should be fine, but you should check first regardless.
Unfortunately with the superhub 3, if you change the default IP address to anything other than 192.168.0.1, the configuration page is no longer accessible. the router will still function as a switch or hub but you will no longer be able to edit any settings or access the configuration page. therefore before you do this, ensure the superhub is configured as you prefer as you will be unable to modify them later, unless you perform factory reset.
This also means that if you have two superhub 3’s, then you will need to do this on one of the superhubs to stop one from interfering with the others, since its a bad idea two have two devices using the same IP address, especially if one is a router/gateway.
Normally you cannot change this via the default interface. We can work around this by entering commands via the address bar as outlined below.
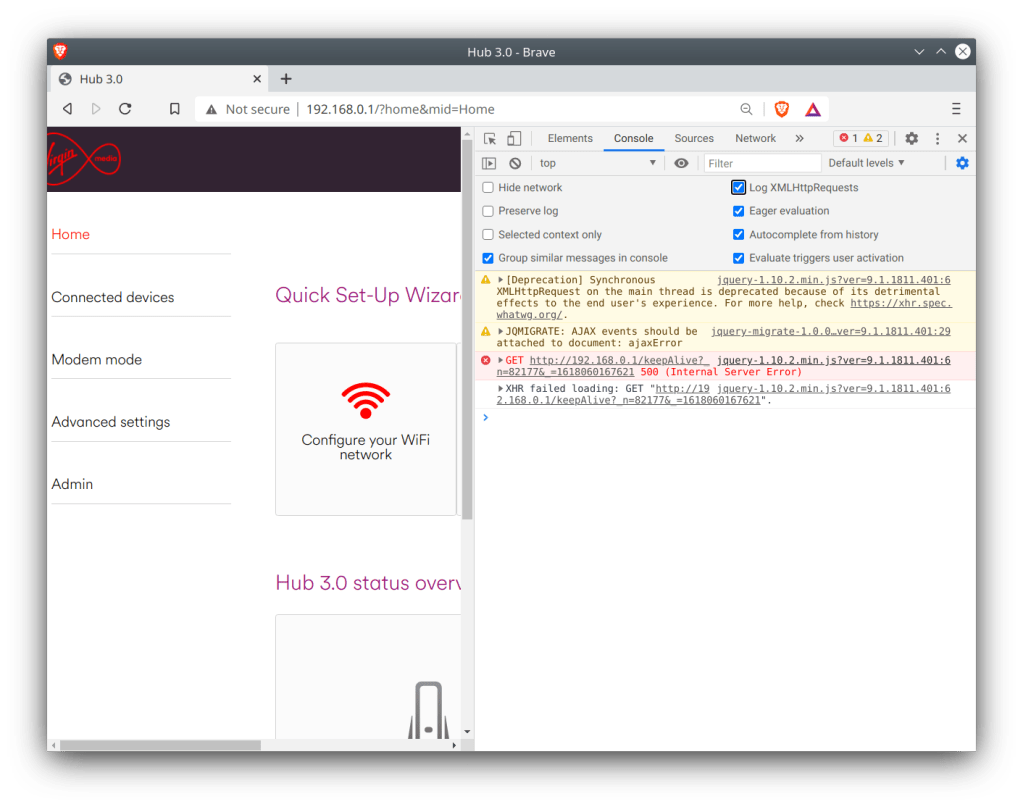
First, enable the developer window in your browser by pressing F12
For Chrome based browsers, Click Console, then enable LogXWLHttpRequests
For Mozilla based browsers, this should be enabled by default
Refresh the router page and inspect the console log
We need to get the authenticator code. This is generated when you log into the router interface and can be found highlighted below, and will begin with n=, followed by a random string of numbers, in this case mine was 82177
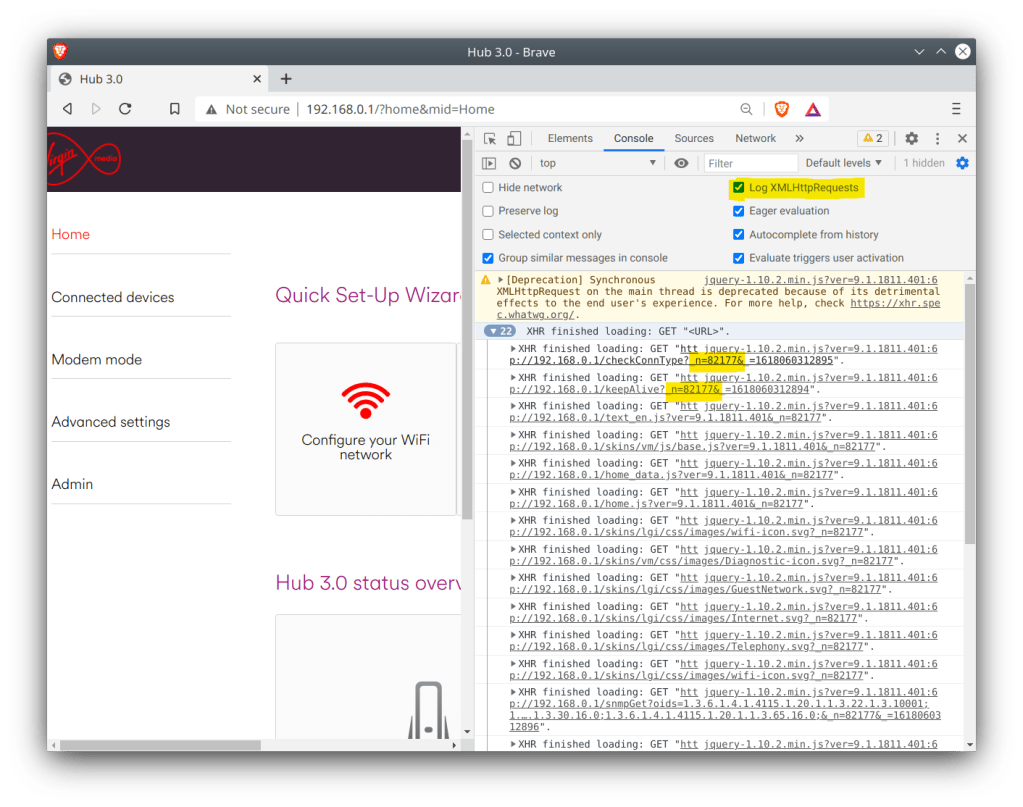
To change the default gateway address to 192.168.1.1, use the address below and paste it into the browser, changing the n= value at the end to the one we noted down earlier
http://192.168.0.1/snmpSet?oid=1.3.6.1.4.1.4115.1.20.1.1.2.2.1.5.200=%24c0a80101;4;&_n=0Best Hex to IP Converter / Translator (codebeautify.org)
likewise if you wanted to change it to 192.168.0.2 instead
http://192.168.0.1/snmpSet?oid=1.3.6.1.4.1.4115.1.20.1.1.2.2.1.5.200=%24C0A80001;4;&_n=0To save and apply the settings, again amend the n= number
http://192.168.0.1/snmpSet?oid=1.3.6.1.4.1.4115.1.20.1.1.9.0=1;2;&_n=0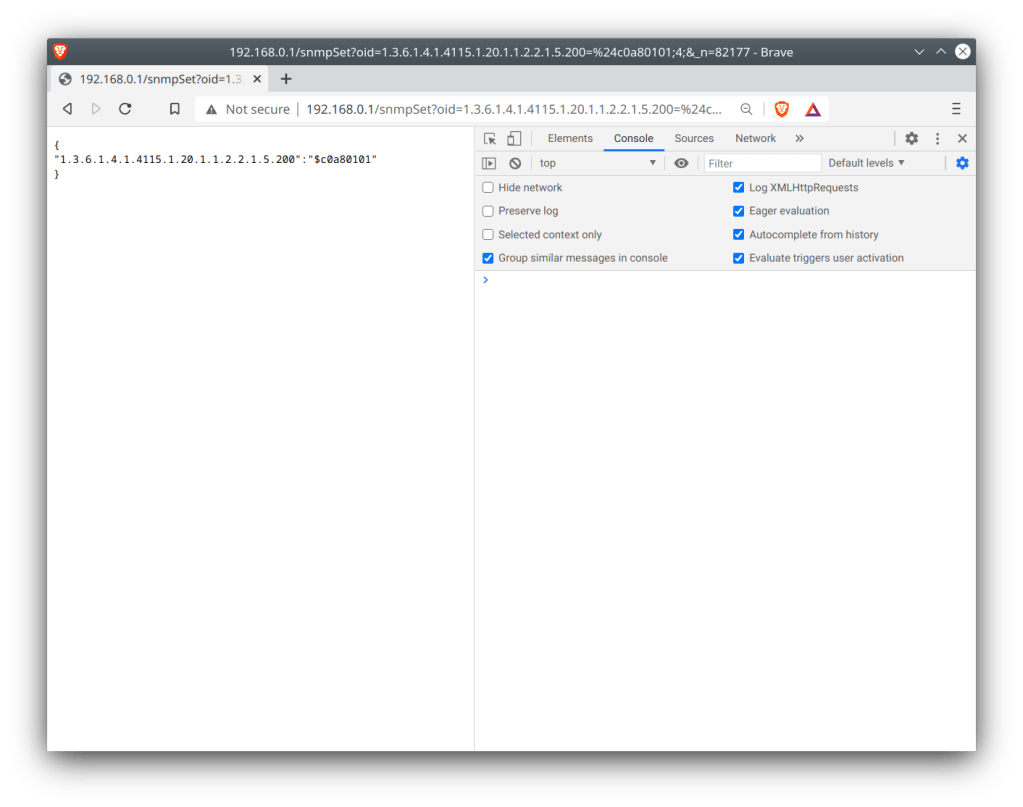
The Superhub should shortly reboot itself after. If not, check the commands have been issued correctly, especially the last one since that applies the settings.
Does it work well?
Almost, there are a few issues with the router being in this setup.
One of which is the constantly flashing green light at the front of the hub. This is due to the router attempting to find a DOCSIS signal, even though it is technically connected to the internet, the cable modem side of things is still trying to connect via its coax connection. There’s no option to disable this so I’d advise to just tape over the light, since its never going to find a DOCSSIS signal.
Firmware updates for the Superhub are delivered via the cable network only, and the Superhub has to be authorised at the headend in order to receive the update. This means you will be stuck with t he same software currently on the router. Whilst this isn’t a huge issue, since the Superhub firmware is relatively stable, with the main issue being on the cable side of things which we are no longer using.
Further Information
Re: Superhub 3 internal network address – Virgin Media Community
Original Process used to change the default gateway address on a superhub 3.
