Monthly Archives: June 2021

Pace Di4000T

The Pace Di4000T was released in 2002, 3 years after active digital had originally launched, and was a new generation of digital set top boxes.

Pace Di4000T
Pace Di4000T

Like it’s ntl counterpart, certain features were cut in this version in an effort to reduce costs for the cable company.

Pace Di4000T

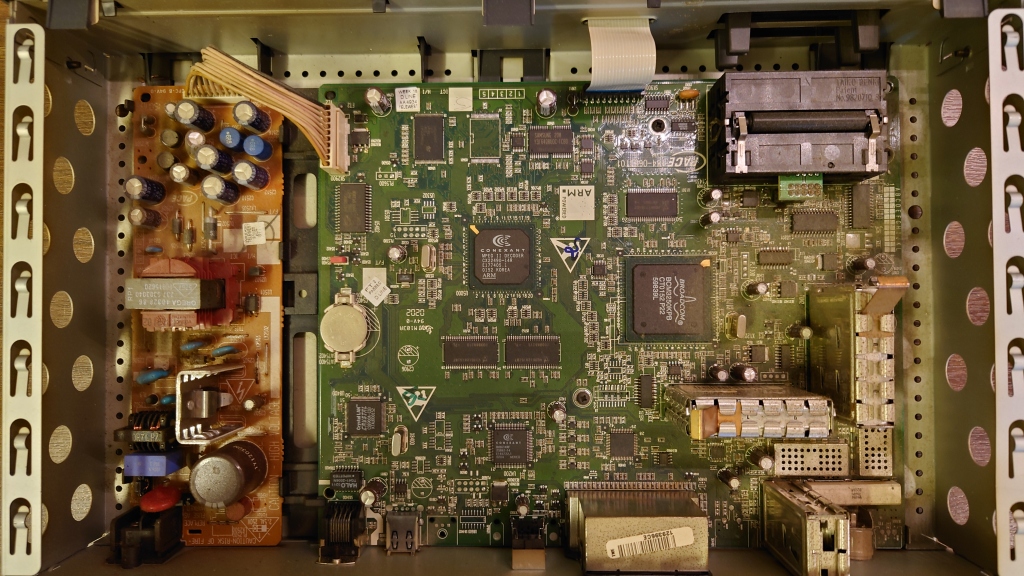
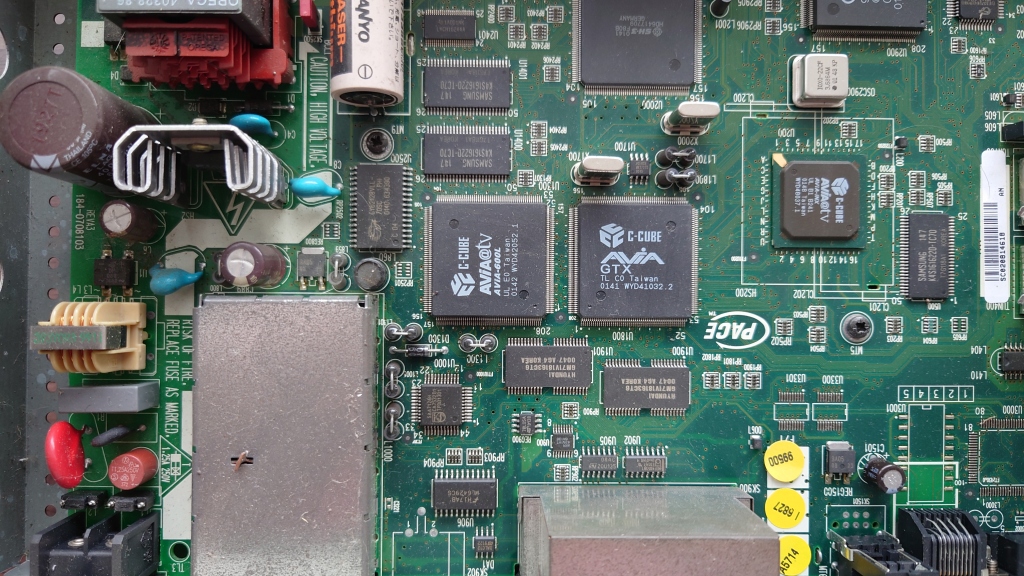
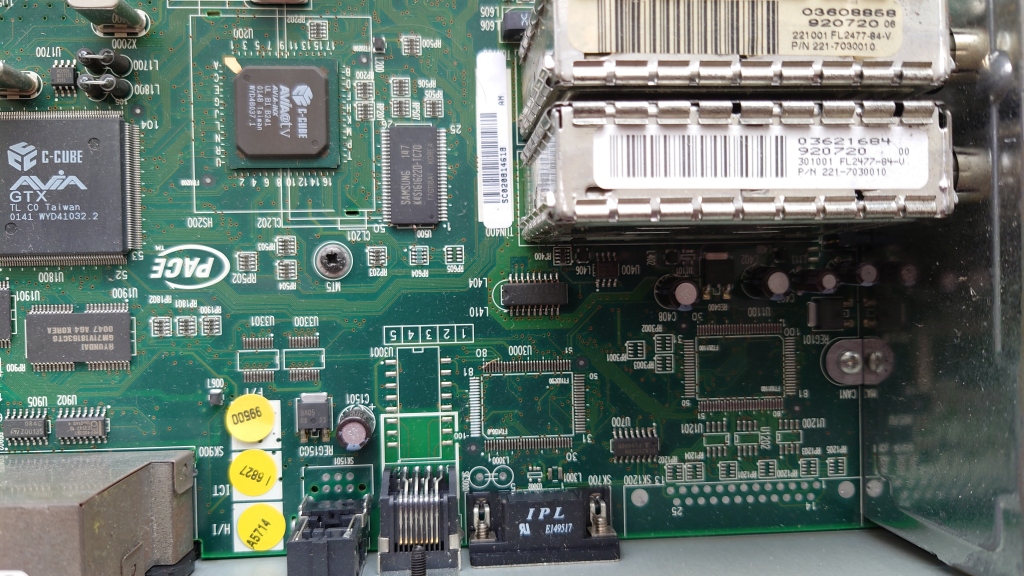
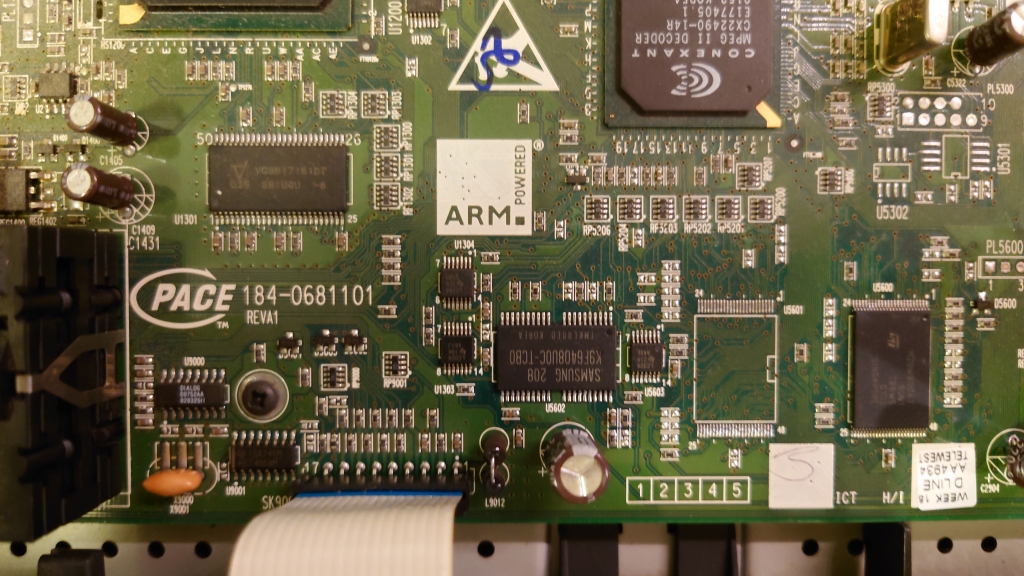
Looks just like the Di4000N, with the main difference being the large Broadcom chip to the left

Pace Di4000N

The main difference is the removal of the second card slot, it remainted in the Telewest version until the Di4000TC

The Di4000T is powered by the Conexant CX22490, same as the Di4000N and is paired with 32MB of memory

Broadcom BCM3250KPB, DVB demodulator and cable modem controller.

Another view, this time with the chips cleaned

Additional space for more flash memory

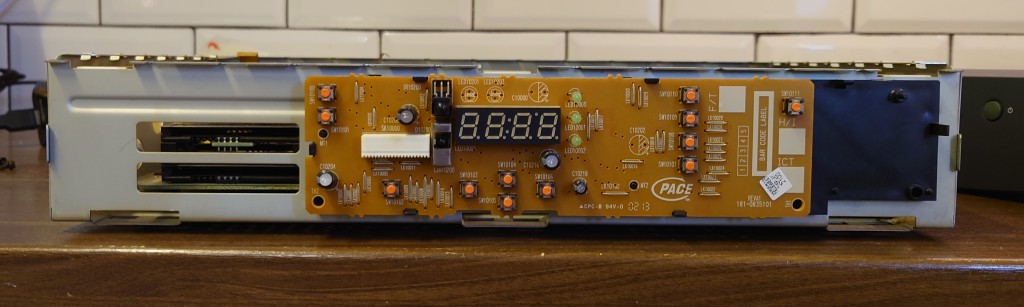
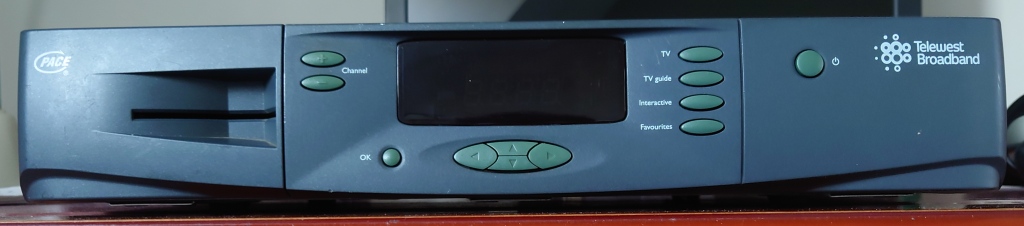
Front panel with the cover removed, the Di4000T has the same front panel as the Di1000/2000 series

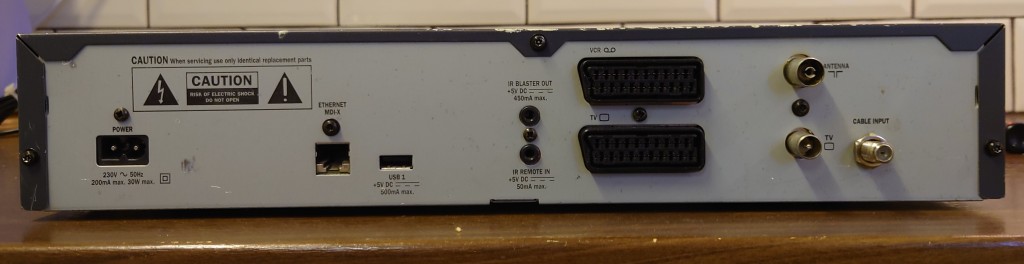
Rear panel, exactly the same as the ntl version

Software Version: 3.7.37.P12EN.P.KNOW.P4000.R

Diag Mode

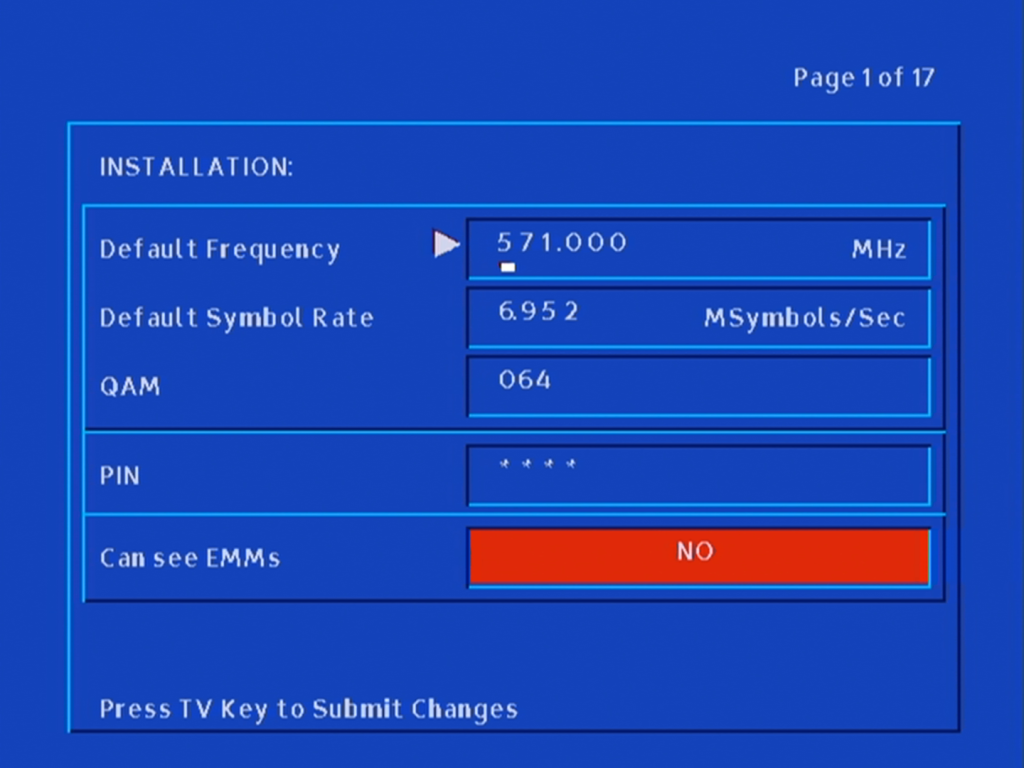
Displays the default frequency for the local area

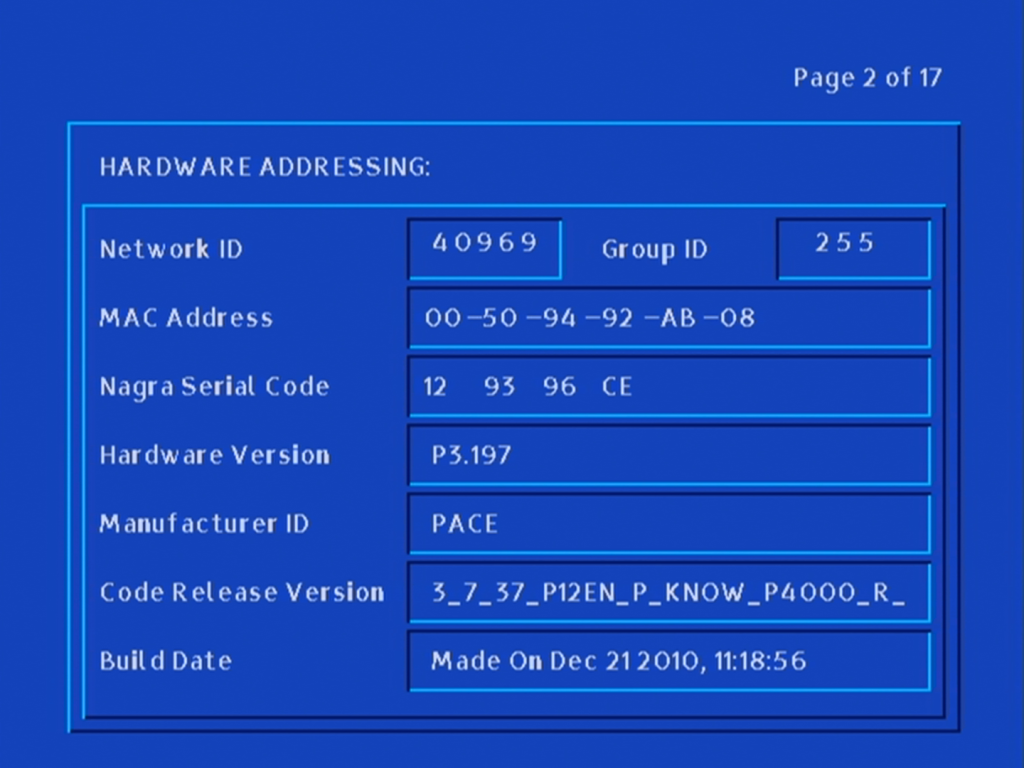
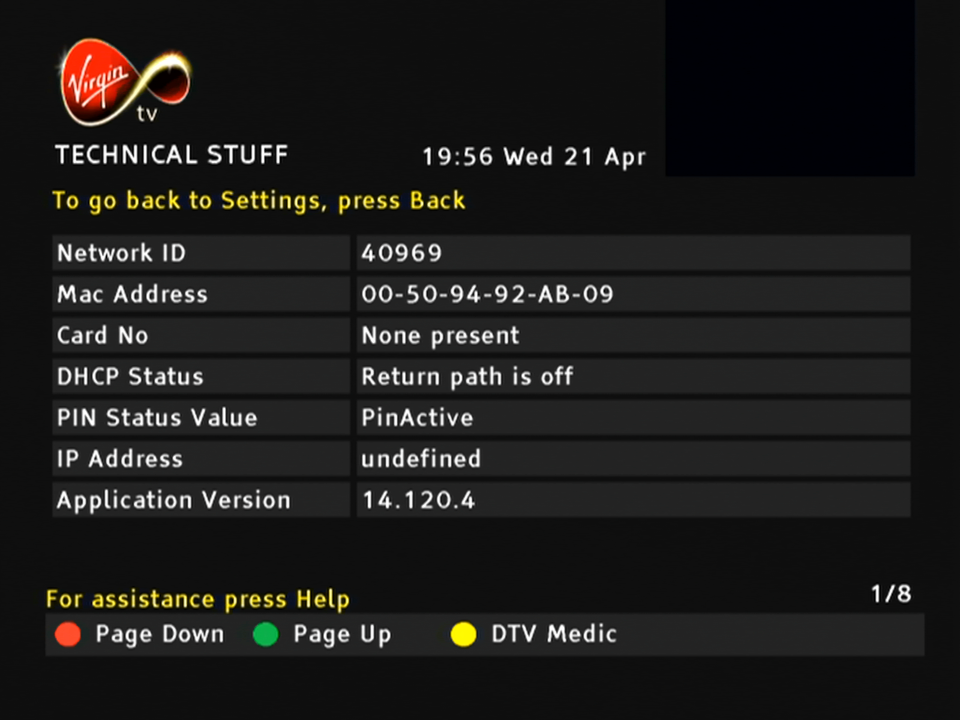
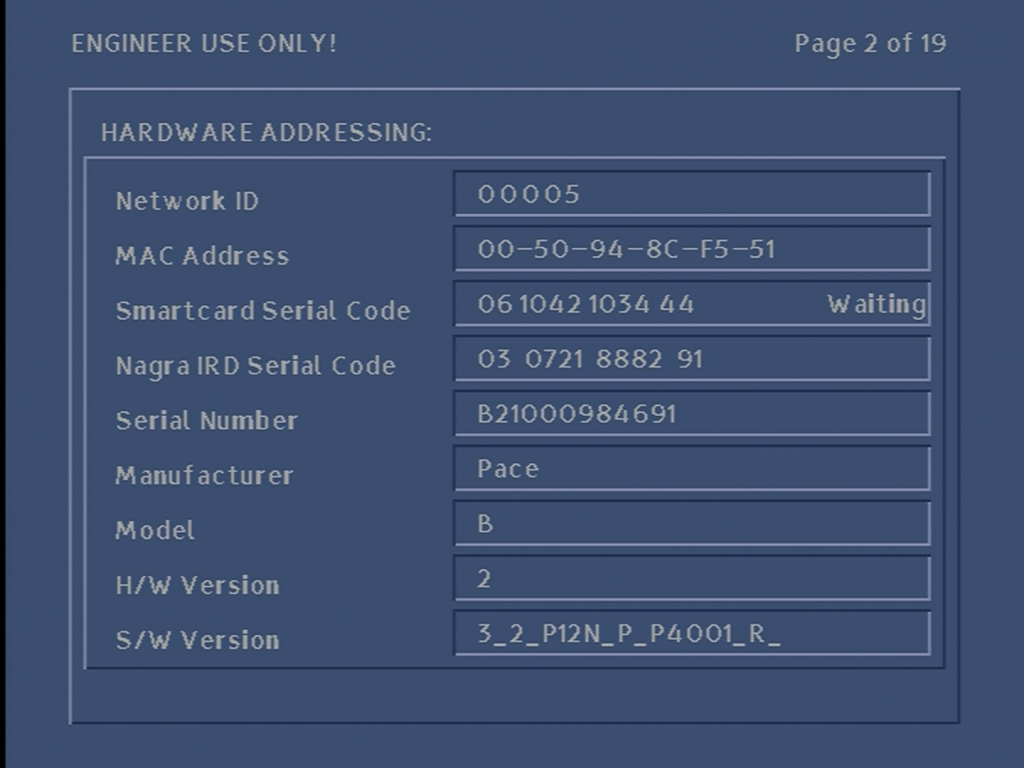
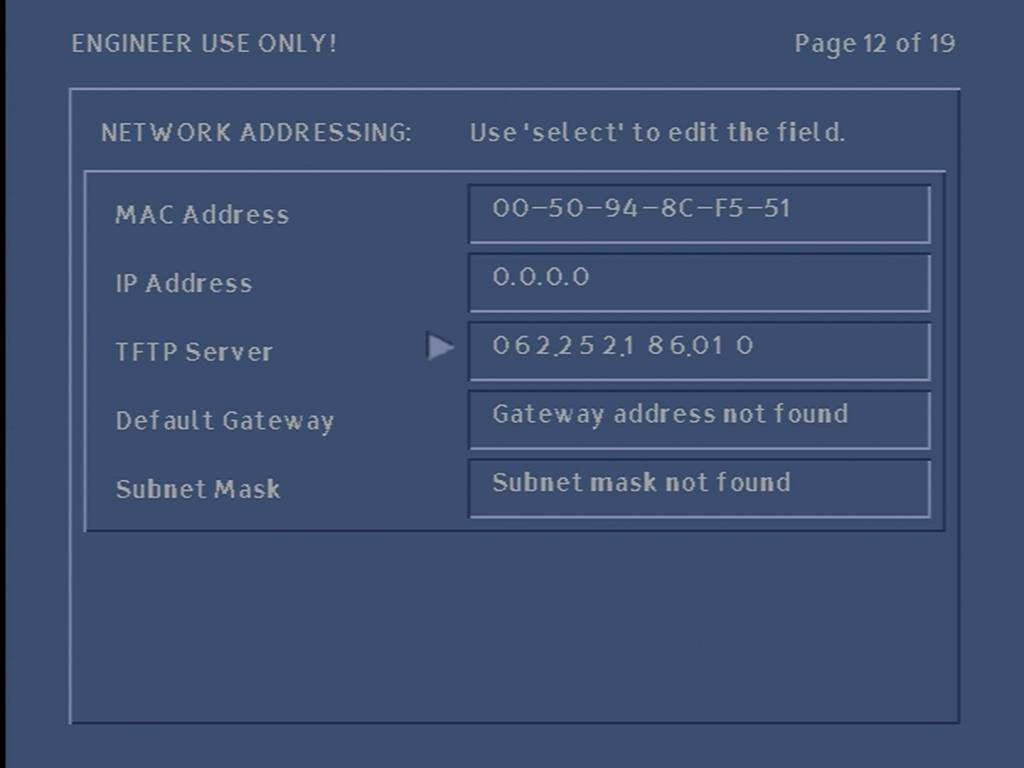
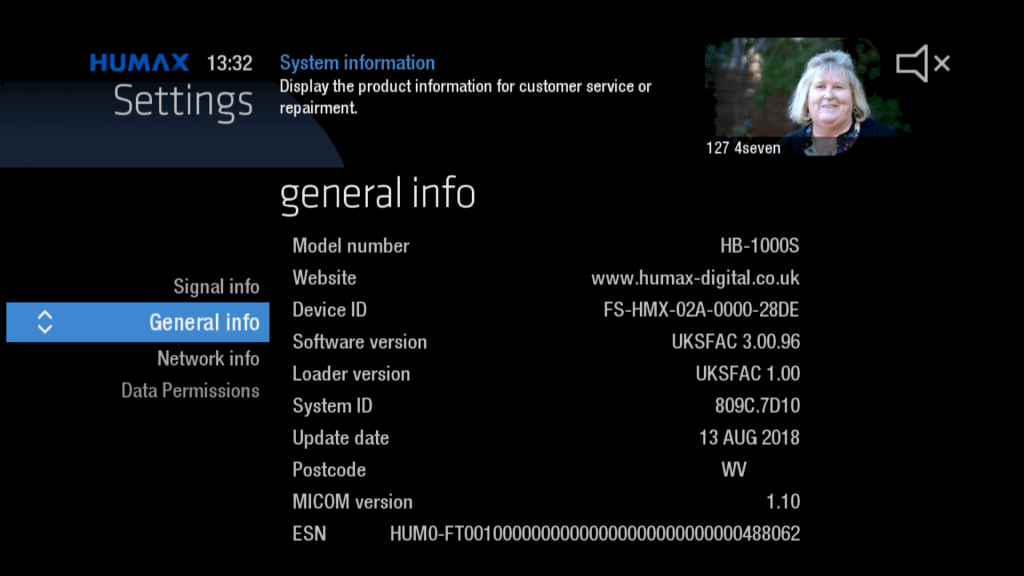
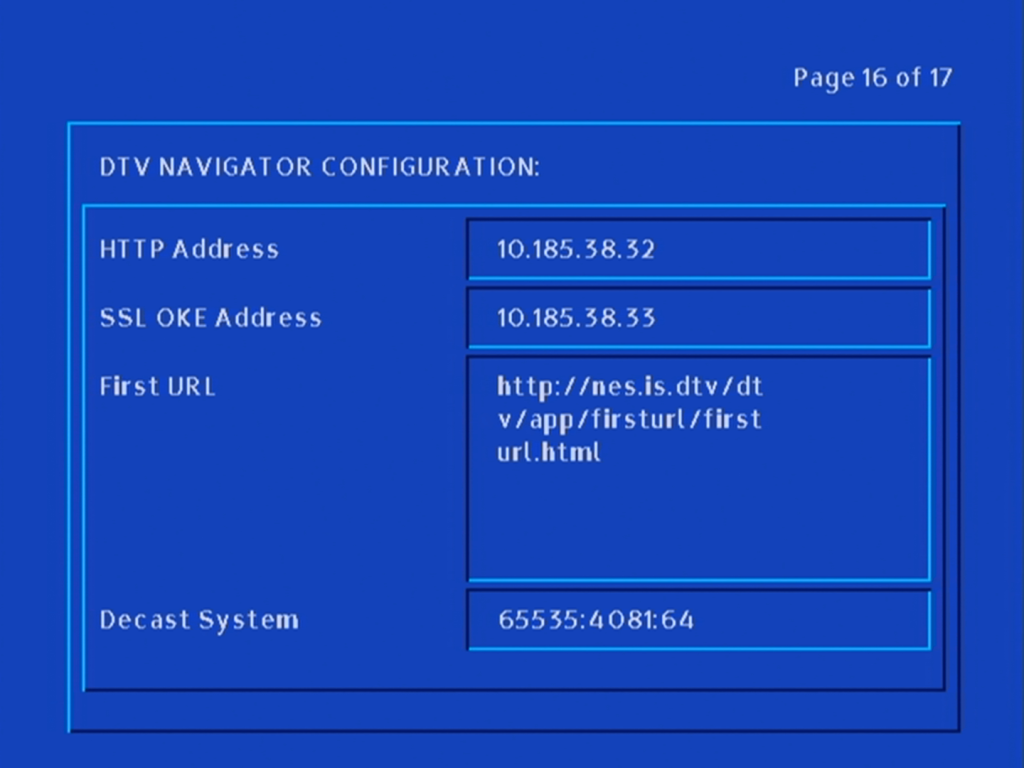
Shows the NetID and the different address used to identify the box, also shows the build of the software

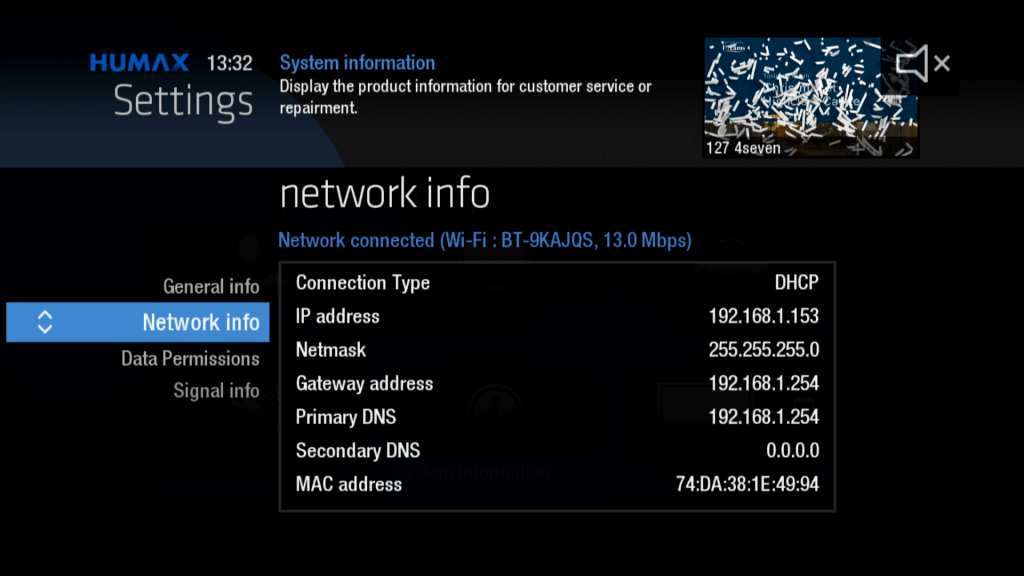
Return path information

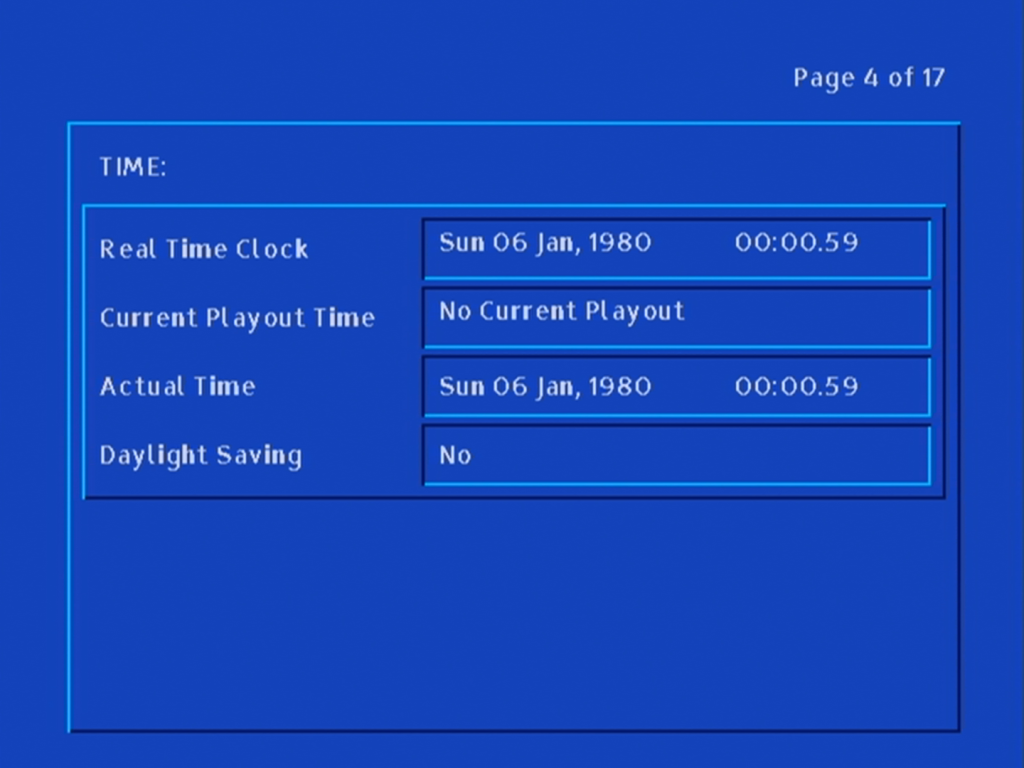
Date & Time information

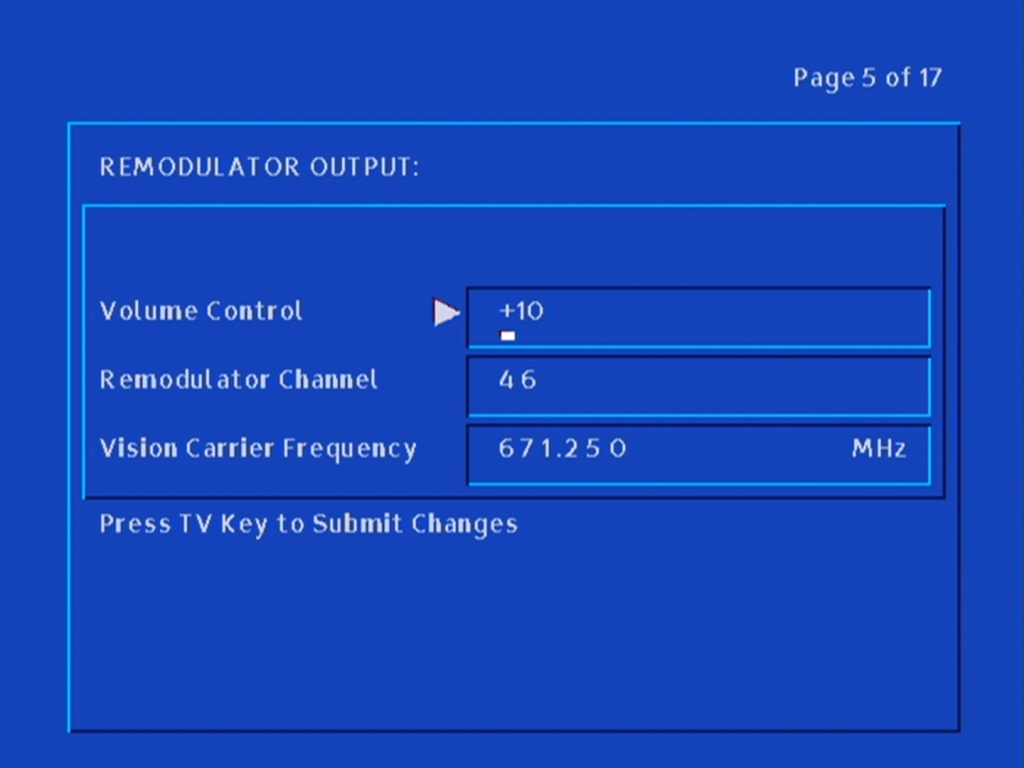
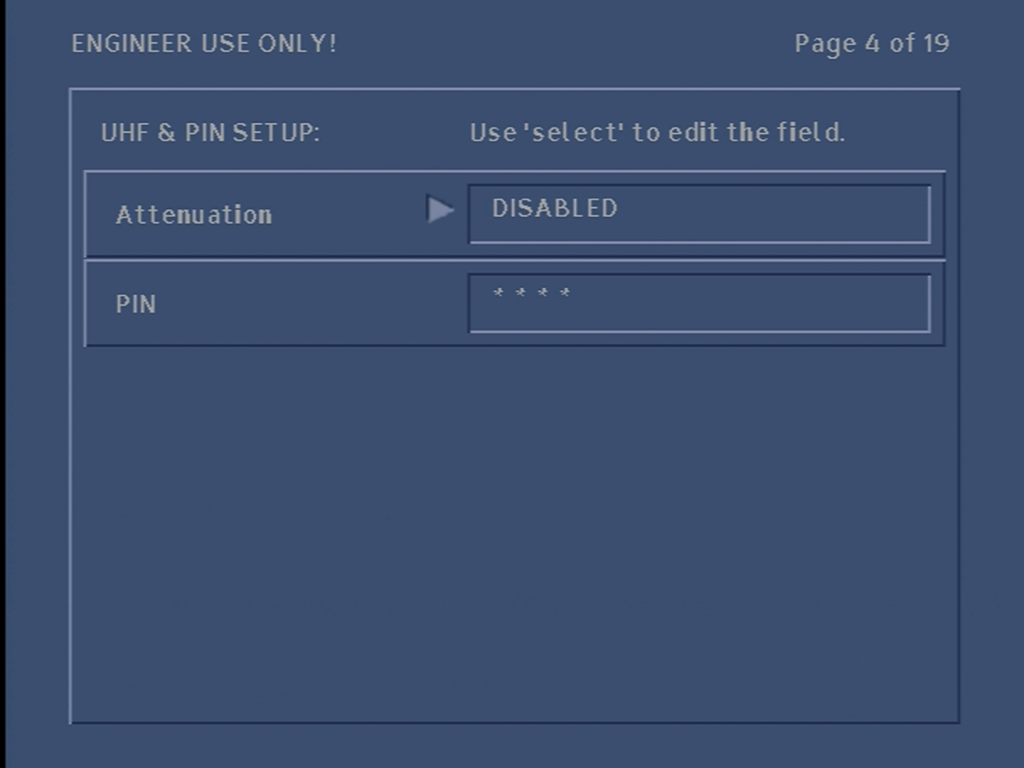
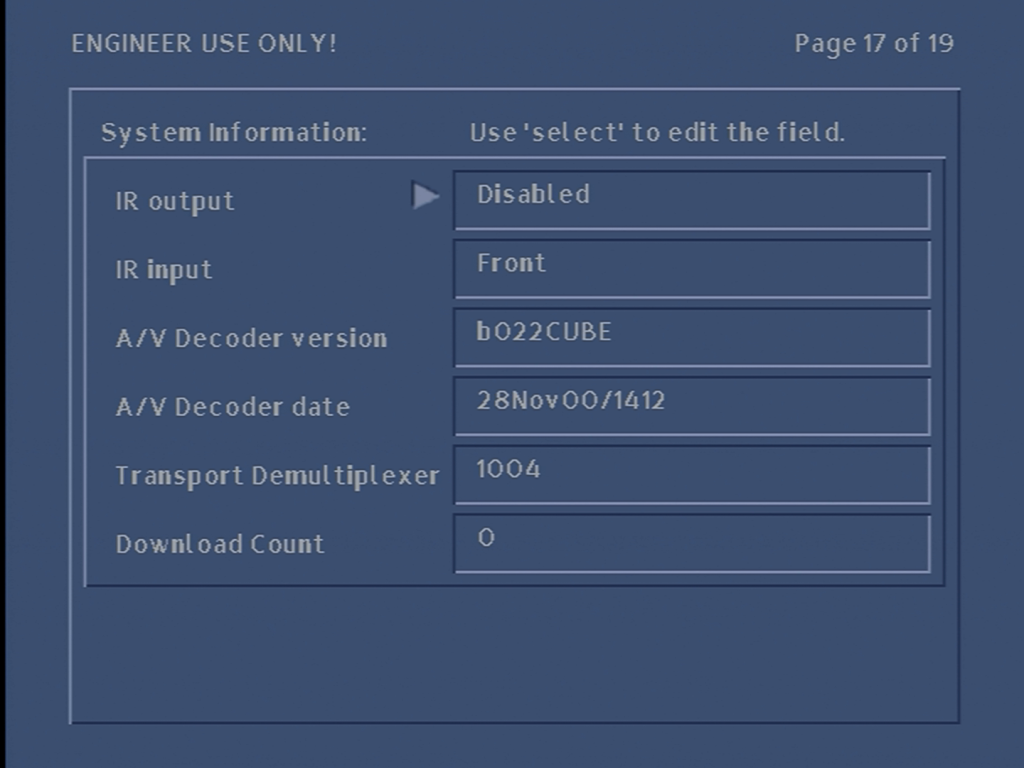
Rf output settings, here you can change the output channel and the colume control
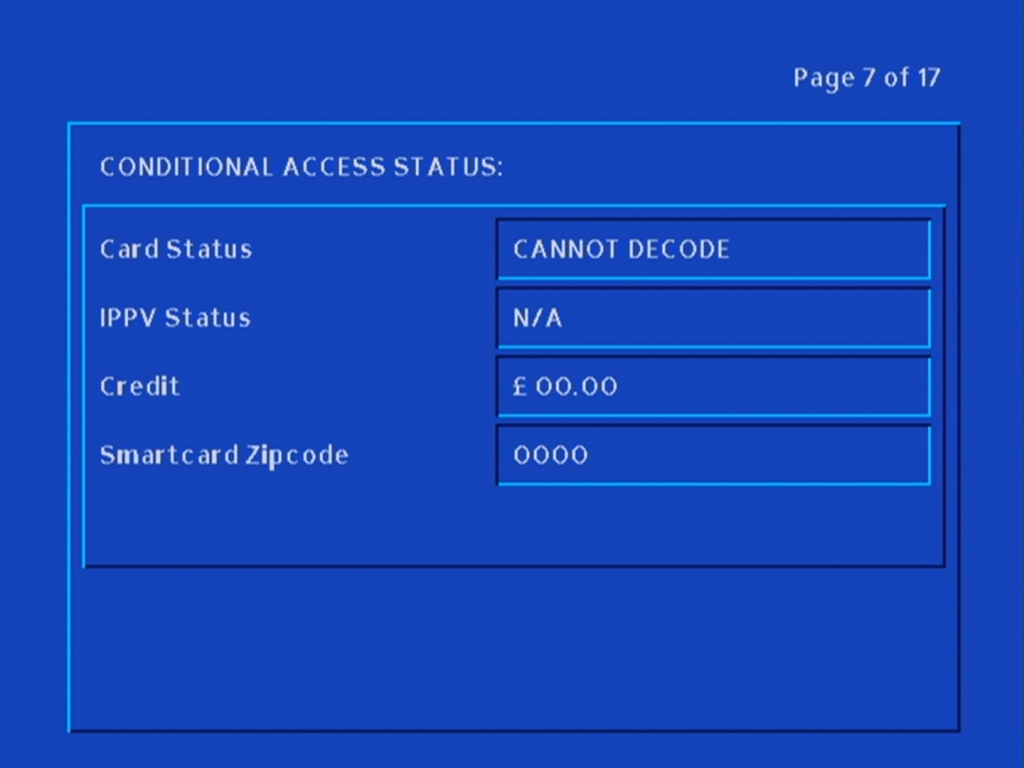
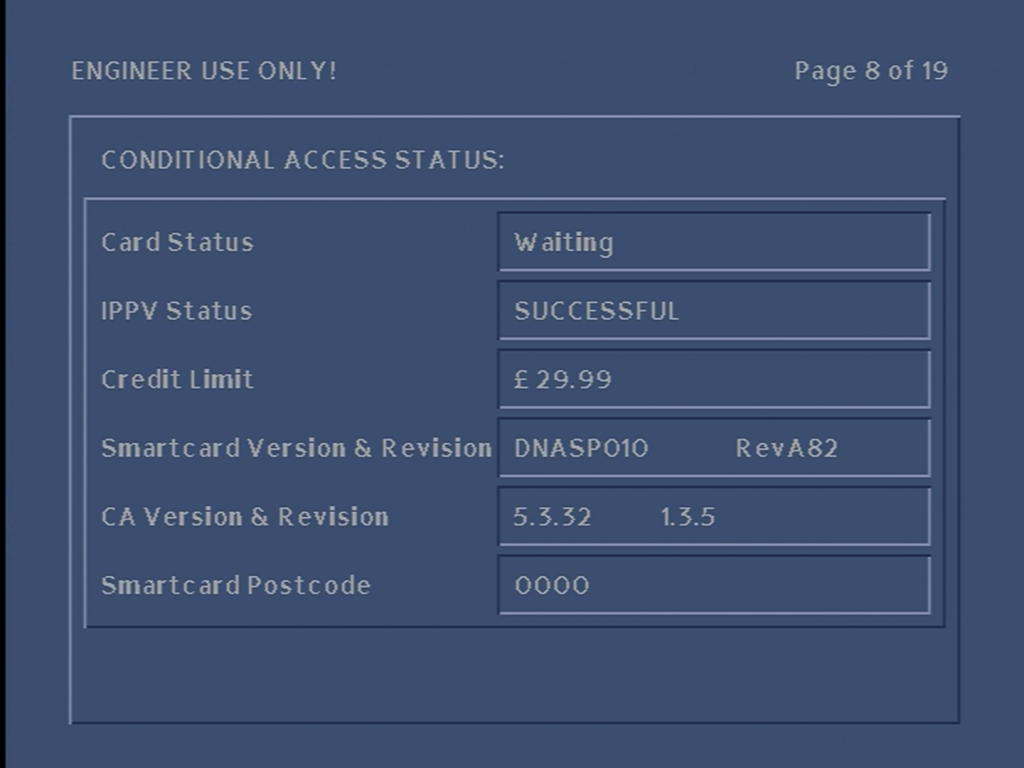
Smart card status

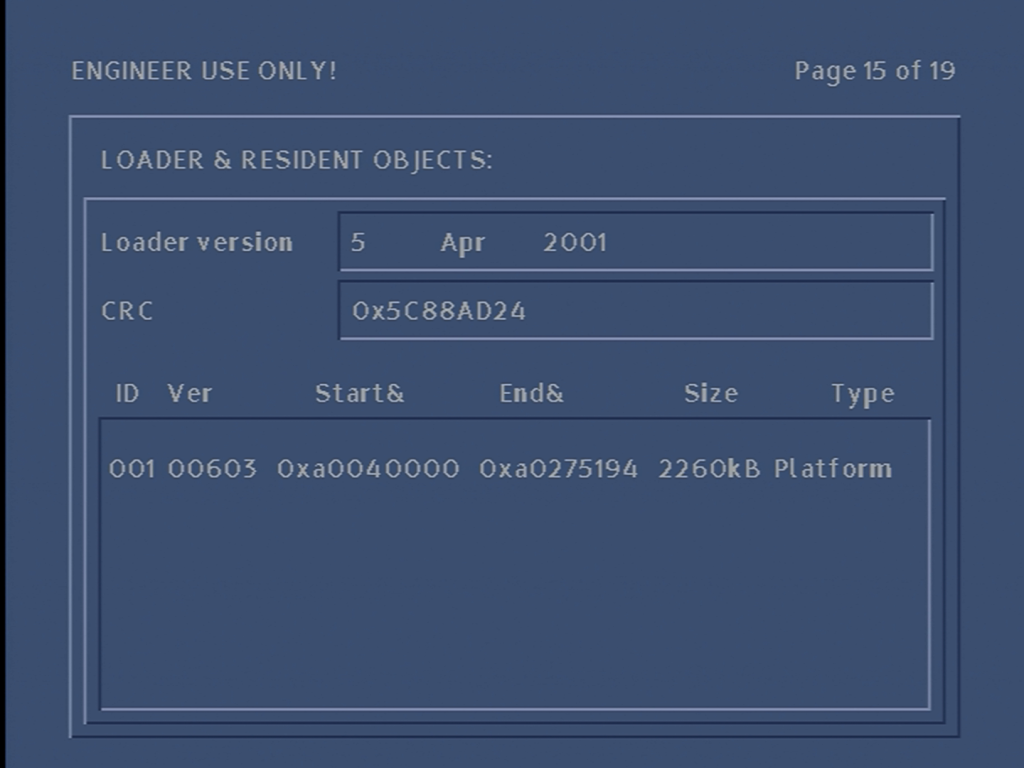
Shows the different images stored in the flash memory

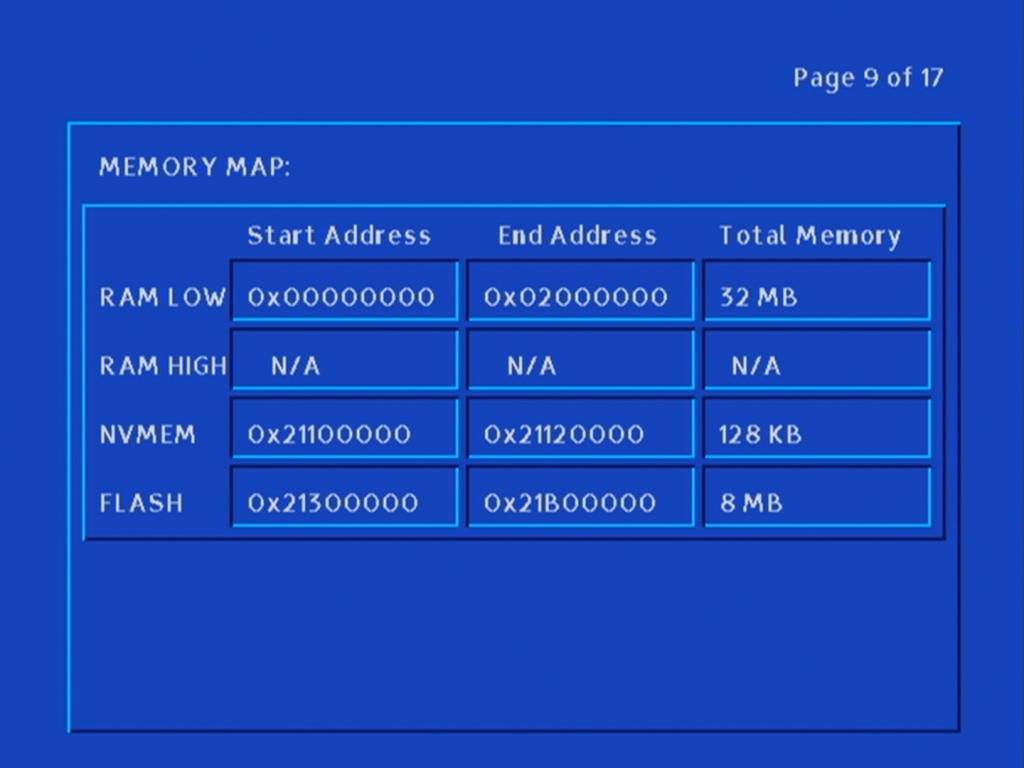
Memory and Flash memory capcities

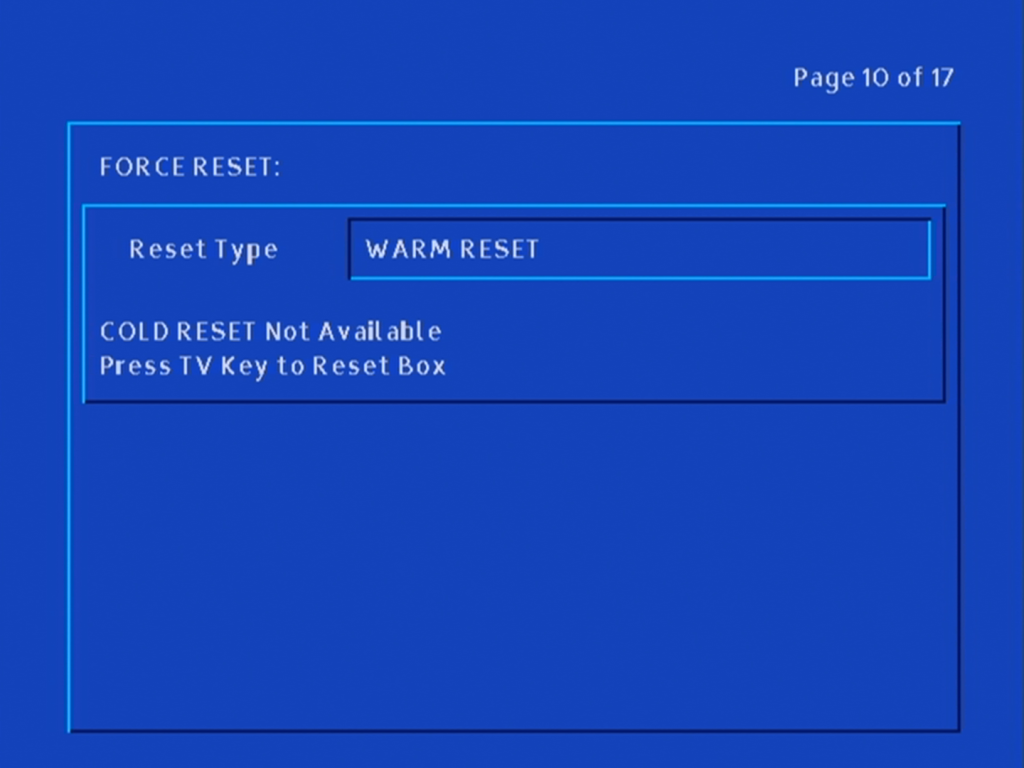
Reboots the STB, not sure why cold reset is not avaliable

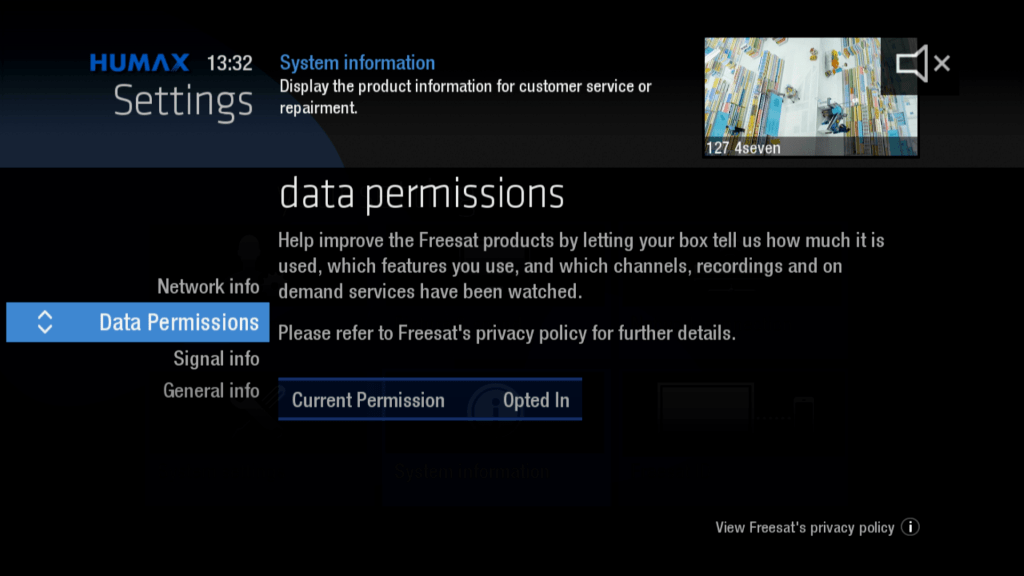
Status monitoring, List of errors and notifications logged by the STB

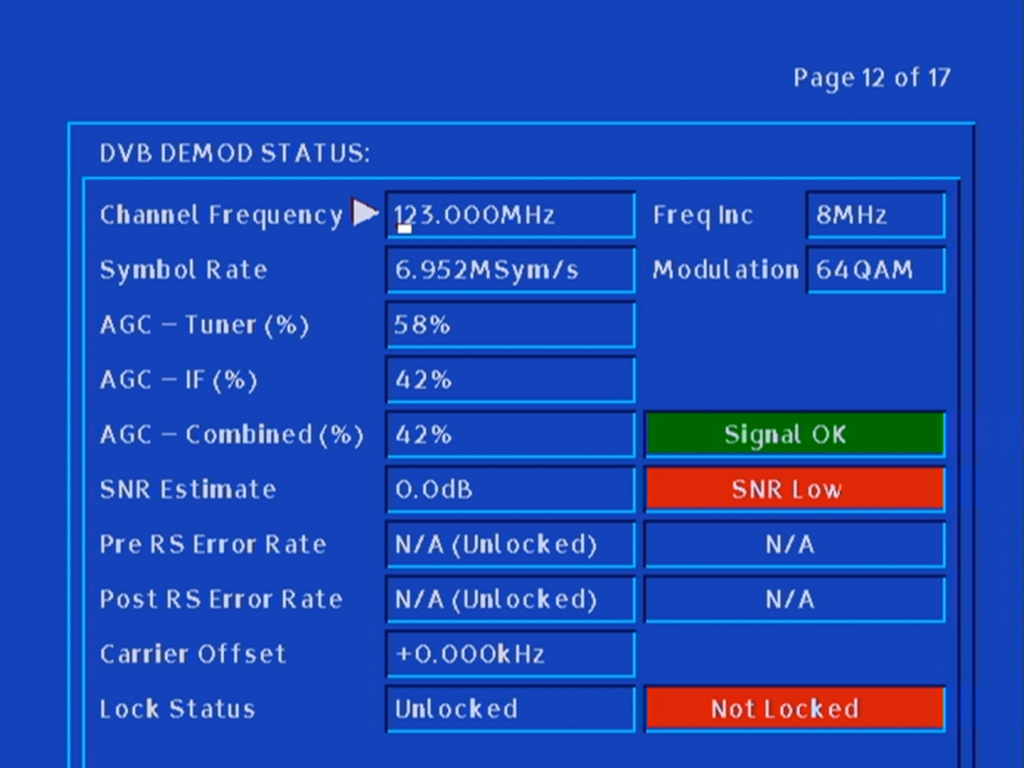
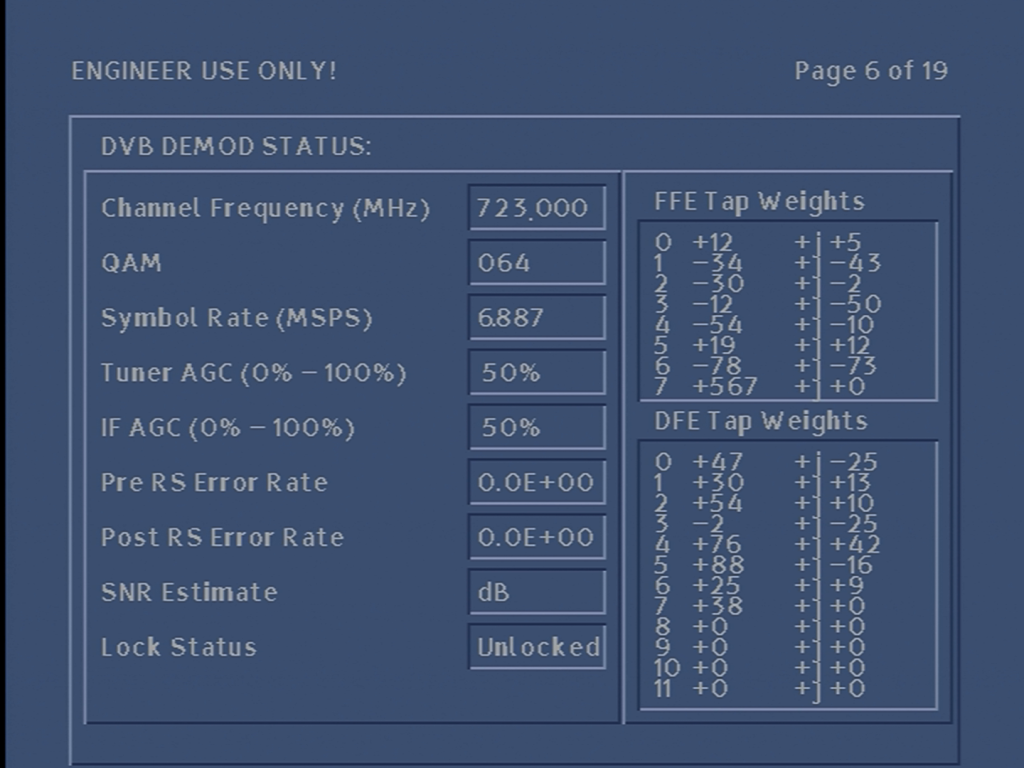
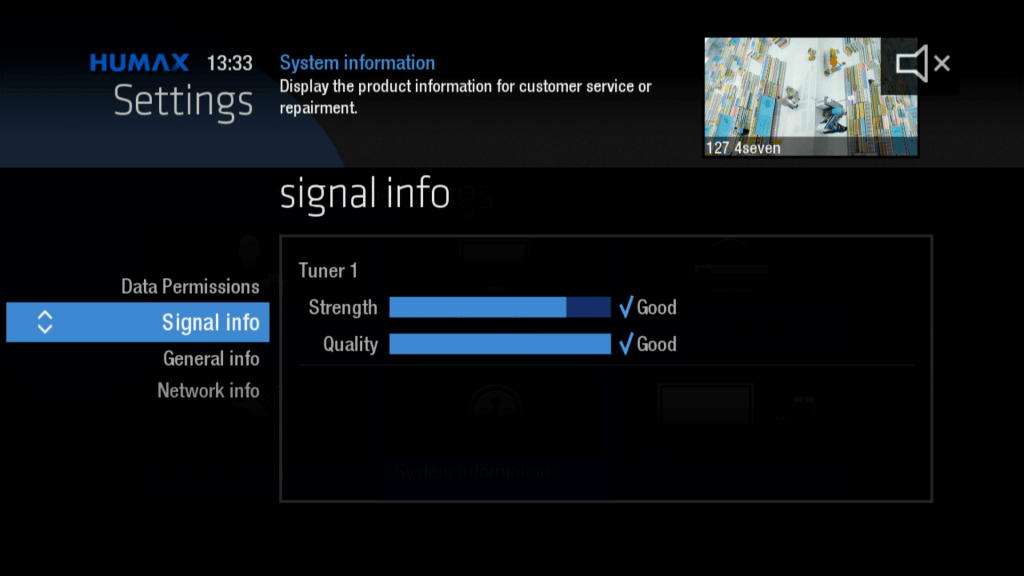
Shows signal information for the chosen frequency and symbol rate.

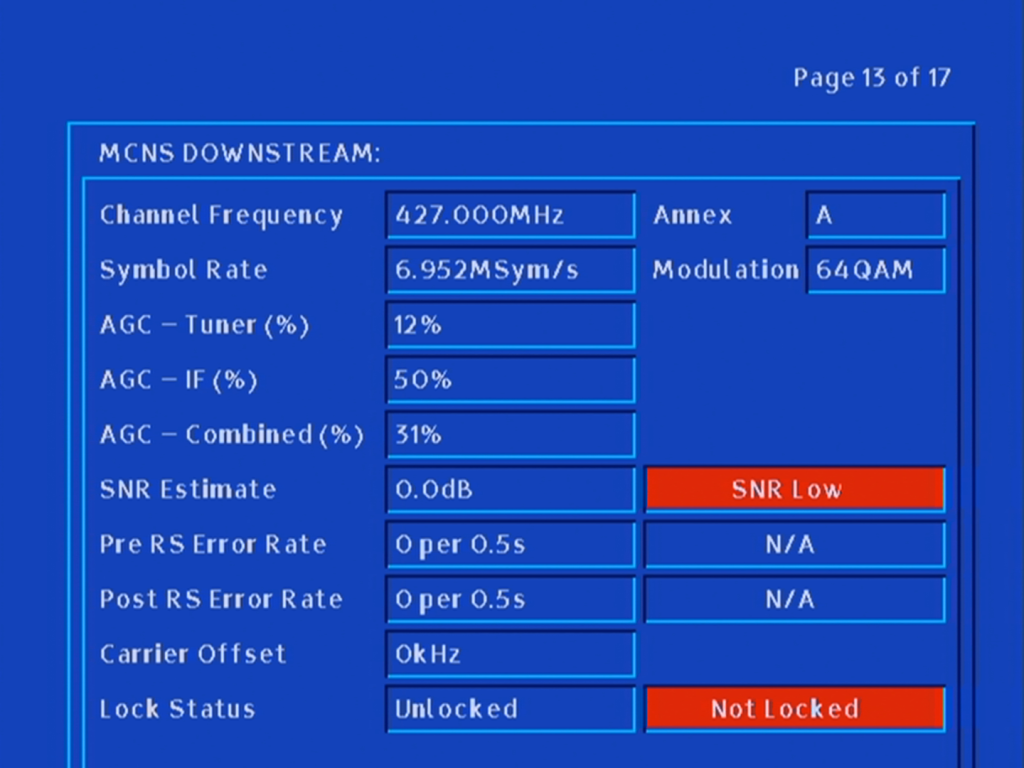
Same as the previous screen but with the cable modem downstream

Signal information for the DOCSIS modem upstream

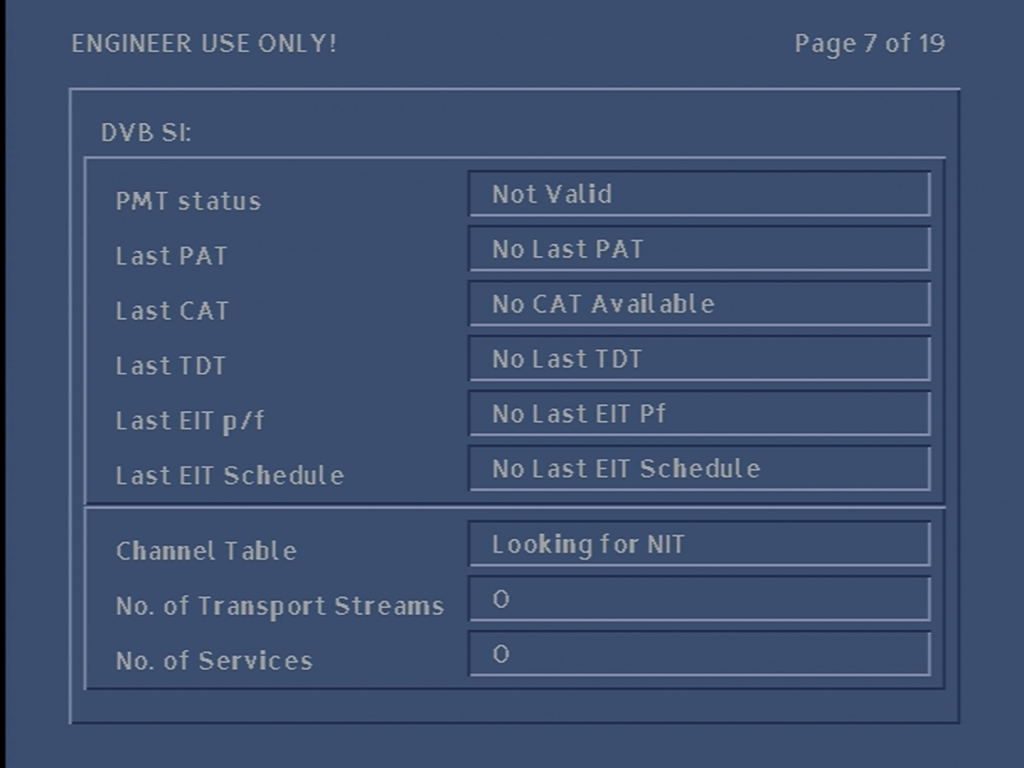
When the box can locate a valid transport stream (multiplex) it shows the details of the DVB-SI, the amount of services found

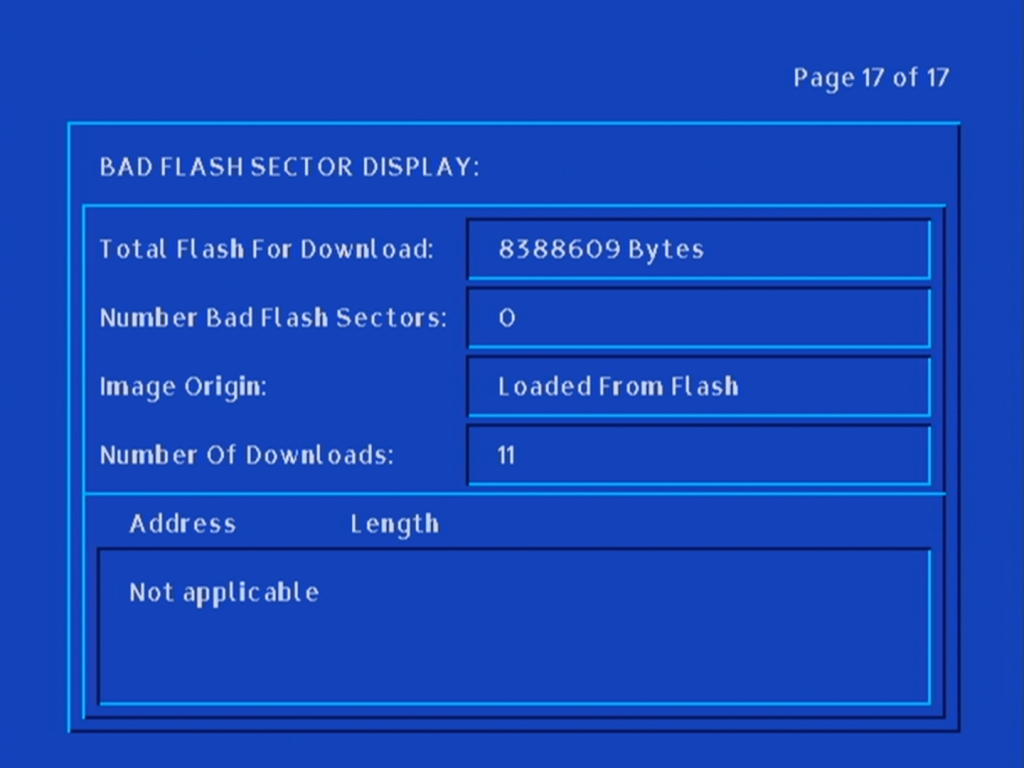
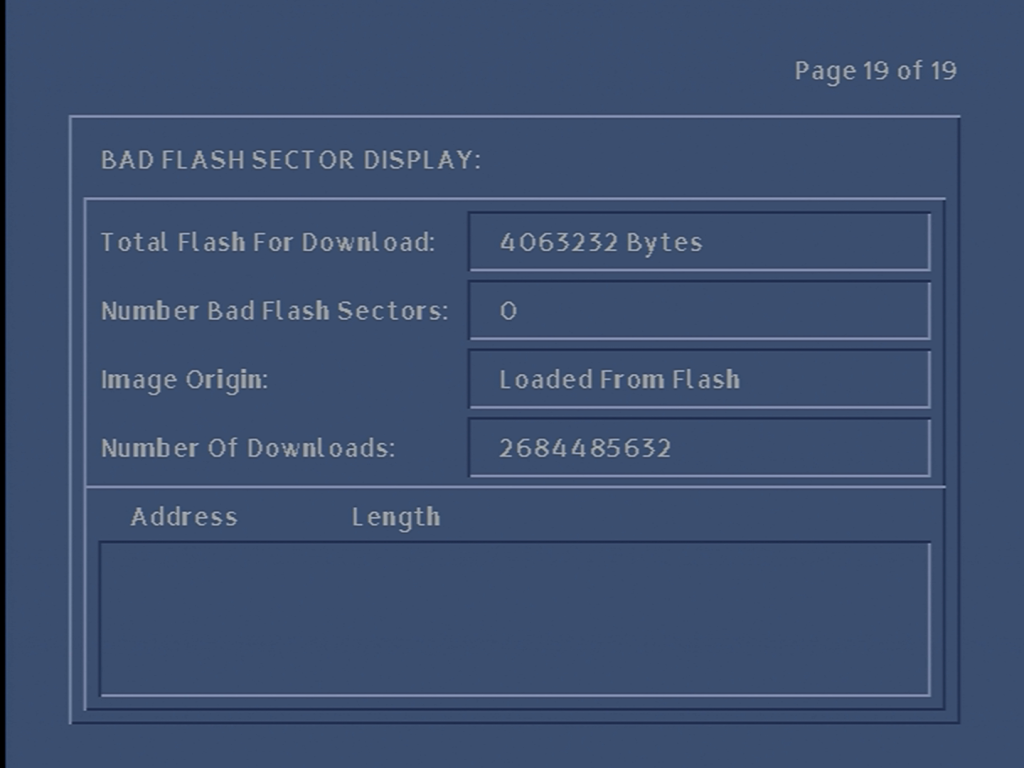
Information relating to the flash memory

Virgin Media Guide

Other Information

Virgin Media Guide

Pace Di4000N

Pace Di4001NC

Pace Di4001NC

The Di4001NC was a cost reduced cut down version of the Di4001 series of ntl set top boxes. One of the noticeable differences is the removal of the second card slot, in favour of just a single smartcard slot for the smartcard. The second card slot was originally designed for Mondex cashcards, which never launched.

Another removal was the ethernet port, despite the box still having a built in cable modem, the IEEE1284 port has also been removed, along with the audio output

Pace Di4001NC Rear

From left to right:

  • Power Input
  • RF Out – outputs the RF modulator, does not pass through the cable signal
  • TV & VCR Scart
  • IR Input & IR Output – No official function
  • RS232 – No official function
  • Cable Input

The RF output no longer includes an internal combiner, which means you will no longer be able to tune in cable channel’s via the RF tuner. Instead only the modulated output of the set top box will remain. This was due to the intention of removing the analogue channels, and to prevent the DVB-C channels from being tuned in on modern digital TV sets.

Pace Di4001NC mainboard

Well it looks very similar to the Di4001, but on closer inspection you can see the components removed, also in this model there aren’t any stickers covering the various chips.

Pace Di4001 C-Cube AViA

From left to right;

C-Cube AViA-600L – MPEG2 Decoder

C-Cube AViA-GTX – Graphics Accelerator

C-Cube AViA-iNX – Transport Demodulator

Di4001NC

The removal of the ethernet and IEEE1284 controllers, the ethernet port seems to remain but is not wired internally.

Hitachi HD6417709

A closer look at the Broadcom DAVIC processor and the mysterious Pace chip, of which the sticker covered some of it on the previous model. At the very top you can see the main processor, which is unchanged since the previous model (Hitachi SH3)

Hitachi SH-3 HD6417709

Pace 909 6162800, ORBIT 61628

Broadcom QAMLink BCM3120KTB

Engineer Mode

To access, hold the Up/Down buttons upon bootup, and release when DIAG appears on the front panel display.

Pace Di4001NC diag screen

Default frequency settings, this would carry any software updates the STB would download upon boot up

Pace Di4001NC diag screen

Some version numbers, as well as the Network ID. This box appears to be running CR3.2

Pace Di4001NC diag screen

Further information in relation to the software versions on the STB

Pace Di4001NC diag screen

Since this revision lacks the internal combiner, you cannot control the outputted cable feed

Pace Di4001NC diag screen

Service status of the box, indicated that the signal is OK and the regional information

Pace Di4001NC diag screen

Signal information for the current frequency, this is the same frequency as the default frequency

Pace Di4001NC diag screen

Information relating to the DVB-SI, and the amount of services received

CAT – Encryption systems

PAT – Channel numbers

TDT – Updates the time & date

EIT – Event info, current program

Pace Di4001NC diag screen

Information for the inserted smartcard, the credit amount and the pairing status

Pace Di4001NC diag screen

A log of events generated by the STB

Pace Di4001NC diag screen

Signal strength status, but this time for the DAVIC tuner (also known as DVB_RC)

Pace Di4001NC diag screen

Same as above but for the upstream

Pace Di4001NC diag screen

Browser settings, for the Liberate navigator client

Pace Di4001NC diag screen

Current date and time, this cannot be set, but is retrieved from the network stream, the STB has a built in CMOS battery

Bootloader version and flash information

Pace Di4001NC diag screen

Memory information, according to these values the box has 16Mb, with 4Mb Flash

Pace Di4001NC diag screen

Information relegating to the MPEG decoders. You can also set the remote control configuration here and enabled the rear in or outputs, this has little effect since the software does not support this

Pace Di4001NC diag screen

No PPV events…

Pace Di4001NC diag screen

Flash memory information, the capacity, bad flash sectors and where the image came from.

More Information

NTL CR3 Software – Software this box runs on

Pace Di4001N – Another model/revision of an ntl box

Pace Di4000N – a STB from another ntl platform

Humax Freesat with Freetime

Freesat introduced its smart tv platform in 2013, which was designed to be a competitor to smart TV platforms like Youview and Tivo (Virgin Media)

The main home screen, appears when you first turn on the reciever,

Now & Next bar, you can skim through the channels by using the Up & Down buttons

Pressing the i button bring up information about the current program, you can also view information for programs on other channels and future programs

The main TV guide, shows what’s currently on. Like most other internet connected EPG’s you can scroll backwards through the guide, which will then take you to an on demand link for the program.

A list of genres for certain channels, accesssed by pressing the List button

Where have all the music channels gone? Seems you need to manually tune them in these days

Showcase

Freetime showcase is mean to highlight and advertise upcoming programmes of interest. Similar to how TV guide magazines showcase programs of interest

Settings

This model supports both Ethernet and Wifi, however a separate USB dongle is required for WiFi functionality.

An external hard drive can be connected via USB to enable recording functionality, if you have a Freesat box that does not have an internal disk drive. This allows you to record and rewind TV, but with only one tuner you are limited to just one program/channel at a time.

Non-Freesat Mode

TV portal is still accessible in this mode.

Personally if you wish to manually tune on channels without any BS restrictions I would advise just to get a standalone FTA receiver, or get a TV with one built in.

Settings – Non-Freesat

Non-Freesat mode can be used to add channels that are not part of the Freesat EPG, but are still FTA. This won’t work with encrypted Sky channels, rather channels that are testing or misc ITV regions

A list of all Astra 28.2E transponders that can be selected, save having to enter the parameters manually

On Demand

A good selection of both Free and subscription on demand services. Most of the major catchup service are present, most of them anyway. There are some omissions though like Britbox, Amazon Prime, StarzPlay, Nowtv and Channel 4

Search

Media Player

You can also play media files from an external USB hard disk or a DLNA server using the built in media player

Humax TV Portal

Humax TV Portal allows you to access interactive applications hosted by Humax, originally supported on their Freeview HD receivers.

Recordings & DLNA

On this model, an external USB Hard disk drive can be connected to the Freesat box, to allow the use of recording. The Freesat software will automatically format the box and prepare it for storage.

Alternatively you can also stream recoding from another Freesat box, or any box that allows DLNA streaming. Some Panasonic TV sets allow this.

You can select the recording, or file to play. And can fast forward and rewind at will, depending on the network conditions, ethernet is recommended.

Alternatively you can stream from a network attached storage device.

Finally there is a section to provide help and support, which takes you to instructions and articles on how to use the various Freesat services.

Looking at early Sky Interactive

Sky digital 1998 logo

Sky and BIB (British Interactive Broadcasting) launched their interactive service in late 1999, one year after the launch of Sky Digital. Designed to be an alternative to the world wide web being delivered through the TV, the early service looked promising.

The service was originally to be branded BIB, but changed to Open…., I’m not sure if this is in reference to the OpenTV middleware stack used by BSkyB at the time. The Open interface was to mimic the experience of a TV High Street, with various banking, shopping and entertainment services being offered.

Open….

One of the loading bumpers for Open….

Austin Powers 2

Open main menu

The main Open…. menu

open shopping

Shopping Menu – Shows a list of retails who have a storefront through Open

open shopping

Even more shopping, E-commerce was supposed to be a huge draw for the service, considering the popularity of shopping channels of the time. Payment is made via a credit card, which the customer enters, and information is sent back encrypted via the phone line. At some point it was planned to use the interactive card as a form of payment

open banking

Home banking services were offered, designed after the popularity of online banking

open entertainment

Entertainment sections, which leads to the popular game section

open music

Music section, where you can check the latest charts, and purchase physical albums

open film

Another loading screen, these were common to see on interactive satellite TV, since data is fed through a carousel like system, this means the digibox has to wait for the data to be transmitted

Film section, surprisingly there isn’t much integration with Sky Movie channels at the time (Premier & MovieMax)

open email

Email – initial offerings were BT’s talk21 service. Email was not push based, you were not alerted when an email came through, instead you had to load the service and connect to open via the telephone line which would then display your inbox. Emails could be typed using the Open keyboard.

open whats new

Whats New section

Any new additions to the service would appear here

Sky digital open games

Games – games were originally delivered on open itself, they later had their own dedicated section (Game Attic), before being spun off into Sky Gamestar and having its own place on the interactive menu.

Sky Sports Active

Sky sports active, one of the defining feature was the ability to choose your viewing angle when watching a main sports event, which was offered when Sky had first launched digital. This could be done via the interactive service, but it was also possible to tune into the stream via the other channels feature

Games

Beehive bedlam open....

Beehive Bedlam

One of the classic games on Sky Digital, and the most well known. Beehive Bedlam was one of the only games that stayed free to play, with the exception of the master levels update in 2004, however the classic levels were still free to play

Corporal Cluck sky games

Corporal Cluck

King Tutti Sky games

King Tutti

Early EPG concept

Sky guide movies 1998

An early pre launch EPG background design, also note the channel text below the Sky logo

sky guide tv listings

Another look at the Sky guide design

Sky guide 1999

Meanwhile, here’s the actual EPG design Sky launched with, note how it says TV GUIDE LISTINGS rather than ALL CHANNELS

Reusing a Virgin Media Superhub 3 as a Wifi Extender

Or an ethernet hub

Despite the Superhub’s remaining property of Virgin Media, when I asked about the return on the Superhub, they advised that the hub didn’t need to be sent back, most likely because they have moved into the Superhub4, and that the old hub can be disposed of.

This seems quite wasteful, since the hub works perfectly. I’m not a fan of disposing electronics needlessly if its in working order. Besides if you need an extra few ethernet ports, why not reuse the equipment you already have?

Starting from Scratch

Probably best to reset the hub back to its factory state. This can be done by holding the reset button down for 10-12 seconds, then waiting for the router to restart

Configuration

Enter 192.168.0.1 into the browser address bar to access the superhub configuration page, you will need to enter the settings password, which can be found on the underside of the superhub.

Before we make any major changes, we can configure the basic settings using the interface. Use this to change any settings relation to the Wifi configuration, as it will be harder to change later.

Disabling DHCP

Since you will be using the superhub on a network that already has a DHCP server, you will need to disable the DHCP on the superhub, since your main router will perform the DHCP duties.

What is DHCP? It is responsible for issuing and maintain the IP address on your network, which ties into NAT (Network address translation). You only need one on your network, having multiple DHCP servers is unnecessary unless you have an enterprise network. Also not to be confused with HDCP

After this you will lose network connectivity with the router, this is because the super hub is no longer assigning IP address. To restore you will need to switch to a static IP temporarily whilst we configure the router. In Kubunu you can configure this in the connections panel in the system settings. For Windows there are various tutorials on how to configure a static IP.

Remember to use 192.168.0.1 for the default gateway, as for the client IP address, you can use 192.168.0.2, You might need to login to the router interface again.

Changing the gateway IP (optional)

You might not need to do this, depending on the IP configuration of your network. By default the super hub uses the address 192.168.0.1 as long as you don’t have any other devices using this address then you should be fine, but you should check first regardless.

Unfortunately with the superhub 3, if you change the default IP address to anything other than 192.168.0.1, the configuration page is no longer accessible. the router will still function as a switch or hub but you will no longer be able to edit any settings or access the configuration page. therefore before you do this, ensure the superhub is configured as you prefer as you will be unable to modify them later, unless you perform factory reset.

This also means that if you have two superhub 3’s, then you will need to do this on one of the superhubs to stop one from interfering with the others, since its a bad idea two have two devices using the same IP address, especially if one is a router/gateway.

Normally you cannot change this via the default interface. We can work around this by entering commands via the address bar as outlined below.

First, enable the developer window in your browser by pressing F12

For Chrome based browsers, Click Console, then enable LogXWLHttpRequests

For Mozilla based browsers, this should be enabled by default

Refresh the router page and inspect the console log

We need to get the authenticator code. This is generated when you log into the router interface and can be found highlighted below, and will begin with n=, followed by a random string of numbers, in this case mine was 82177

To change the default gateway address to 192.168.1.1, use the address below and paste it into the browser, changing the n= value at the end to the one we noted down earlier

http://192.168.0.1/snmpSet?oid=1.3.6.1.4.1.4115.1.20.1.1.2.2.1.5.200=%24c0a80101;4;&_n=0

Best Hex to IP Converter / Translator (codebeautify.org)

likewise if you wanted to change it to 192.168.0.2 instead

http://192.168.0.1/snmpSet?oid=1.3.6.1.4.1.4115.1.20.1.1.2.2.1.5.200=%24C0A80001;4;&_n=0

To save and apply the settings, again amend the n= number

http://192.168.0.1/snmpSet?oid=1.3.6.1.4.1.4115.1.20.1.1.9.0=1;2;&_n=0

The Superhub should shortly reboot itself after. If not, check the commands have been issued correctly, especially the last one since that applies the settings.

Does it work well?

Almost, there are a few issues with the router being in this setup.

One of which is the constantly flashing green light at the front of the hub. This is due to the router attempting to find a DOCSIS signal, even though it is technically connected to the internet, the cable modem side of things is still trying to connect via its coax connection. There’s no option to disable this so I’d advise to just tape over the light, since its never going to find a DOCSSIS signal.

Firmware updates for the Superhub are delivered via the cable network only, and the Superhub has to be authorised at the headend in order to receive the update. This means you will be stuck with t he same software currently on the router. Whilst this isn’t a huge issue, since the Superhub firmware is relatively stable, with the main issue being on the cable side of things which we are no longer using.

Further Information

Re: Superhub 3 internal network address – Virgin Media Community

Original Process used to change the default gateway address on a superhub 3.