A quick update and a look at some newly added apps for the Virgin TV 360, including some new games. Correct as of December 2023.
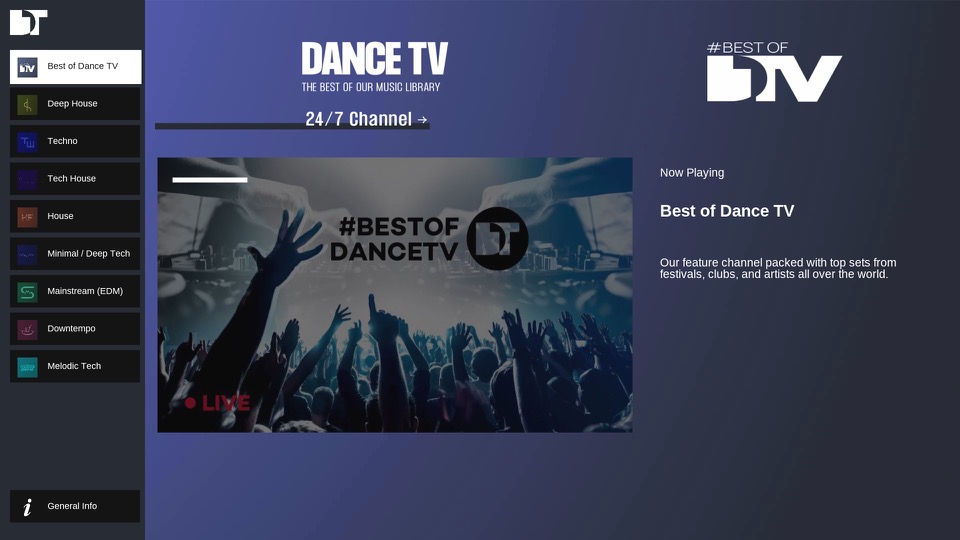
DanceTV
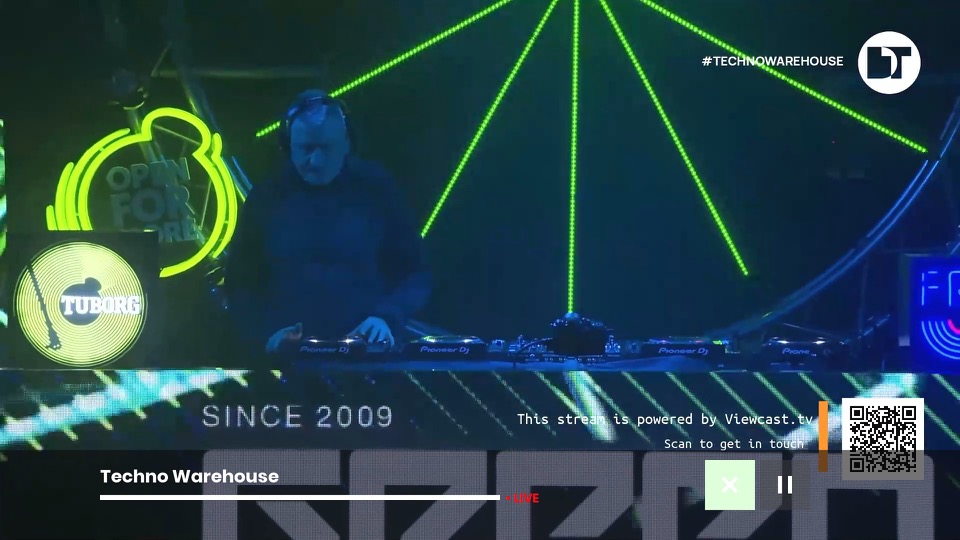
A collection of live music channels that focus of different genres of dance music. Feeds include Deep House, Techno Warehouse, House Floor & EDM Mainstage. There is also a main channel that has a variety of dance music. These channels will play mixes from live events. I’ve yet to see traditional music videos on there, so you’ll have to stick with KISS and Clubland TV for those.
AppleTV+
We now have AppleTV+ which is Apple’s streaming TV service that features a few of their original shows. Virgin has really made a push to add further streaming services to their platform as additional subscriptions, and this will be important to the VirginT V Stream which is reliant on these services.
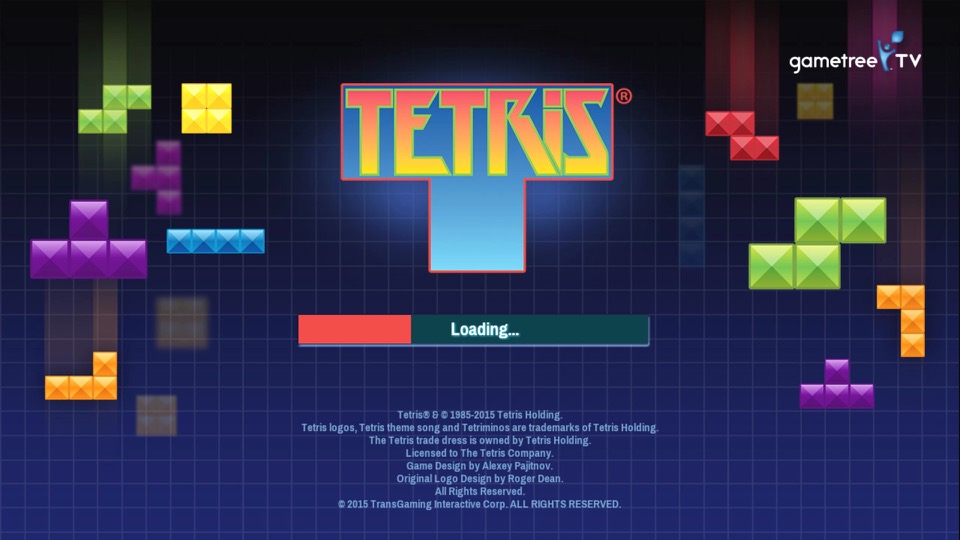
Games
Games have been reintroduced onto the service, and unlike the Tivo games they are currently free, though I suspect they will introduce adverts into them at some point like BT did with theirs.
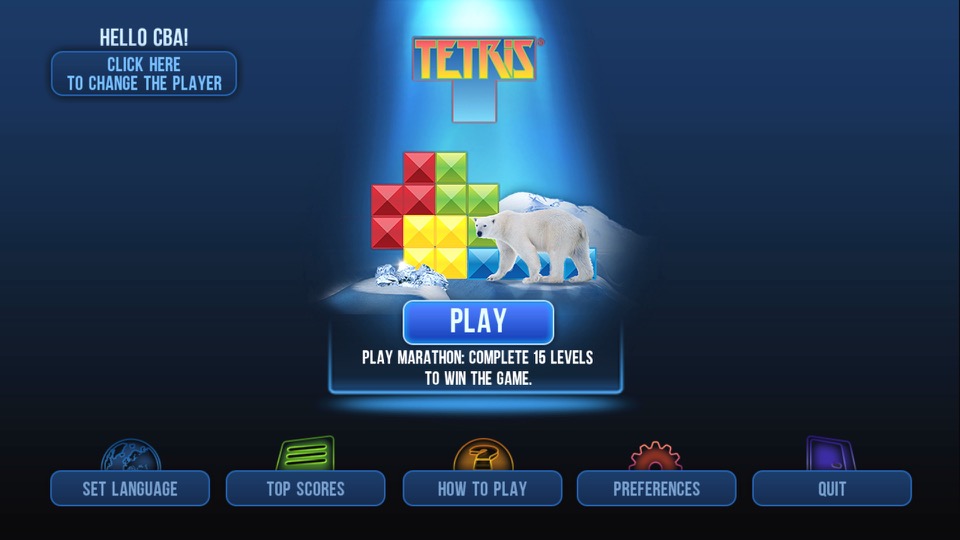
Tetris
A favorite that you cannot go wrong with. It’s a little tricky with the remote, pressing OK will rotate the piece and pressing up or down will immediately drop the piece. This is very similar to the version featured on BT TV, in fact it’s the exact same game.
Hangman
A simple game of hangman where you have to guess the correct word. You can choose from a list of different categories (Professions, Animals, Fruits, Vegetables, etc).
brutal
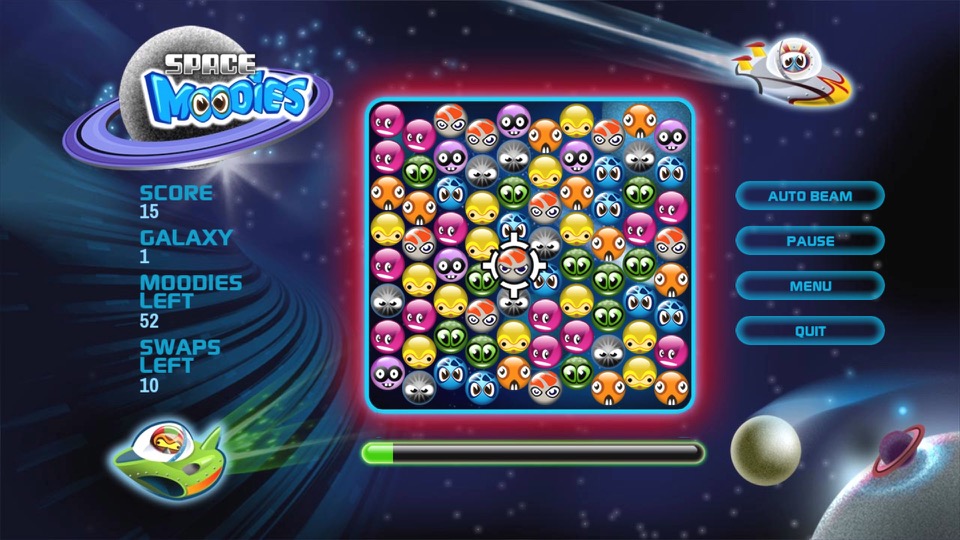
Space Moodies
Another one of those games where you have to match three of the same colour.
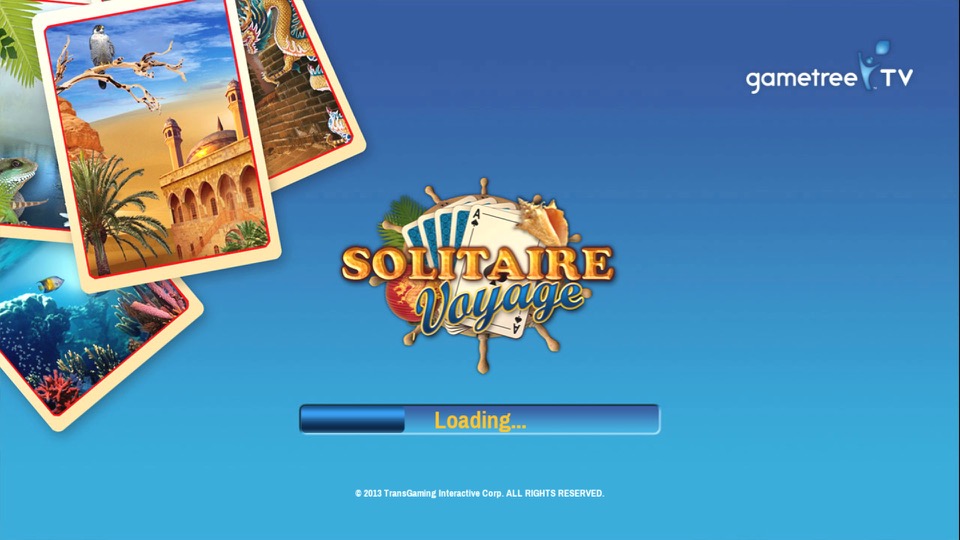
Solitaire
Some card game I have no idea how to play, I’d imagine it’s the same as the Windows version.
Other Stuff
Fast channels are a bit disorganized, you do have a section of channels in the main EPG, but many reside in their own container apps.
One idea would be to organize them into existing EPG genre sections but make them distinct from actual channels. This would increase the visibility of the channels. For example, allocate 600-630 to traditional news channels (BBC/Sky/GB News) with 631-660 allocated for the FAST news channels. The same would apply for the music channels with (250-280 for MTV/NOW Music/Bauer channels) and 280-299 for Pluto’s music channels. This would make the channels more noticeable since they are tied into the EPG and since ITV and UKTV have embraced these services, it would make sense to do so.
Ofcom are looking into regulating these channels, as they are currently unmonitored since they are not classed as broadcast channels which might explain why Virgin have separated them for now. I expect them to act on this urgently since they really don’t want Infowars on our screens anytime soon, or anyone who dares to go against The Message.
There is also a question if FAST channels are sustainable – Possibly.
Whilst many are getting accustomed to Video On Demand (Streaming services) these make a lot of sense for serial drama’s and Sci-Fi shows, since many viewers will want to follow these series more sequentially, as each episode is often connected with each other in order to follow the overall plot. Reality and documentary shows however are different as the episodes are not always connected, and in the case for DIY shows they often feature a different set of people for each episode. Or in the case of Mythbusters or Brainiac, a different subject per episode. I guess cartoons and certain sitcoms could also fall into this.
TLDR: We need a central hub for these FAST channels, the main EPG might not be suitable due to possible Ofcom regulation.
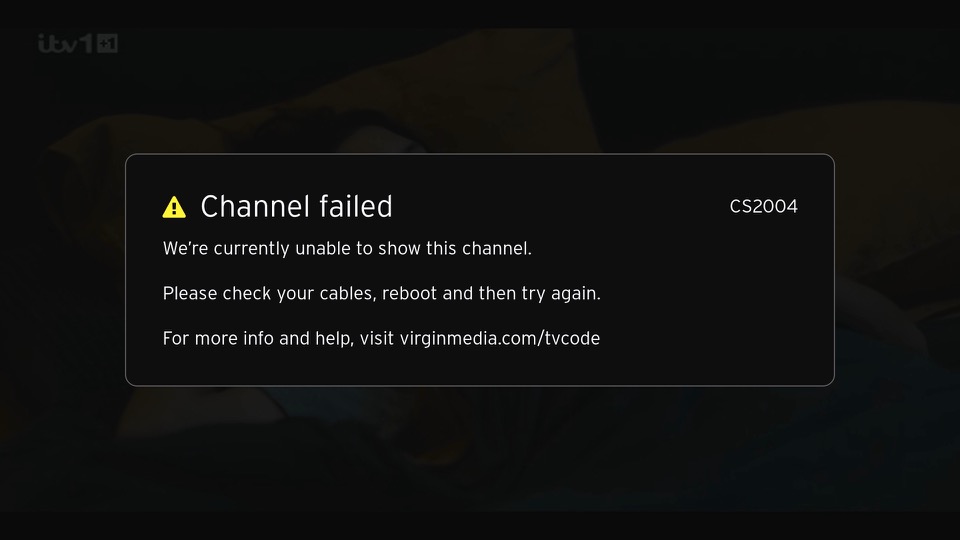
An error screen that appears of the box cannot tune to a channel. This can happen if your signal levels are out of wack or if you just disconnect the RF cable. This will not affect the FAST channels in the guide and the box will continue to operate normally for many of the streaming apps or on-demand stuff. Recording can also be played back from the main TV box.
Virgin’s successor to the Tivo and sort of answer to Sky Q.
The familiar colour of purple welcomes us to the 360 and we are greeted with the welcome change on channel… 360. Its a nice touch and goes through the capabilities of the new software. The platform makes use of Horizon 4 platform by Liberty Media, which is the parent company of Virgin Media. Horizon is also used across Europe by VM’s sister company like Telenet and Ziggo. Horizon was previously in use on UPC Ireland, which was later bought and rebranded as Virgin Media Ireland.
The set top box itself remains the same as the V6, using the Arris DCX960 with the same amount of storage (1TB), though a different remote control is used which drops the Tivo thumb buttons but adds a profile button and voice control. By using the same set top box, this allows for an in-place upgrade which can be requested by the customer to migrate the software from Tivo onto Horizon. A new remote is sent via the post during this process and once recited and activated by the customer, the software is upgraded.
One setback is existing recording are lost during the upgrade, so there is a grace period of 5 days before the software is updated automatically. This is likely due to the two platforms using different DRM to manage recordings.
TV Guide
The EPG guide, with the miniTV being displayed on the bottom right of the screen, which is a weird place to put it. The Tivo and even their older Liberate software placed the miniTV on the top right.
Pressing the OK button bring up the information banner which will show what you are watching. And what is on later that day. It will also show you the director, and the cast of the current movie you are watching, in a similar manor to how the previous Tivo platform presented it.
You can also set the box to record the current program, and enable subtitles or audio description.
Scrolling down will also give you options to watch on demand or to purchase it from an online store. You are also given recommendations of similar shows or movies
Channel off air slides, these come from the video stream and are not generated by the box.
Ah my favorite show, Fringe.
Filtering by the channel genre
Pressing Ok will bring up a small menu
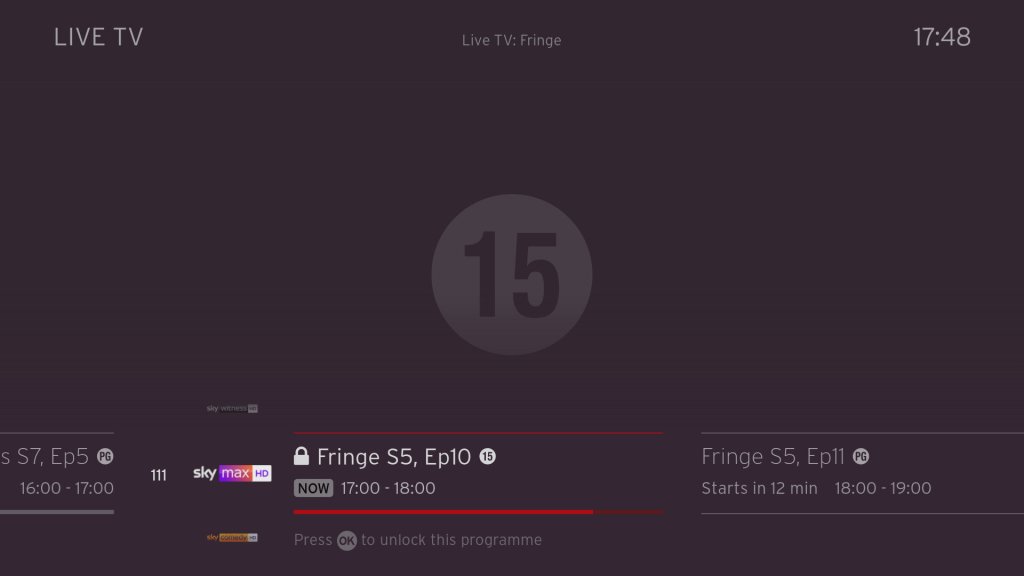
Trying to watch an age restricted program outside of watershed hours, pressing Ok will prompt you to enter your PIN.
Navigating the user interface, you can quickly see what’s on next, and on other channels.
FAST Channels
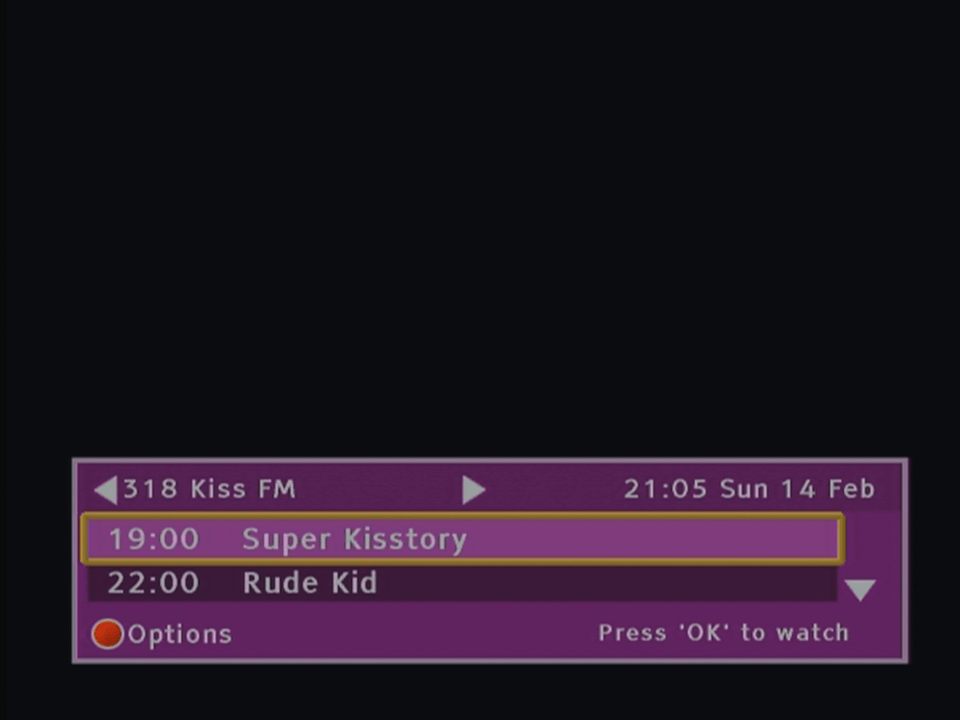
Some of the PlutoTV channels will appear in the guide as streaming channels, however they are not integrated very well. Selecting then channels requires the box to buffer for a few second which cannot be helped, but when leaving the channel you are promoted if you wish to leave, which makes cumbersome when channel flicking. I wonder if this is a side effect of Ofcom, since these are not considered traditional broadcast channels then they cannot be directly accessible from the guide. I should also not these channels cannot be recorded, but their content is available on catch-up via the PlutoTV app.
This message will appear overtime you try to change channels in the top right corner, making it cumbersome to channel surf.
You also cannot pause or rewind for these channels, nor can you record any shows on these channels. Trying to do so will show the above message.
+1 channels now have their own section in the EPG which some might prefer, these are in the 3xx section of the guide. These channel are largely redundant, since you can just record or use the catch-up feature considering you have six tuners at your disposal, there’s little need for these time shift channels.
Voice search is a new feature that comes to the Virgin platform. Here you can press the microphone key on the remote and speak into it, either a command or a show you wish to search. It actually works quite well and is much more convenient than having to type to search on an onscreen keyboard, and it appears to be quite accurate despite having a lot of background noise.
Every so often, the Horizon software will show hints on how to navigate the TV guide interface.
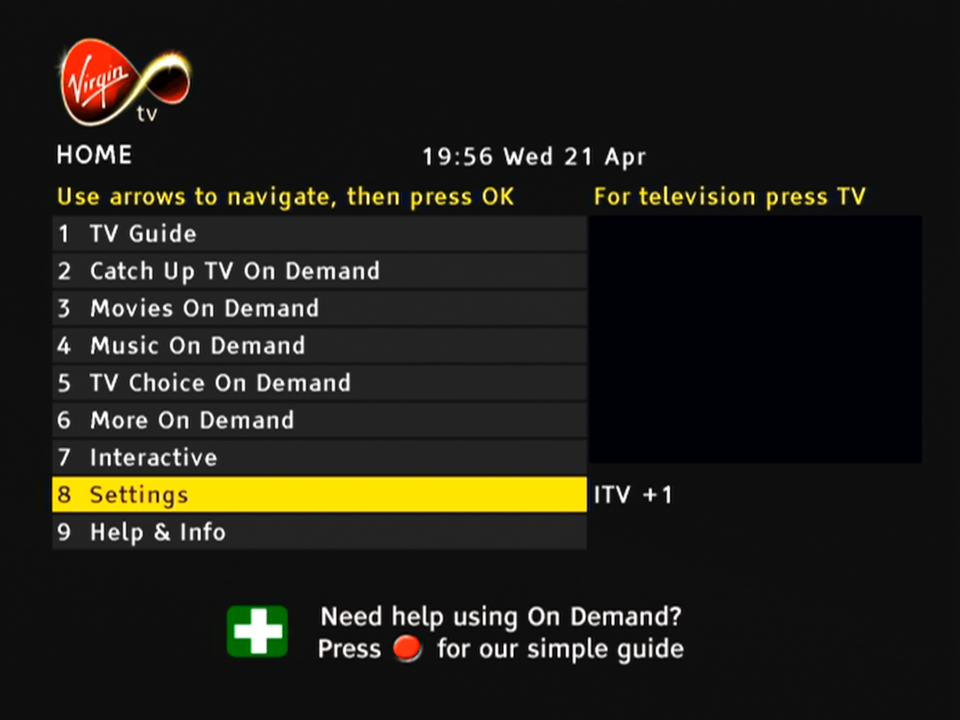
Settings
Profiles are one of the main features of the 360 software, where each user can set their own preferences for favorite channels and language settings.
Favourite channels
A few accessibility options with voice-over options added.
Parental controls where you can lock specific channels or apps to restrict their usage. You can also enable PIN requests for program’s recorded after the watershed.
Video output settings, up-to 4K (2160p) output is supported.
System configuration where you can amend the auto power off. One power lets you turn on both the 360 box and the TV itself at the same time.
You can also switch between the Ethernet connection or to use the WiFi instead, though the box will always try to use the Ethernet connect if its available. You can also rename boxes if you have multiple 360 boxes.
Lastly some information about the box, this one appears to be the Arris DCX960. There is also a Humax version floating about (Humax 1008R-HDD-VM )
According to a few online sources, the box is powered by the Broadcom BCM7252, with 4GB of RAM. The CPU is a dual ore ARM processor though there is no indication as to which core it implements (most likely the Cortex A53)
Lastly adding additional buffering time to recordings.
Recordings
Watching recordings, which shows both shows available on demand and recorded program’s. Anything recorded and stored locally is represented by a full circle, whilst on demand is represented by a red ring instead. This is a bit misleading since I assumed the ring meant unwatched programmers, whilst full circles were already watched.
Selecting. show will display the amount of seasons that are currently available, and a list of episodes to select from with a short description of the episode.
A list of recorded shows, what can be sorted by date. You can also view any recording that are planned (and active season passes)s and how much disk space remains.
Like Tivo, you can customize the season passes where multiple episodes can be recorded. You can set to record only new episodes only, or from a specific season. And set to keep at most between 10 – 25 episodes so your storage does not get filled up from one show.
Age restricted program’s will require a PIN to be entered to watch. By default this is set to 1234 but can be changed at any time.
Apps
All the standard streaming apps are available such as BBC iPlayer, ITV X, Netflix and Amazon Prime.
PlutoTV: A free, ad-supported streaming service that offers a variety of on-demand movies, TV shows, and live channels. It operates similarly to traditional cable or satellite TV, with a channel guide that allows viewers to watch content on specific channels at scheduled times. Pluto have expanded the amount of channels steaming with the service since its launch on Virgin Media in 2020.
Radioline: A radio streaming app similar to TuneIn, radio stations and podcasts can be streaming and played through the 360 box, or through your sound system if you have your 360 box hooked up to it. There is an SPDIF audio output on the box for you to connect to an supported audio system.
VEVO: For music videos, had a large catalog of songs but there are certain omissions from popular artists, in that most all their music videos are available. Like Spotify, there are curated playlists available.
The Red button still exists, and can be invoked on the BT TNT Sport channels to quickly access other screens
BBC also still has a red button service, although this is just links to iPlayer instead. No more news headlines or information, that’s all done through the internet now.
A fireplace app, that shows a looping view of a fireplace. No I’m not kidding.
Fit At Home: A video fitness app with pre-recorded exercise segments
News headlines from France24
And the Wall Street Journal, a newspaper who famously tried to claim that PewDiePie was a nazi.
Paramount+ and Disney+ is also a welcome addition to the service. Now we just need Discovery+ to be added, although Virgin offer a lot of their content through their live TV channels and catchup/box sets.
No games though, why?
Full view of the app gallery
Comparison to Virgin Media Stream
Not long after the 360 was launched, Virgin introduced Stream which was offered to broadband only customers. This is a tiny box that connects wirelessly and is independent of the cable network (you still need a Virgin internet connection). Main different is you not receive live V channels through I (in the traditional sense, some apps might allow live TV broadcasts but its not using DVB-C, rather IPTV)
It’s really geared to customers who prefer to stream their shows fully on demand and have no plans to watch live tv, or they are happy with the freebie lineup instead.
Virgin Media App
A few captures of the Android app, running on a Sony Xperia 1 IV. The app will block screenshots when a channel is being streamed but not if browsing the guide. You can push channels and shows directly to your 360 box if its on the local network, and use your phone as a remote control providing its on the same network.
Lastly you can watch live broadcasts on any internet connection, but you are limited to up to 5 devices.
Conclusion & Improvements
My overall though on this was, is that it?
It’s not a bad services, if in fact its a lot better than say BT TV or TalkTalk offer, but there just isn’t that much improvement over the Tivo software that was used previously, This does goes to show how forward thinking Tivo was in its design and feature implementation. But really the move to Horizon 4 was more so that Liberty Media could have their operators migrated to one common platform.
If you’re an existing Tivo V6 user than there is little incentive to upgrade, unless you need the voice search.
Some improvements that could be made are:
Better FAST channel integration: Its a good idea to integrate them into the guide, as many people will simply ignore them if they’re hidden inside an app. But the shortcoming is you cannot channel hop as easy since the box will prompt you if you wish to leave the app, despite the illusion that you are still within the live TV interface.
More storage options: Needed as you lease more mini boxes from Virgin, 1TB isn’t going to cut it for a large household, especially when you consider 4K content. A 2TB upgrade would be very welcome. The box is detachable from the hard drive, though it requires unscrewing from the base. This is really so that Virgin can offer a mini box using the same design, the end user is not authorized to modify the hard drive.
Ability to steam to a smart TV or a Android set top box, or function wirelessly: This seems to be a common request for multiroom, as many people would prefer if they could get Virgin TV in another room without the need for a coax connection, like the mini boxes for Sky Q. However being able to stream live channels to another network device might be beyond the 360 hardware capabilities, its designed more as a generic PVR than a server. I really wish Virgin would pull their finger out when it comes to this, as multiroom viewing was one of the things cable TV did well and it seems they are not really trying with the 360.
I’m not sure why the Stream isn’t capable of this, I would assume they are using the same Horizon middleware.
More apps: This will always be a moving goalpost, but investing support for Britbox, AcornTV, Rakuten TV, Sportstribal and Plex TV are useful but they remain niche services.
Gaming services may be preferable in the future, with Xbox Gamepess Cloud, PlayStation Now & Amazon Luna being an example of such services.
Further Information
I should also mention that Virgin marketed the box as the Virgin TV 360, not Horizon 4 which is what the software is referred to internationally and by Liberty Media. Likewise EOS refers to the hardware architecture that Liberty Media has designed, since the hardware is capable of running the Tivo middleware.
As with the V6, the box features six tuners. Multiroom is handled differently with the 360, as mini boxes come linked to the main box to allow recording to be shared. The main box acts as a central server which the mini boxes can playback recording from it. However unlike Sky Q, the mini boxes require a cable feed for live TV, and can only live buffer a certain amount since that relies on the internal flash storage.
The 360 mini box is pretty much the same and the main 360 unit, just with the hard drive section removed. In theory this means you could attach additional storage for one extra monthly fee, though its unlikely Virgin will take advantage of this, We should be lucky the 360 has a hard disk at all, the European versions don’t have one and rely on cloud storage which means recording have to be streaming through your internet connection.
Call me a simple guy, but I prefer having everything on local HDD storage rather than in the cloud datacenter. I can just imagine this stuff being a disaster with not being able to watch back recording due to downtime/maintenance, or not being available due to ‘rights issues’. Just because you can, doesn’t mean you should.
Also, like the V6, the 360 does not feature a built in modem like the origin Tivo did, so you will need a permanent connection (Wireless or Ethernet, unsure of the speeds but I guess its enough for HEVC 4K video) to use the 360. Channels are still delivered using DVB-C rather than IPTV as Virgin would have you believe, though anything on demand will require an internet connection.
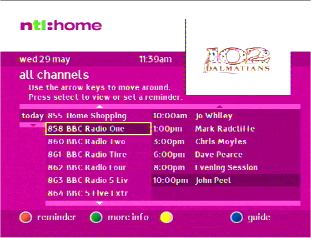
This update marks the start of the unification of the Langley and Bromley platforms, as the colour scheme as been changed to match the one used by Bromley CR3. Internally many amendments were made in how the DVB-SI was handled in order for it to behave like the Bromely imersion.vplentation
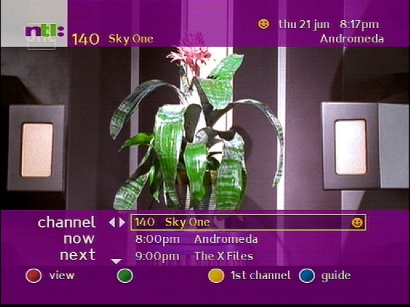
The channels banner keeps its layout but adopts the new color scheme
Information banner that displays details on the program being broadcast
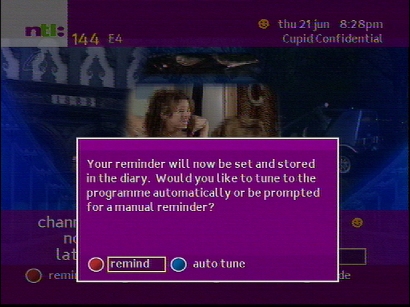
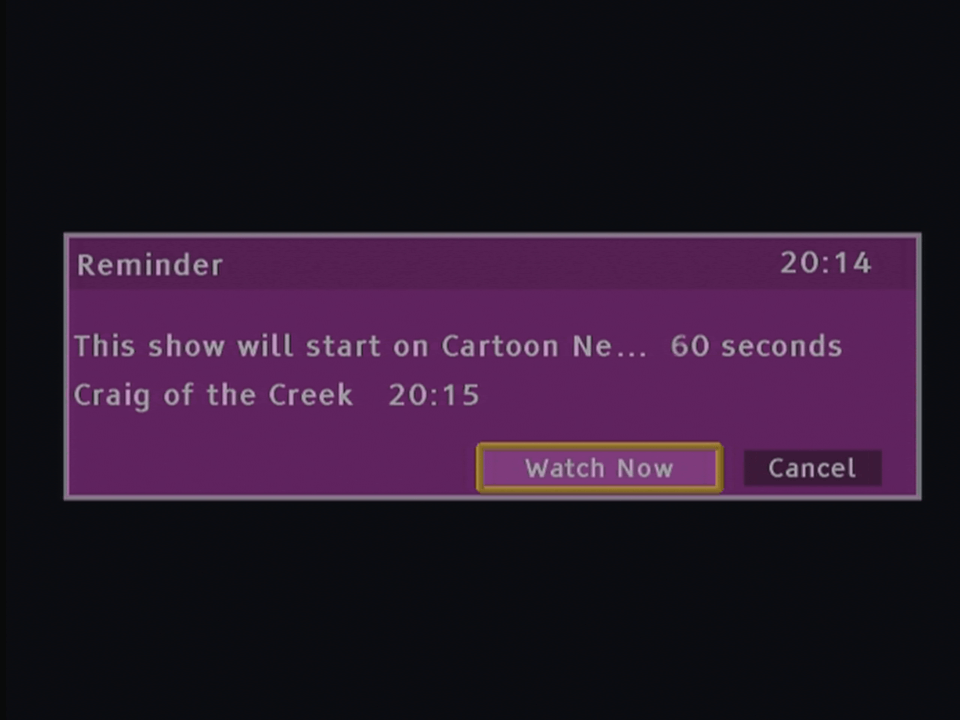
Setting a reminder for a future event, auto tune can be enabled for when you are settings a recording for a VCR, the box will then automatically change over to the channel
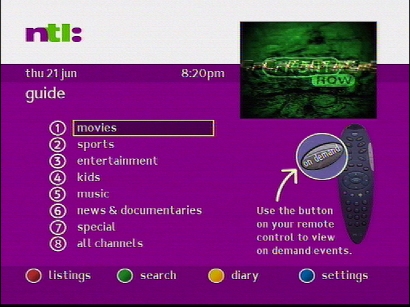
Main guide screen, different genres can be accessed here
This guide still has the classic layout, whilst the Bromley guide uses the grid like layout that is well known today
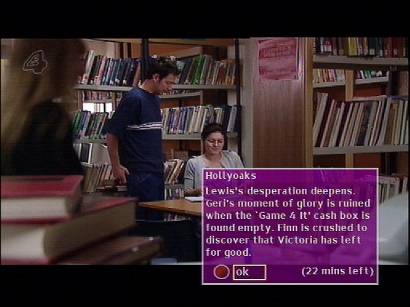
Pressing text on a channel that does not have an interactive link
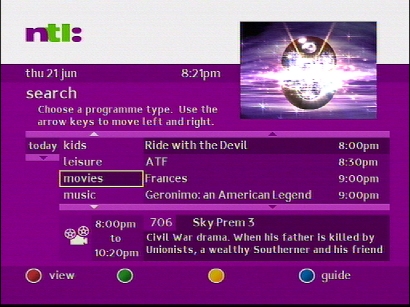
Using the subject search feature to find a program
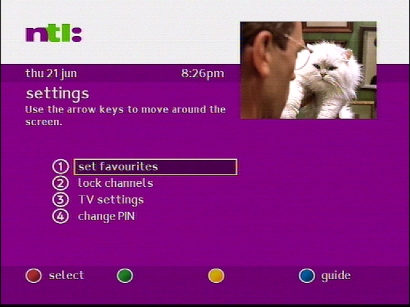
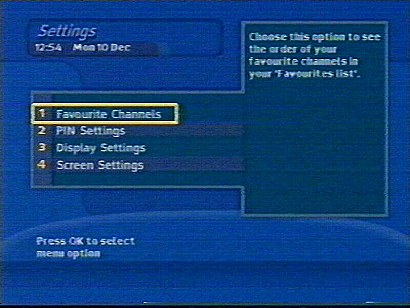
The settings area, which remained unchanged since the previous version
Telewest redesigned their digital TV service in 2002, which saw the TV Guide software undergo a complete rewrite and redesign of the user interface, similar to what ntl undertook with their Bromley TV service.
Like ntl the TV guide was written entirely in Liberate TV middleware, and the entire interface is rendered using the Liberate browser. In contrast, the previous Telewest software used an EPG system developed by Pace, with the Liberate browser being added as a separate component what had to be loaded.
This meant the customer had to wait for the Liberate browser to load before they could access the interactive service, and on screen interactive prompt were not possible since the interactive stack was not running whilst the customer was watching TV.
Viewing TV on Demand listings
The Liberate middleware was upgraded to 1.2, which featured several programme and feature upgrades to the HTML browser used, one of which was the ability to use a mosaic style screen with different video feeds .As mentioned earlier, the Liberate intake now runs constantly, allowing for ‘press Red’ functionality to be used on TV channels, this was essential since Sky and ITVDigital had implemented similar interactive prompt features. These would also be instrumental for the upcoming Big Brother and Wimbledon 2002 interactive services, where customers could choose from different angles and feeds through the use of interactive, of which was not possible with Liberate 1.1 (The mosaic feature mentioned earlier)
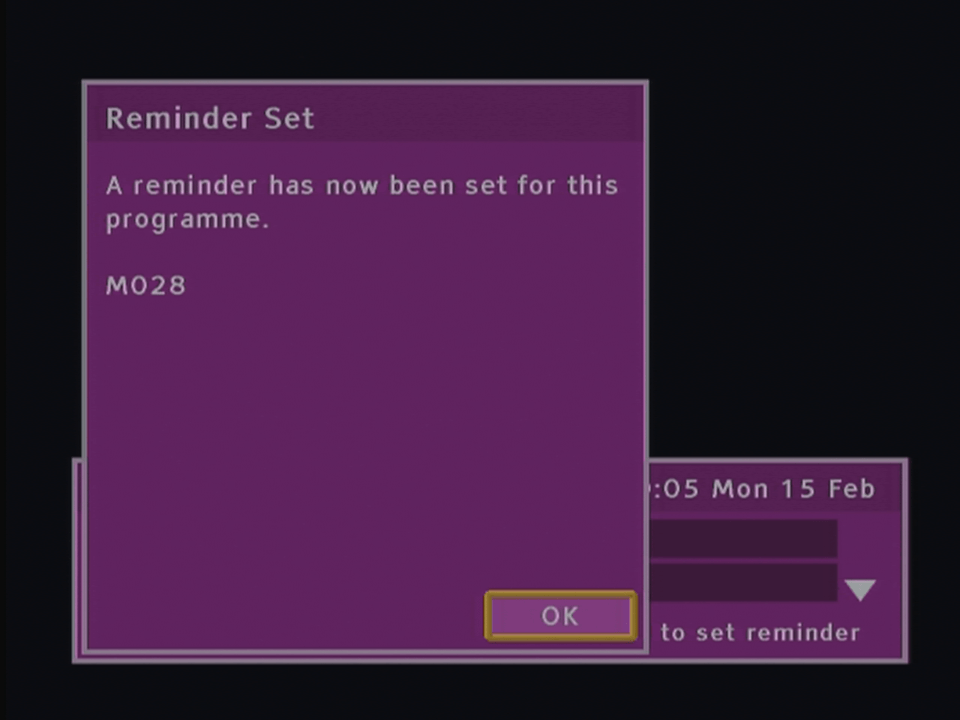
A reminder alert for an upcoming program
Also new addition was the mini TV guide feature, where a small screen of the channel the customer was currently watching is displayed whilst the customer browses the TV guide or interactive. The exception to this is when they are browsing the On demand TV section, where the box changed to a Front Row preview channel, the reason being this was to allow the box to get up to date PPV listings rather than rely on cached data, and to do so it was necessary for the box to tune into a specific frequency that carried this data, preventing the use of mini TV.
A weird design decision since Telewest already had a functioning return path due to the internal DOCSIS modem inside the Pace box, why not use that to retrieve the PPV listings?
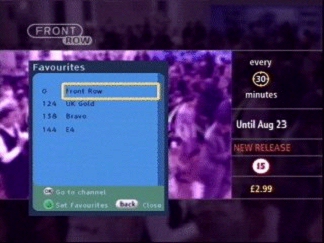
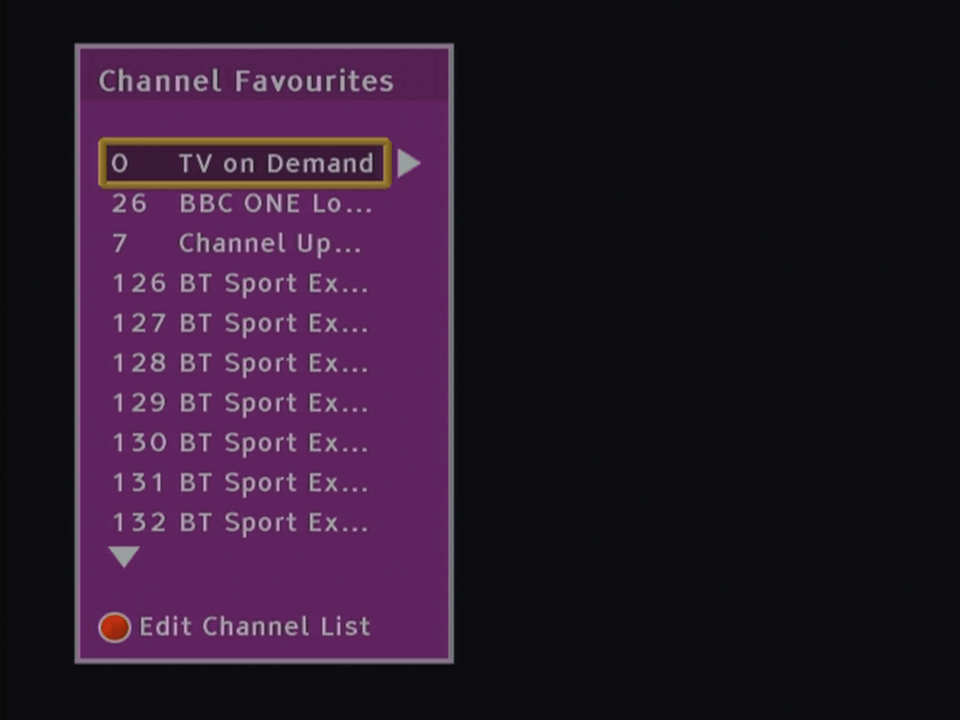
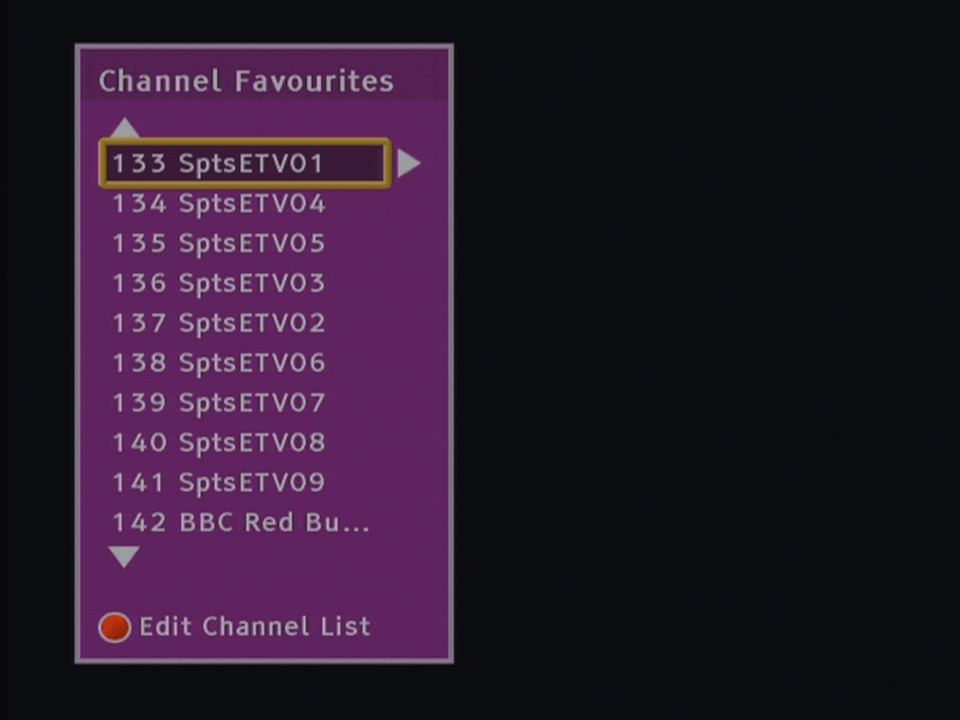
Adding Favourite channels
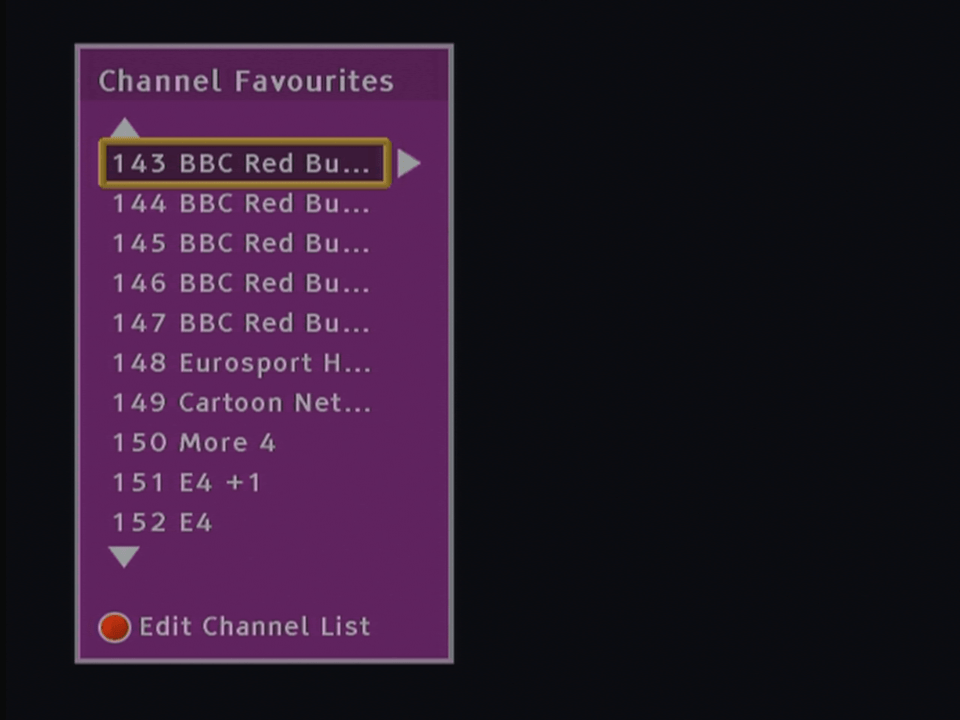
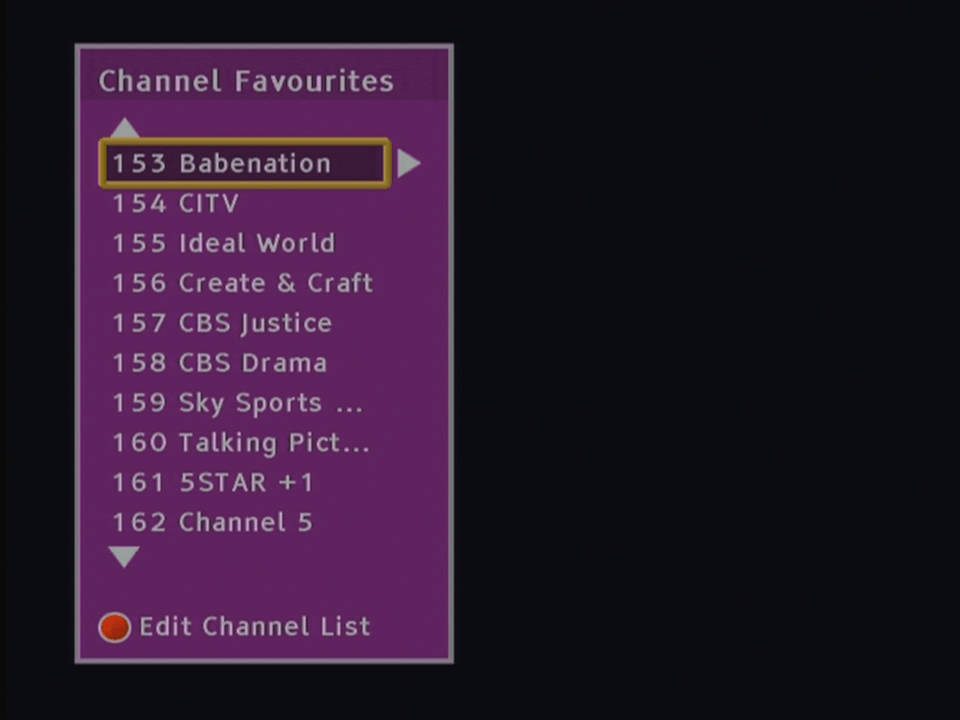
Viewing Favourite channels
Pressing reveals information on the selected program, and any program broadcast within the next 24 hours
View of the search and scan banner, known here as the Mini Guide like Sky you can view what’s on other channels
In 2003, a slight update was made to the interface layout, the Telewest Broadband branding is now in effect, and the layout is more square compared to the previous design.
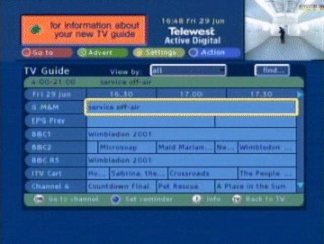
Telewest launched it’s Active Digital TV service in 1999 and was built on the same foundation that Cable & Wireless used for their digital TV service.
These screenshots were originally hosted on Digitalspy and were captured by a forum member, but the links to them were broken in an update, and were no longer directly accessible. From the looks of it they were captured using the RF output, so they are not indicative of the quality available at the time.
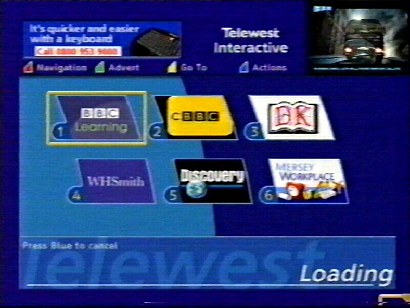
Startup Screen
Now & Next bar, very similar in practice to Sky Digital
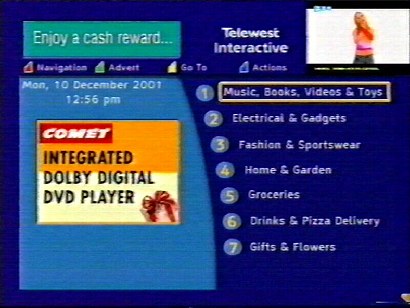
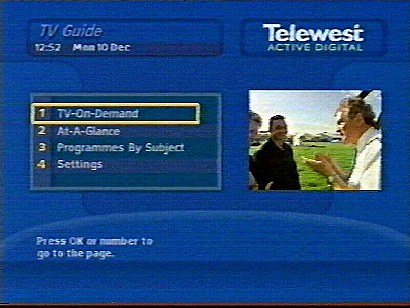
The main home screen
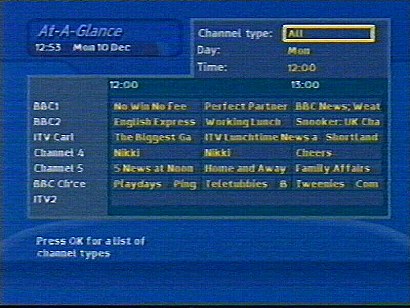
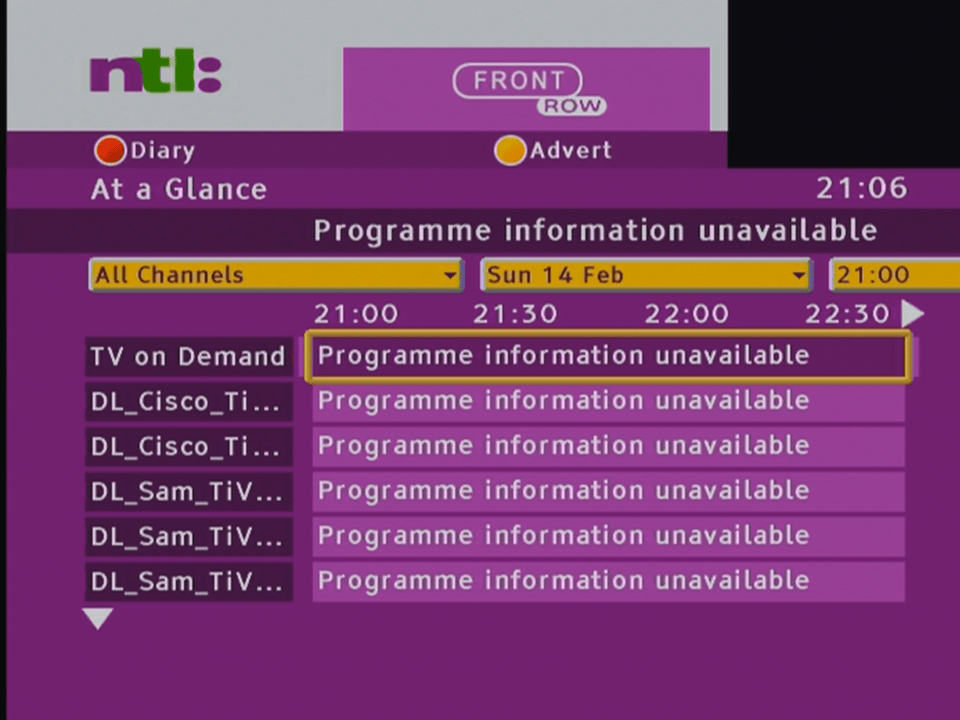
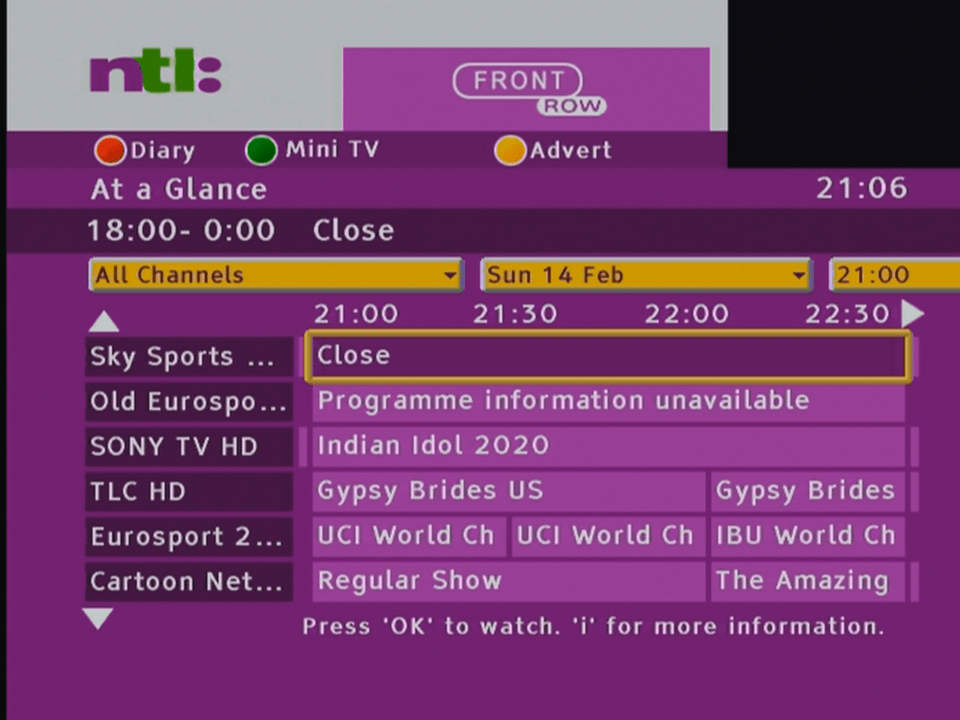
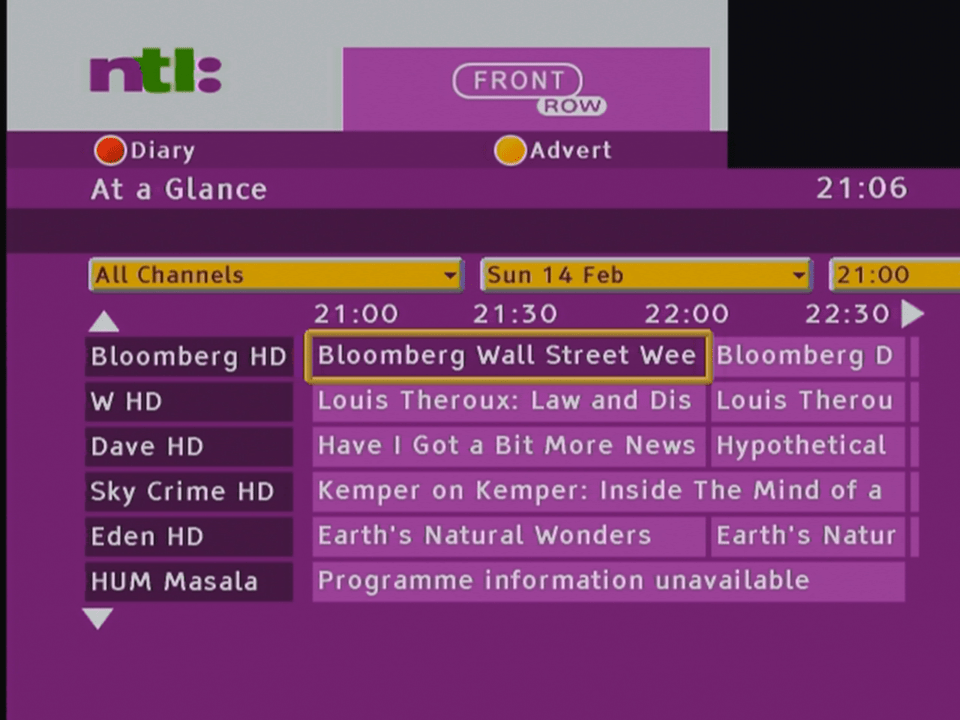
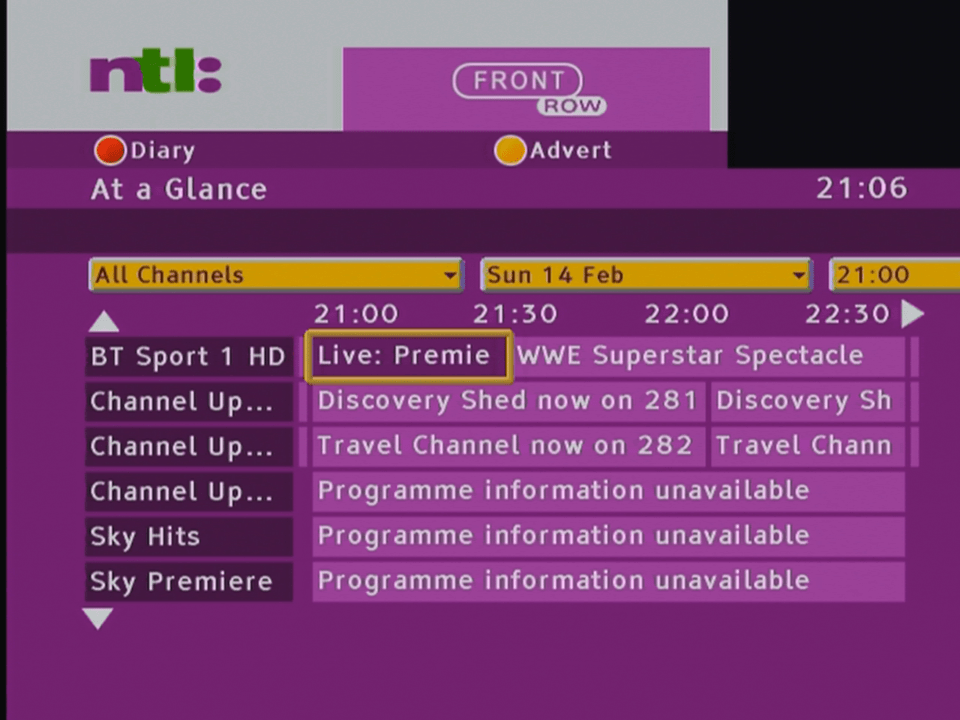
At-A-Glance
The main TV Guide, called ‘At-A-Glance’, this shows TV listings for the next three days
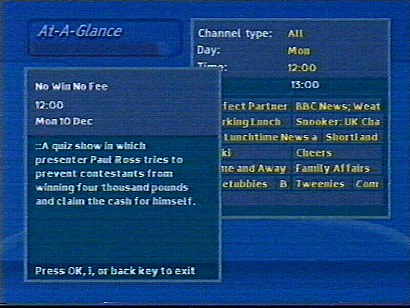
Pressing i calls up a description of the program
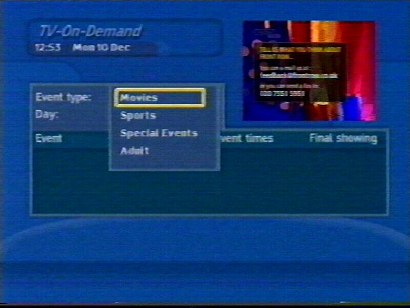
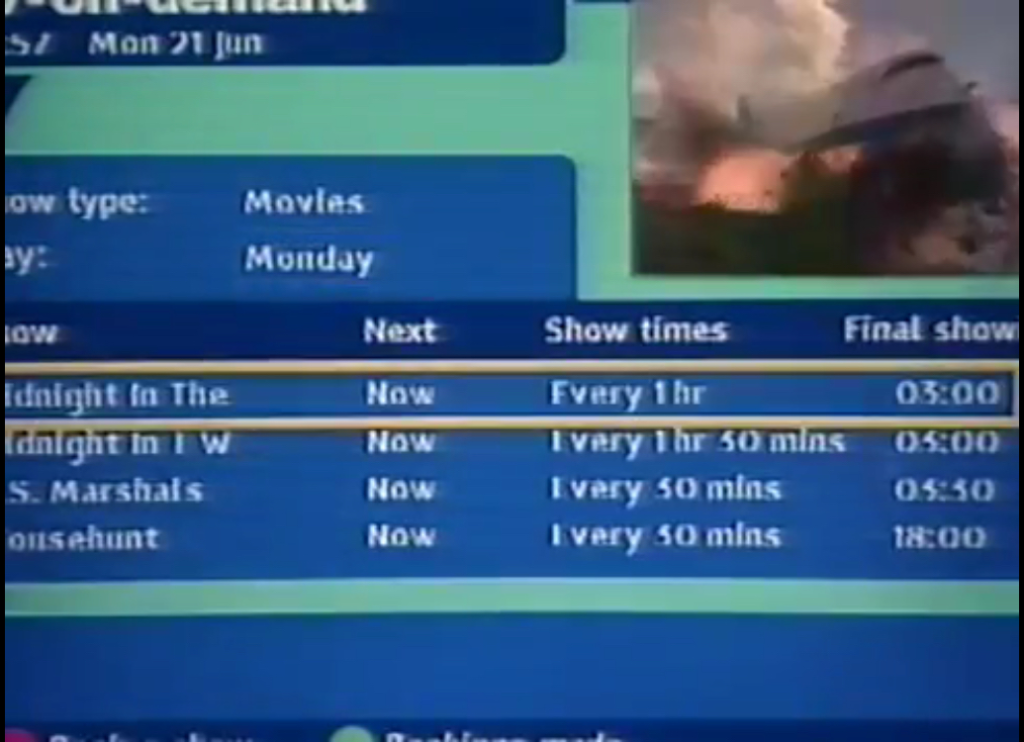
TV-On-Demand
This isn’t true video on demand, at this point only NVOD was supported. the customer selects a convenient time slot showing to view the movie or event
Different categories
Programs-By-Subject
This I imagine is similar to the A-Z listings on Sky, where you can view programmes by their genre. Useful for discovering new or similar programs.
Settings
Main settings area
You can set the reminder notification warning before the program starts. Its worth noting that cable had implemented this before Sky Digital,
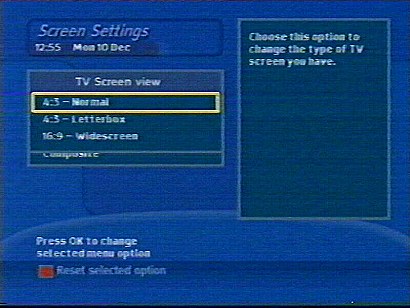
Here you can change from RGB to Composite, and set the box to output widescreen or standard. Letterbox options are also available.
Interactive
The early implementation of interactive was done in a separate Liberate browser, that had to be loaded separately. this meant that red button functionality was not yet possible in this build, since the Liberate environment was not yet running full time.
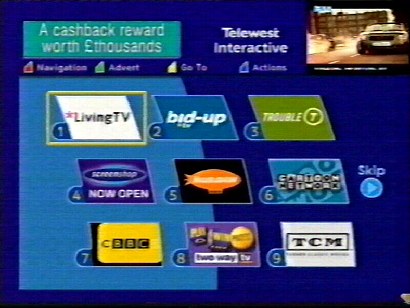
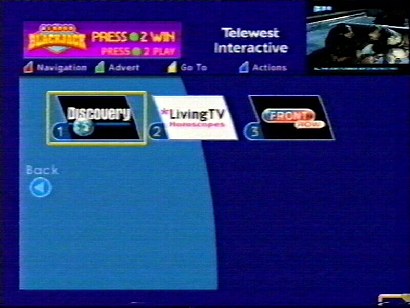
The main interactive menu, very similar to the ntl interactive portal
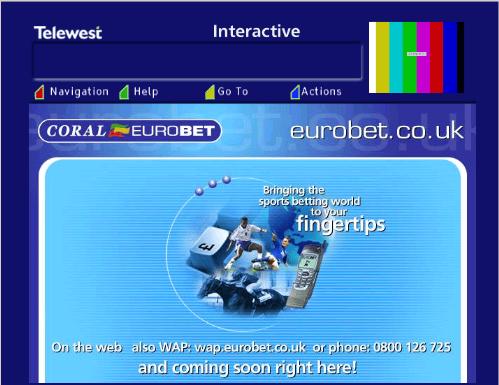
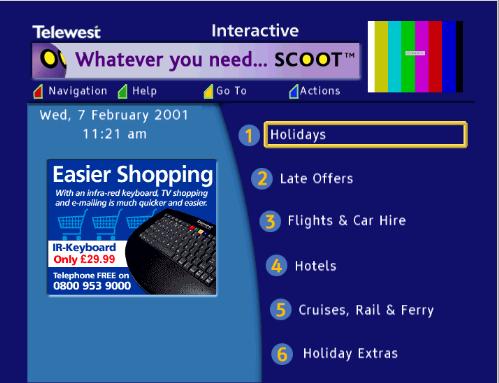
List of all entertainment interactive services, which are customised websites that are designed for use on an embedded set-top-box.
Interactive is delivered using the internal broadband cable modem built into the set top box, a phoneline is not required and the service is always on
Nearly all of the content and service are built using HTML3, which makes it easy to develop and host service, although there are some differences and restrictions comparted to a desktop class website.
A navigation bar can be used to browse around the service, and to exit back to the tv channel you were watching
An email service was built into the service, and was tied into the blueyonder email service.
The DiTV 1000 was one of the first digital cable boxes released in the UK, and one of the first DVB-C box’s with a built in DOCSIS cable modem.
The DITV1000 was also used by Telewest, where it was branded as the Di1000T, however the internals should be the same, although there may be differences in the memory configuration
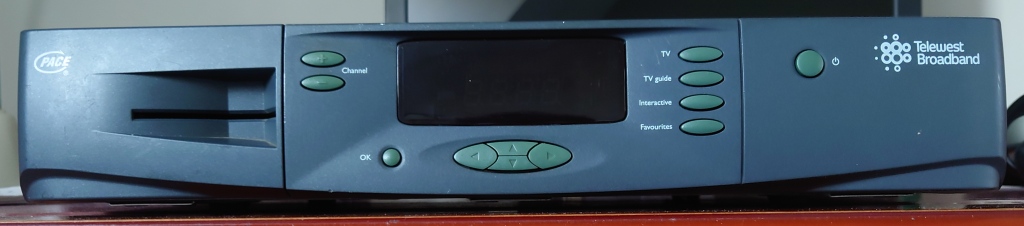
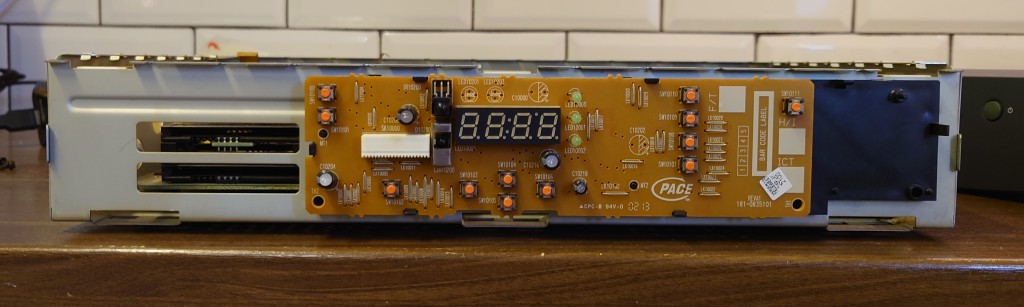
DiTV 1000 Front
Two card slots are present, with the smartcard slot visible behind the front cover flap. Front panel buttons can be used to change channel, move and navigate the on screen cursor and access various different menus.
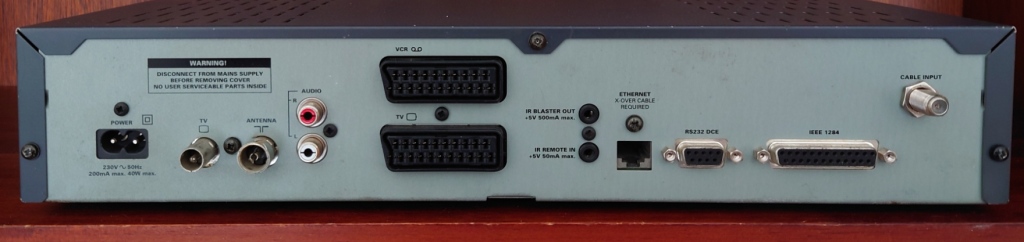
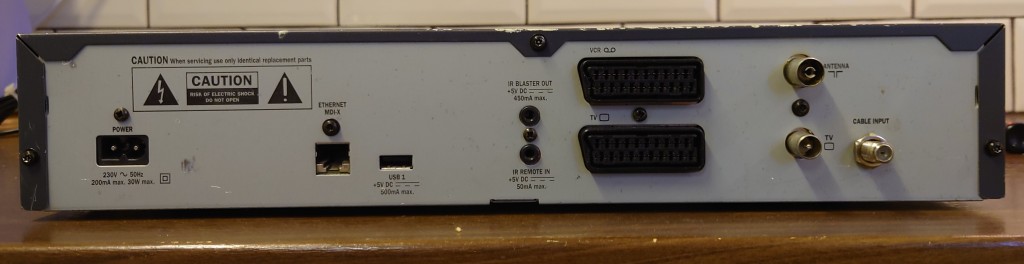
DiTV 1000 Rear
Power – Mains input
RF Output: Outputs a modulated RF signal to a TV
RF Input: In from antenna
Audio Output: Outputs audio to a HiFi system, useful for radio
Scart Ports: Supports compostie and RGB, and VCR passthrough
IR Remote In/Out: To connect external IR blaster devices, Not officially used but is power enabled
Ethernet Port: Originally used to provide broadband services to a computer using the internal DOCSIS modem, redundant as cable modems are now preferred.
Serial Port: Labelled as RS232, Not Officially used
Pararell Port: Labelled is IEEE1284, Not Officially used
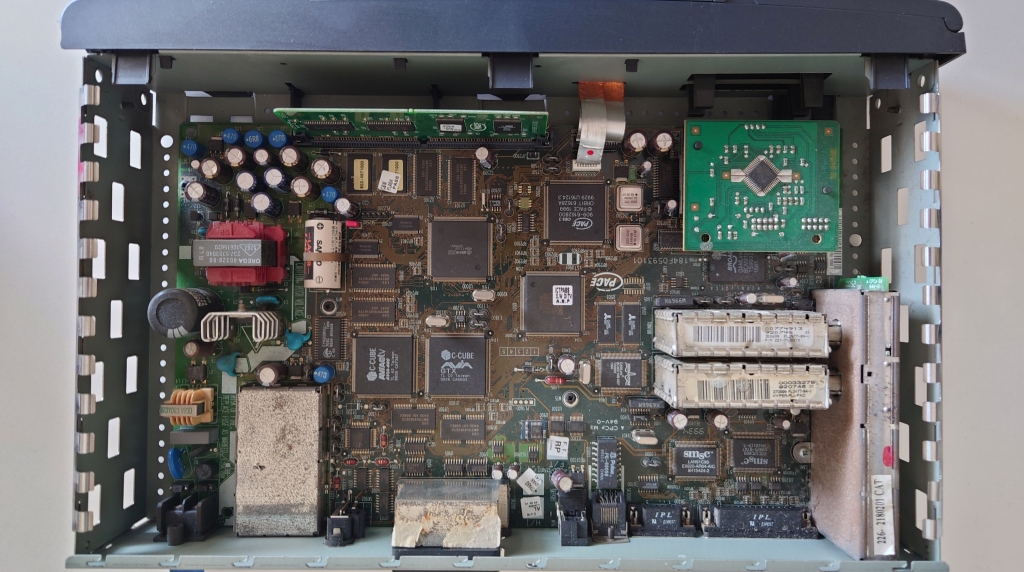
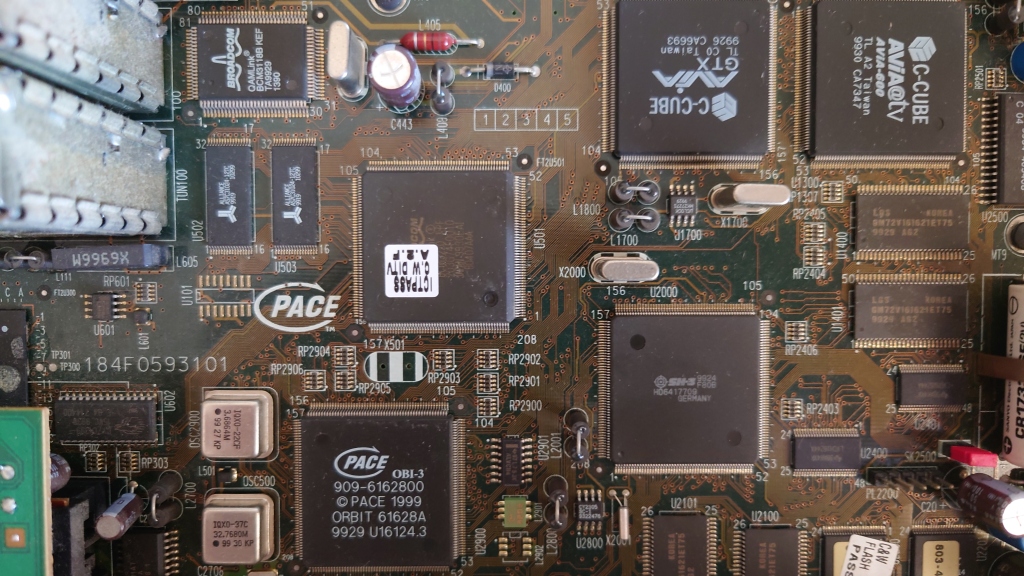
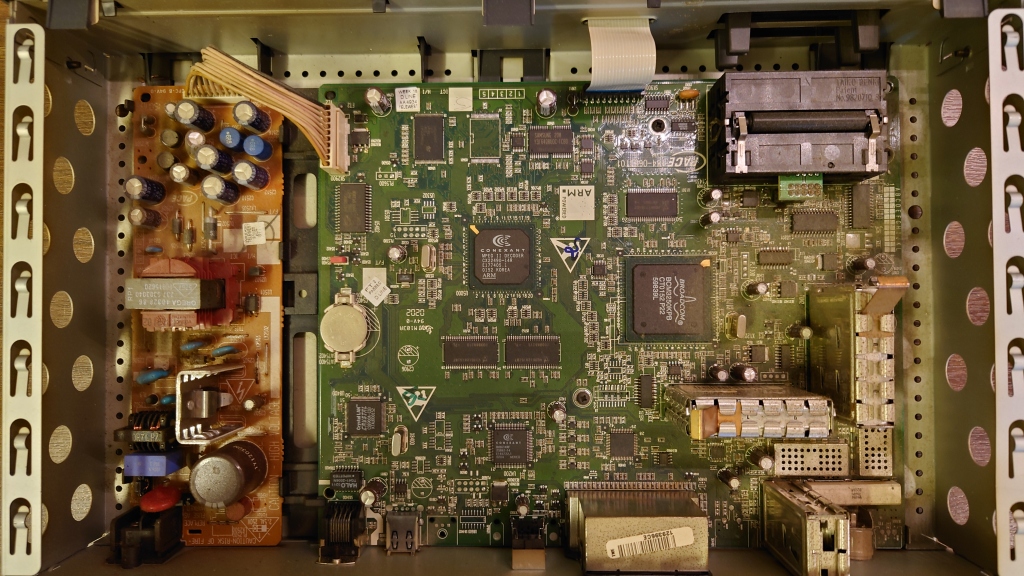
Internals of the DITV 1000, note the various amount of processors in this box, no wonder it runs hot.
It kind of reminds me of the Sega Saturn, which itself had 8 processors for various different tasks. Remember this box has to function as a high end STB and a cable mode, and still has to remain the size of a typical VCR.
Note the lack of a fan, since these box’s run hot they would have benefitted greatly from an additional fan to extract the heat generated by the components. Whilst this would have increased the cost of the stb slightly, the increase in reliability would have paid for itself in time, remember ntl had to pay installers to come out and replace the box once it had failed, and then had to be sent back to Pace in order to be diagnosed and repaired. Also customers are generally poor at maintaining AV equipment, with many putting the boxes in Tv cabinets and stands with closed doors, often on top of a VCR or DVD player that already generates heat. It’s no secret that heat is the main reason electronic components die early, and this was before the days of thermal throttling.
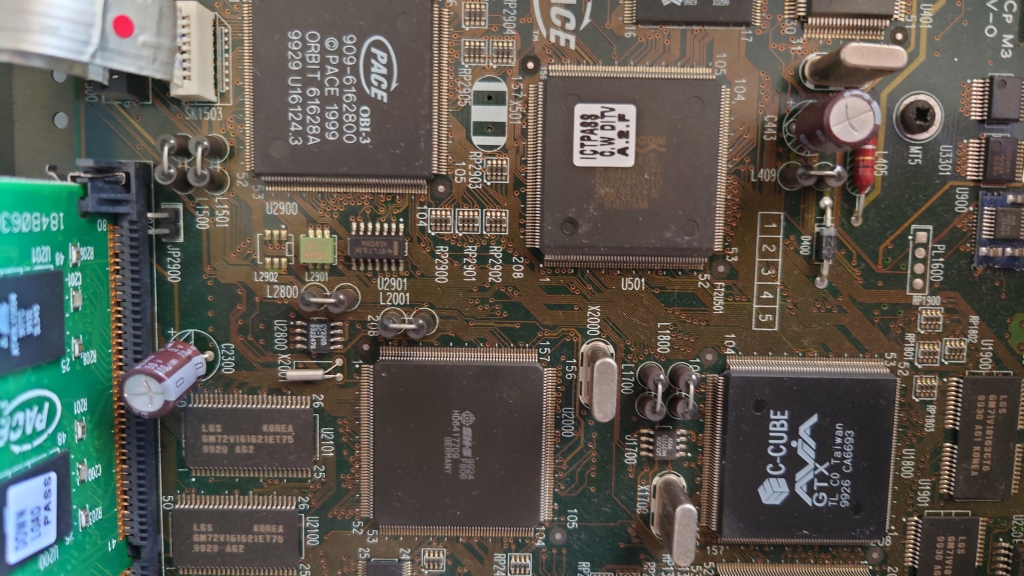
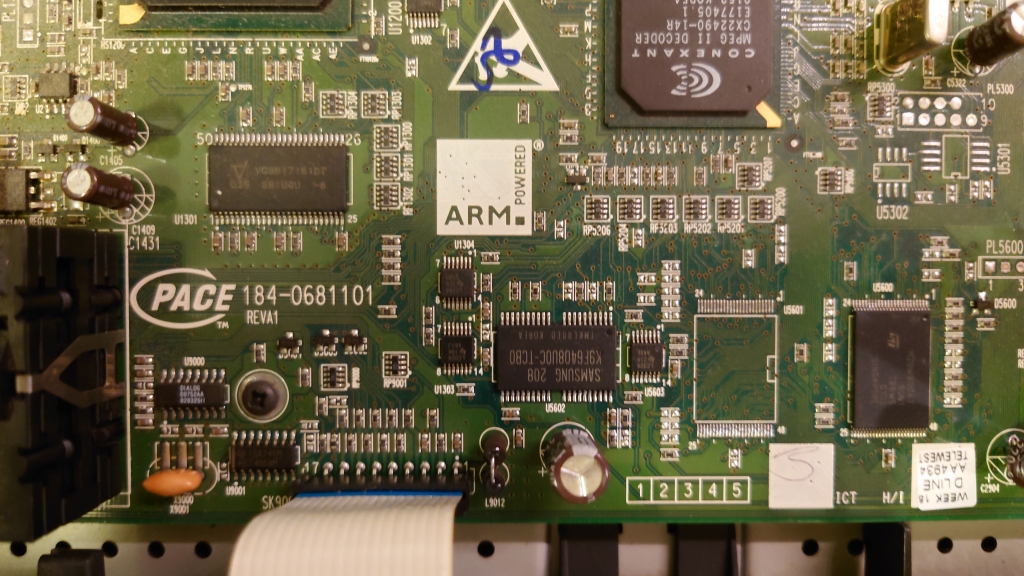
View of the memory and flash chips, with the memory module. Interesting to note the two flash banks, one labelled C&W Flash and the other as Download, wonder if these store two separate images? One for main use and the other for backup?
View of the bottom right side, showing part of the PSU
The main set of processors, from top left working down
Hitachi SuperH/SH3 Processor – Central Processing Unit
Another view of the main processors
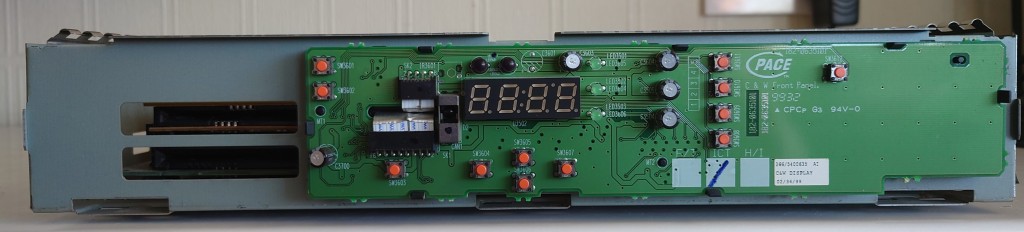
DiTV1000 Front Panel
Update Process
So looking into the update process for the Ditv1000 I came to a plausible theory, When pace had written the initial loader for the stb, they neglected to include a function to check for a firmware update on boot up, which the later boxes did support and do. Typically when you boot up a cable box, it checks the default frequency for a valid netID and if there are any updates available for that stb, and the loader application for the ditv1000 may not have done that.
Since the loader is present on some sort of ROM medium and its likely Pace had already manufactured the software on the ROM chips themselves, they did not want to write off these chips since it would be a considerable expense, instead they included a workaround in the software loaded in flash, where once the operator had released a new update, a signal flag would be sent out within the transport stream, of which the software would then corrupt itself in an extent that the loader would fail to boot (possibly by failing a checksum) and would then trigger the download process.
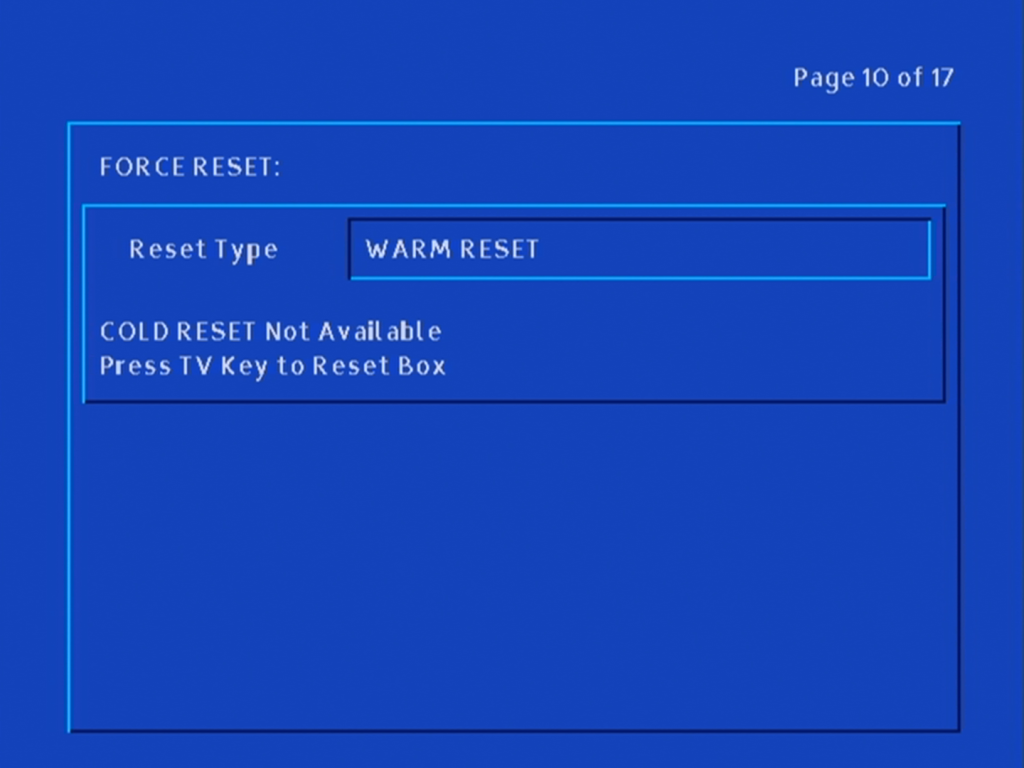
To force an update on the Ditv1000, Hold the power button upon powering on the box from the mains power, release the power button when OHAY appears on the screen. then press
Update Process, this is displayed after you enter the key sequence
Diag Screens
To access, hold the Up/Down front panel buttons together after powering the box from the mains, release once DIAG appears on the front panel.
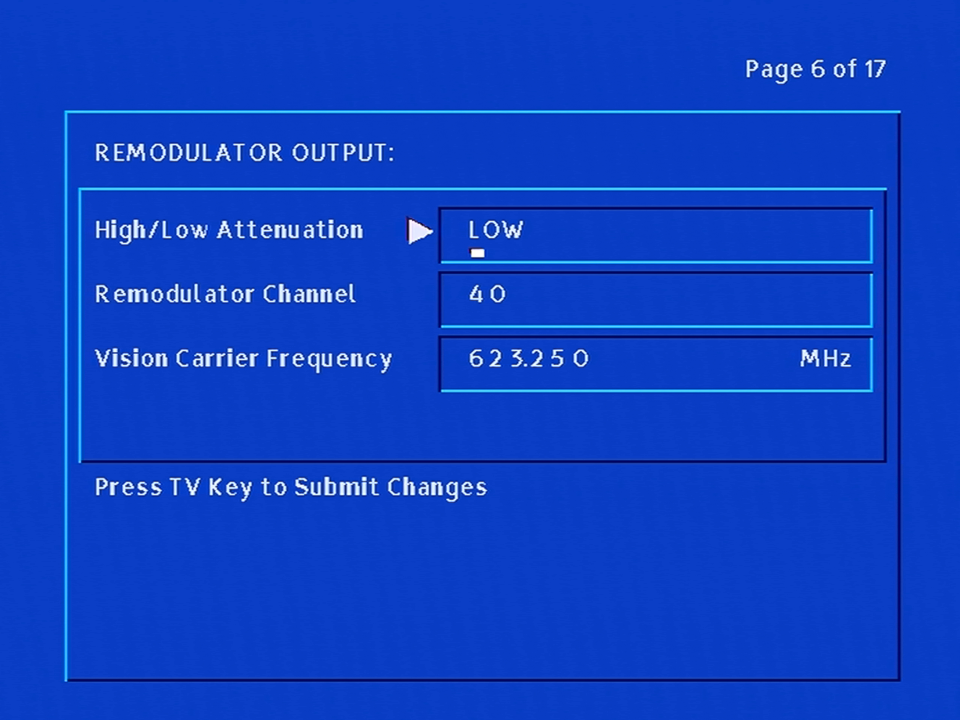
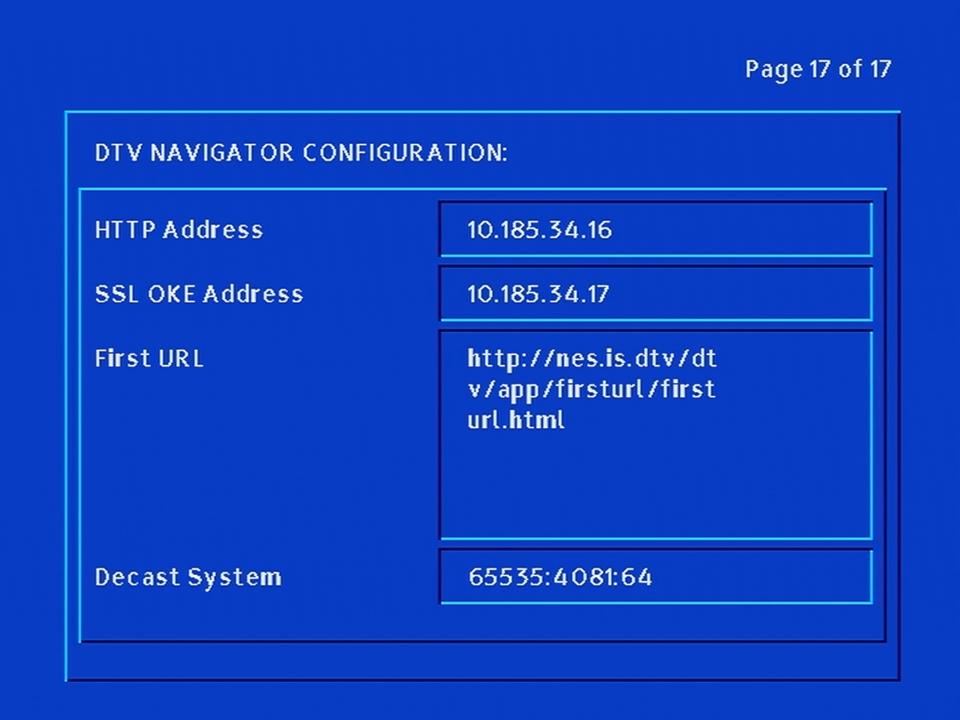
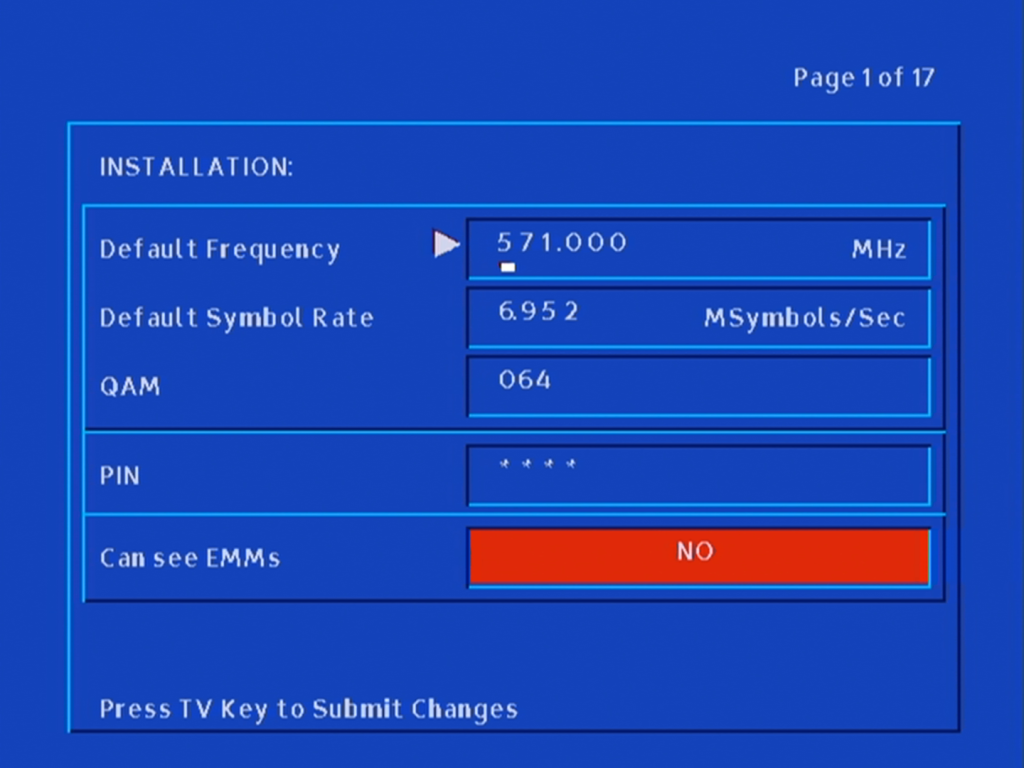
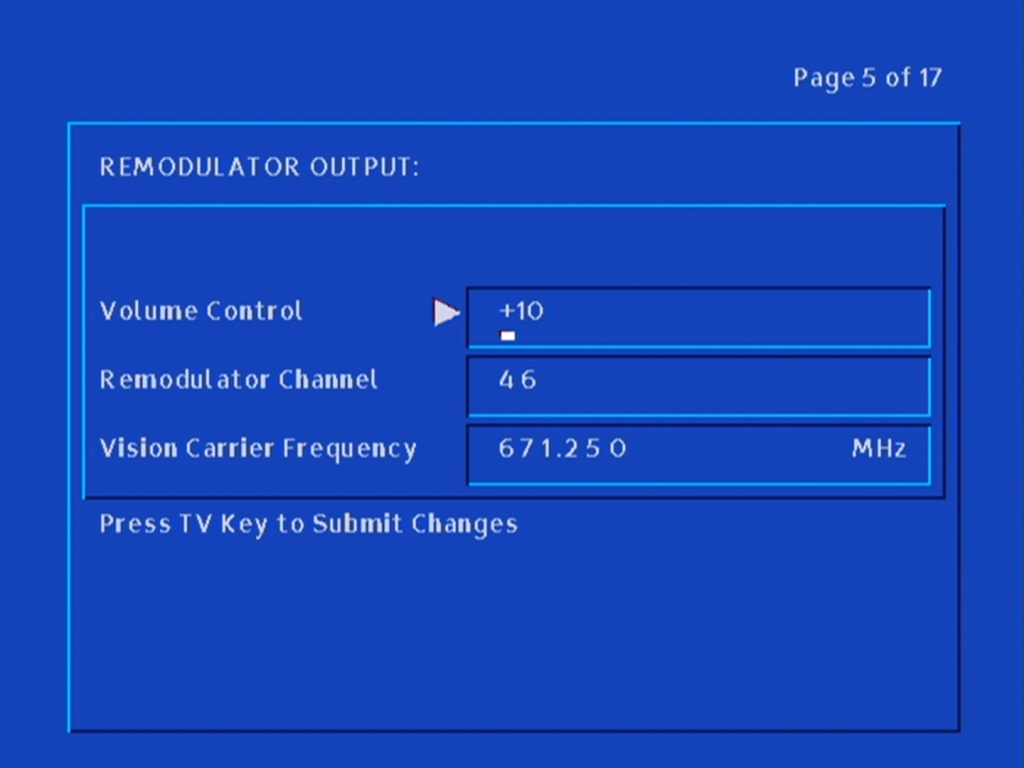
Default Frequency settings
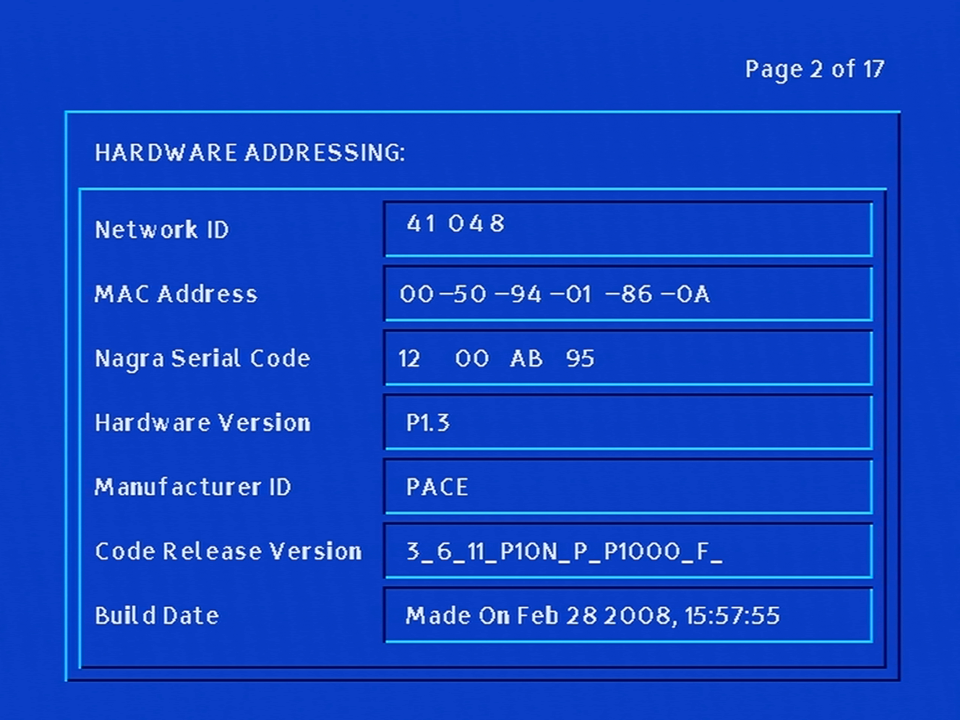
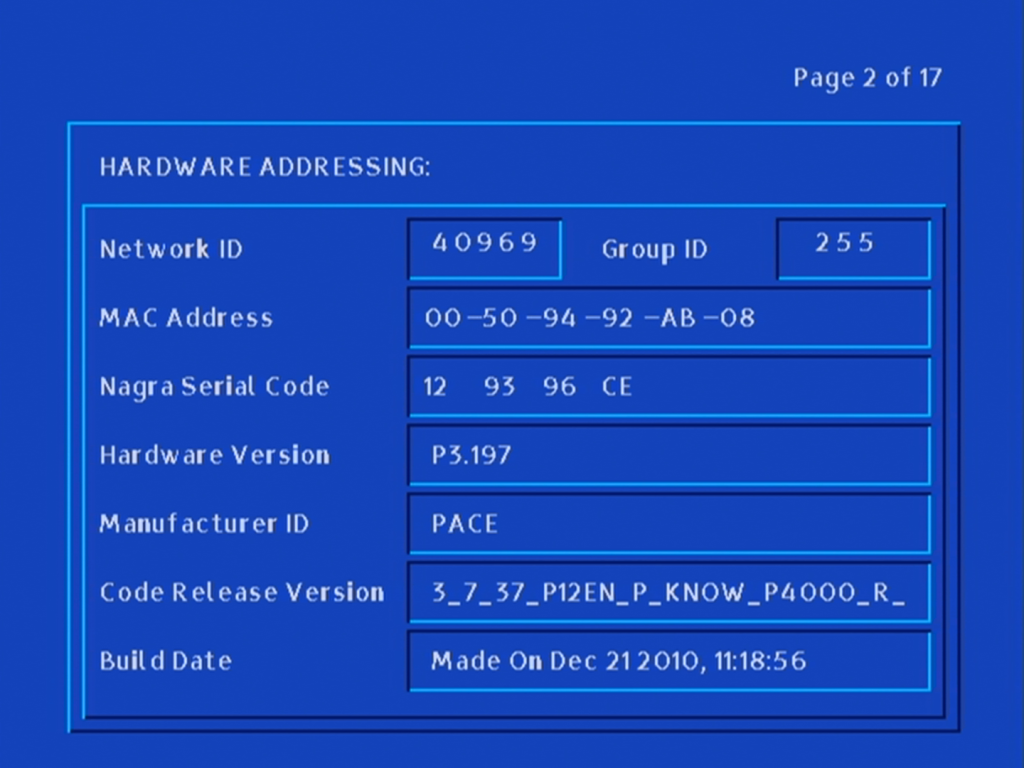
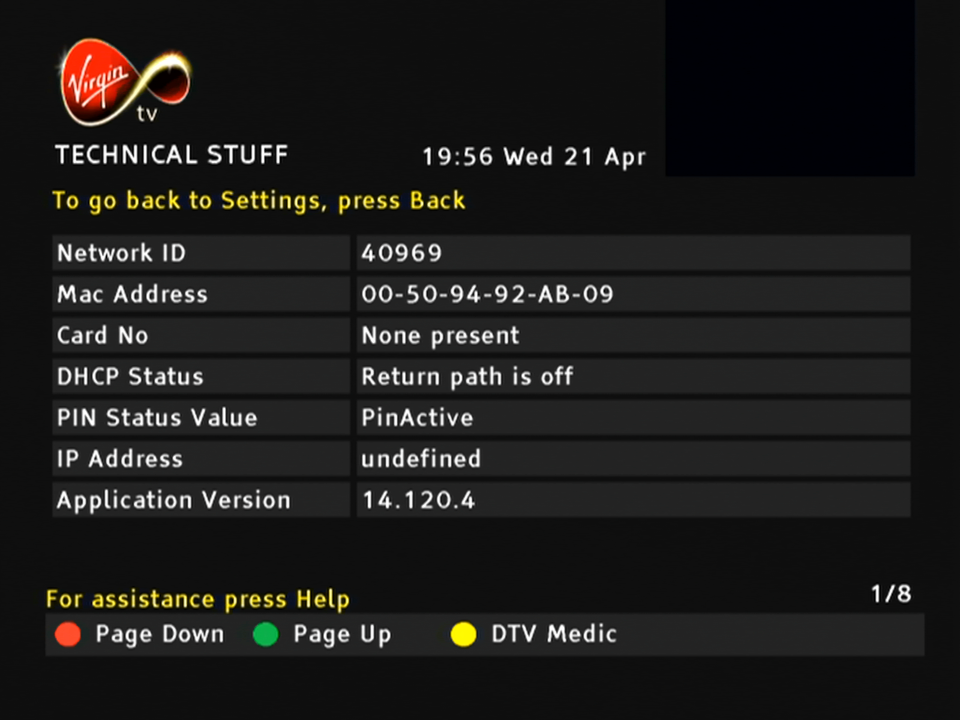
Hardware version information and the loaded software information
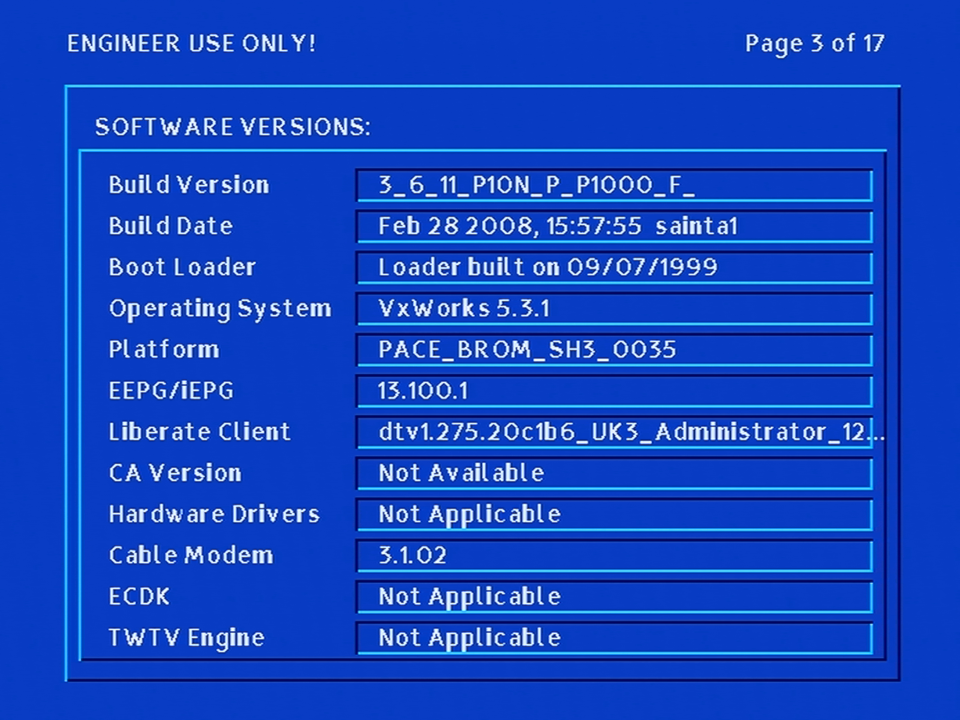
Software versions for various components
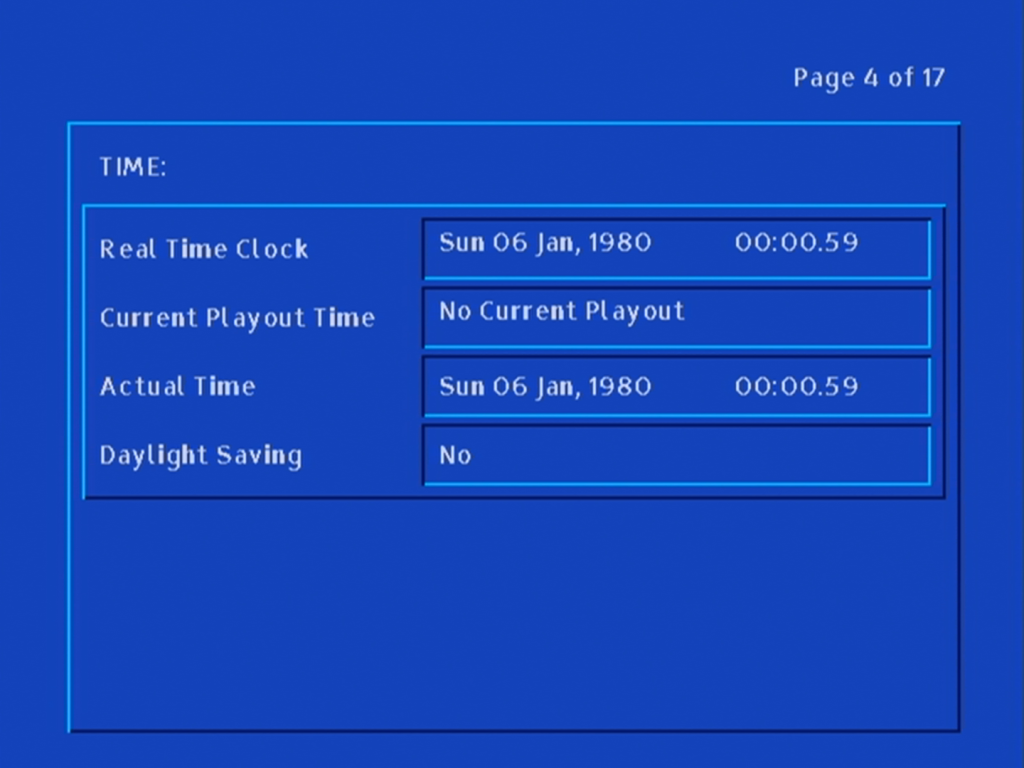
Date & Time Information
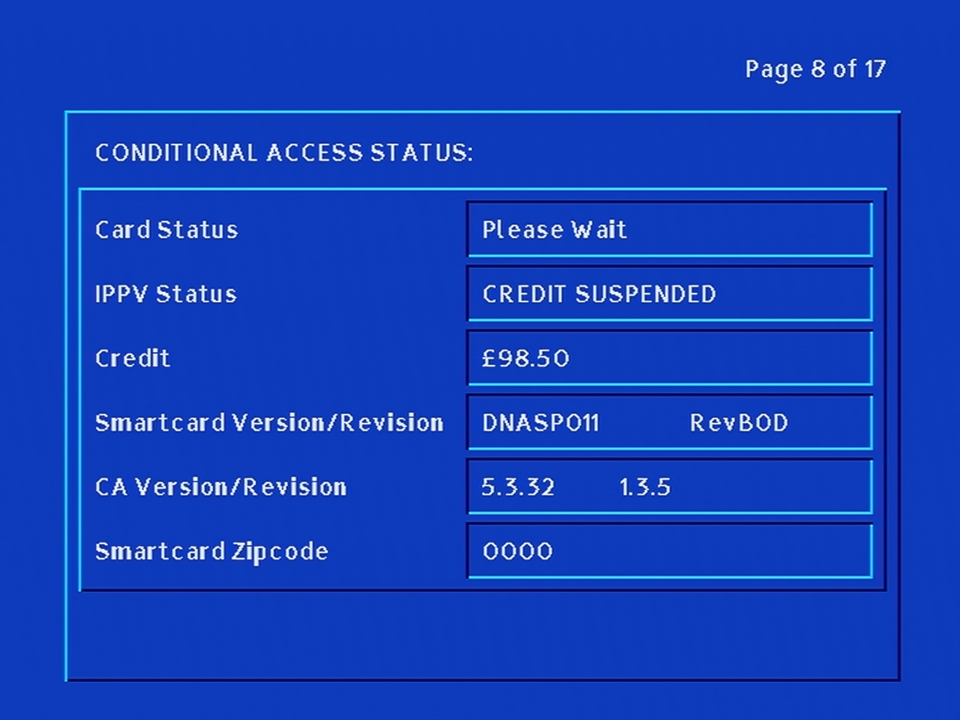
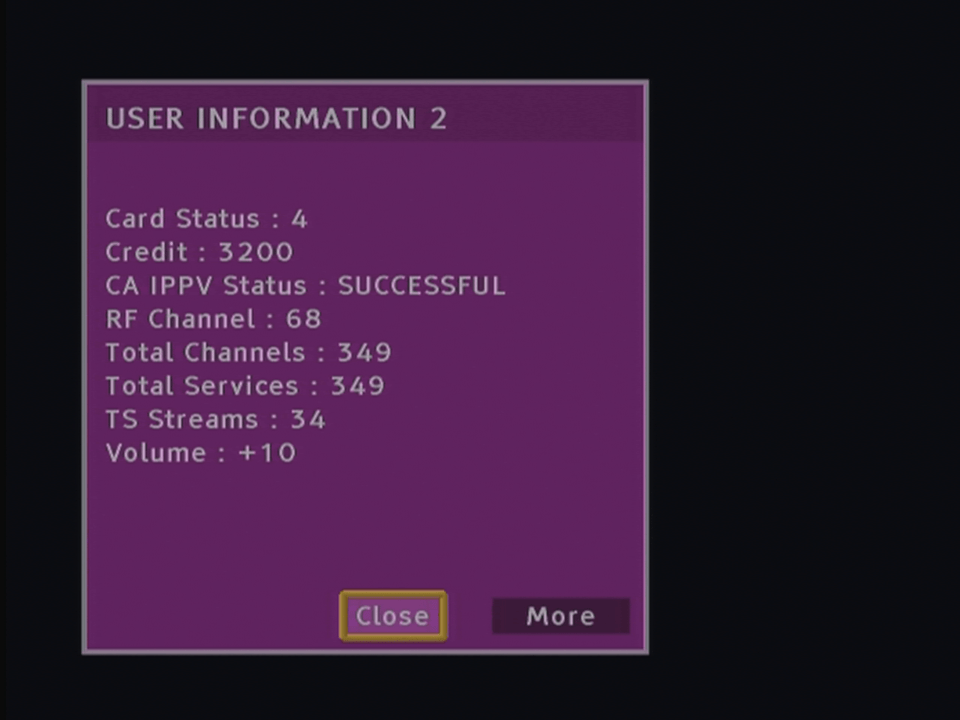
That’s a lot of credit
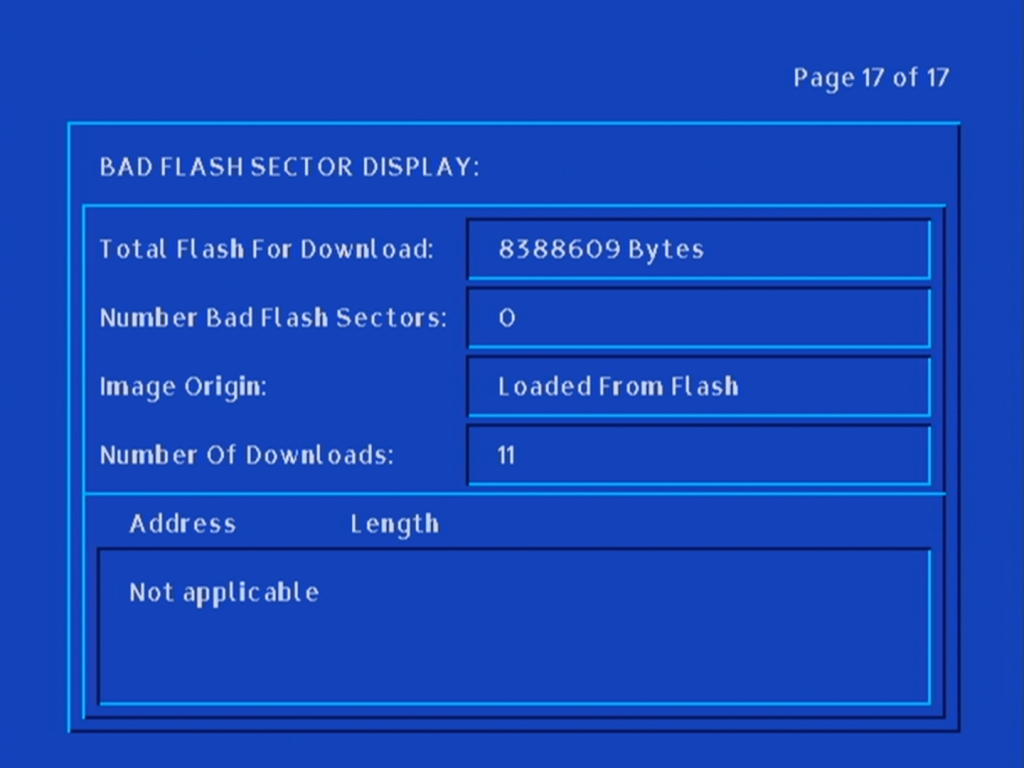
The bootloader status
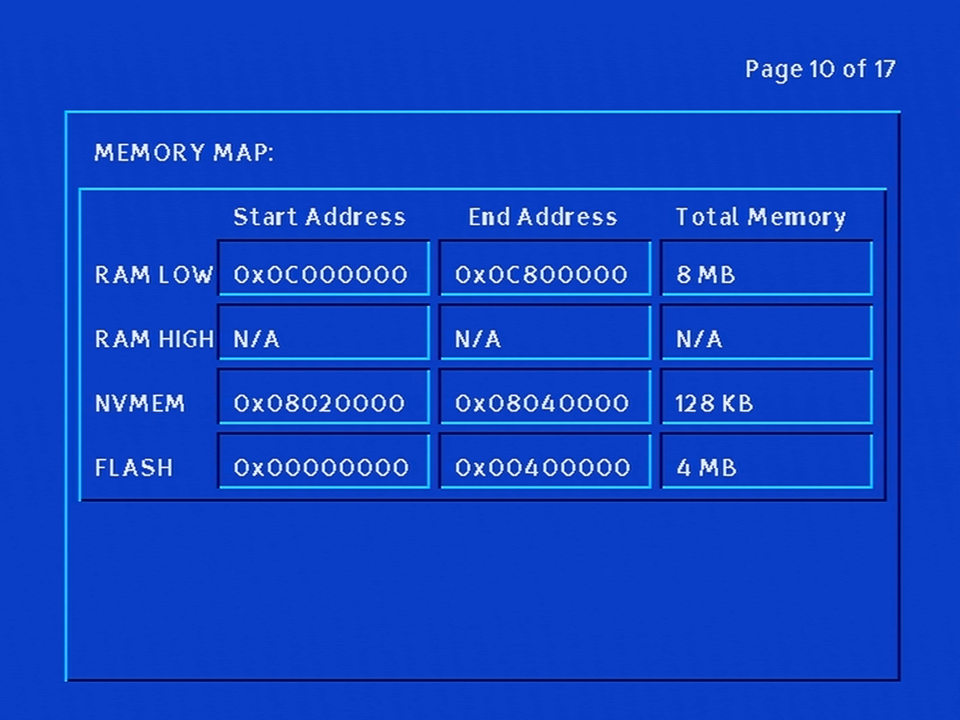
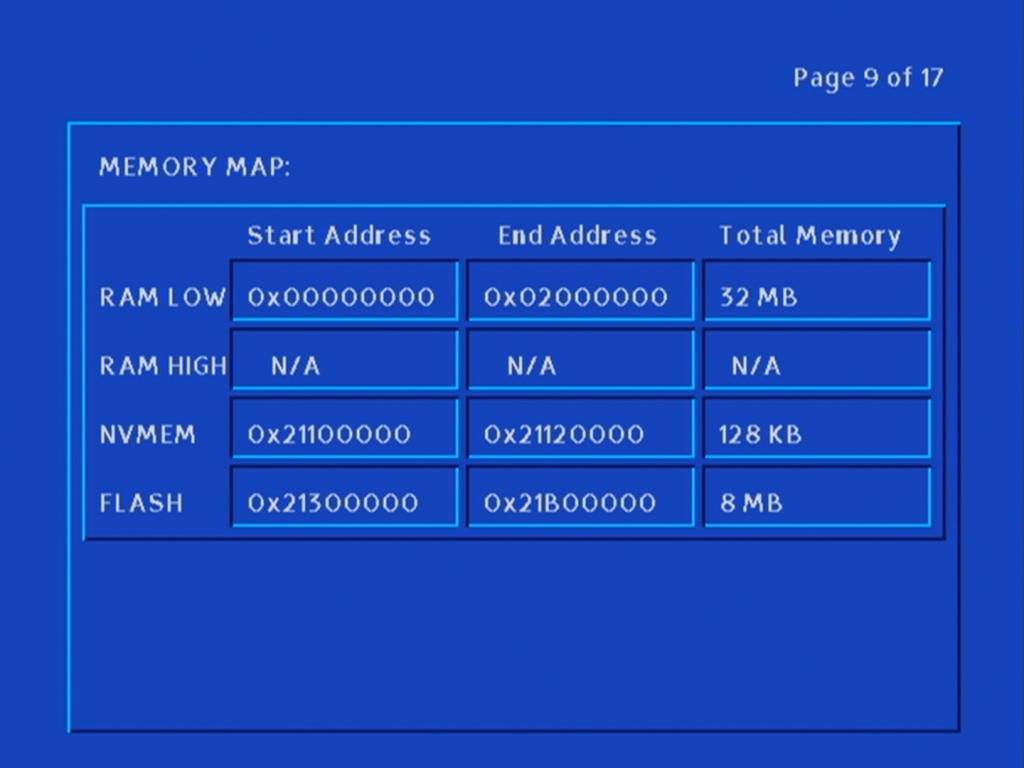
Memory information for both RAM and Flash memory
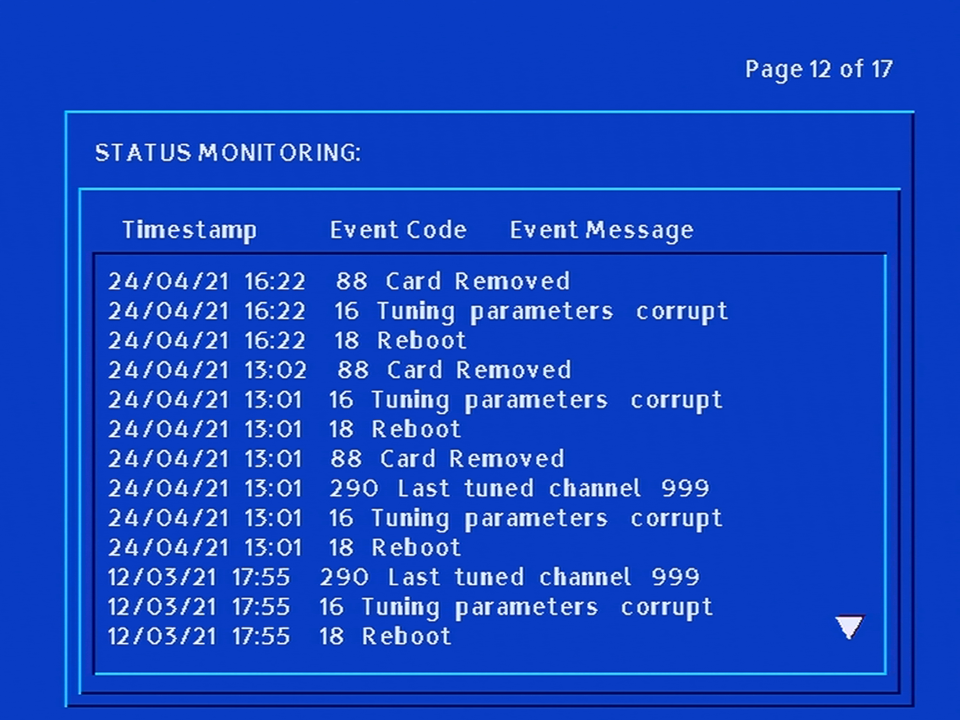
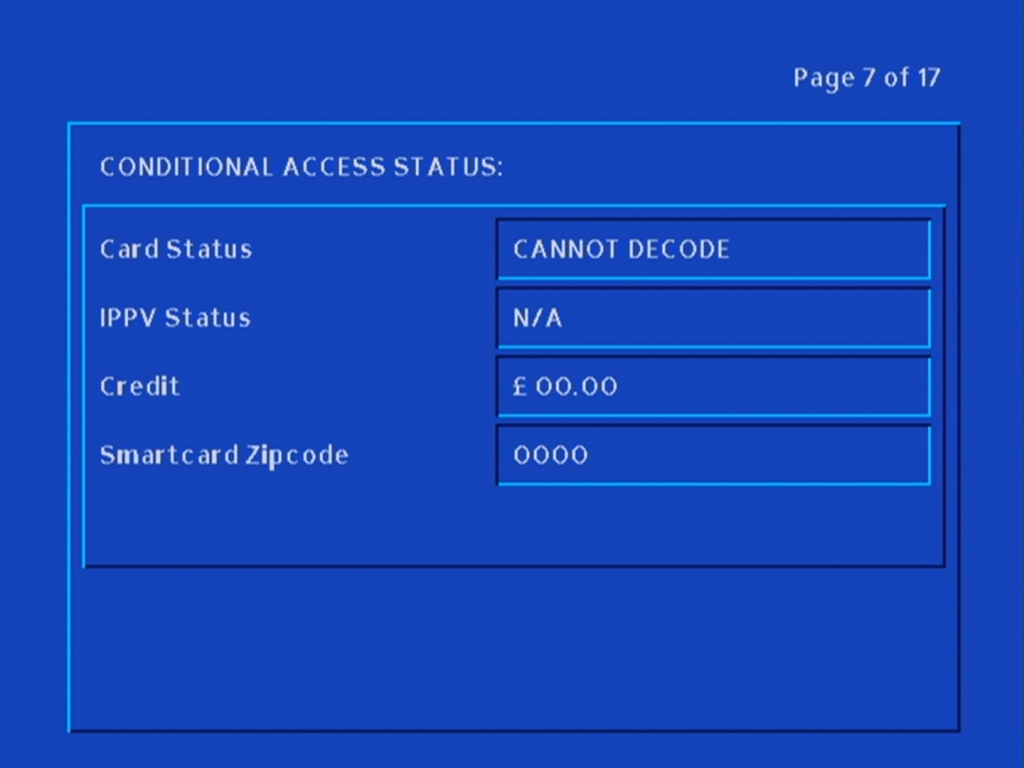
Status and a list of logs and events
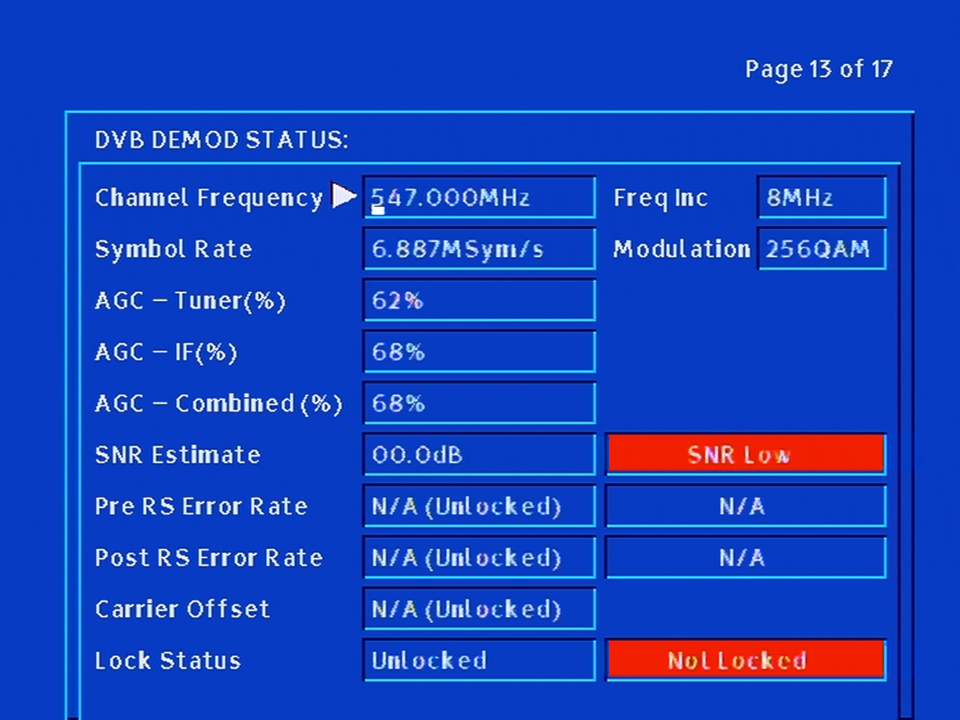
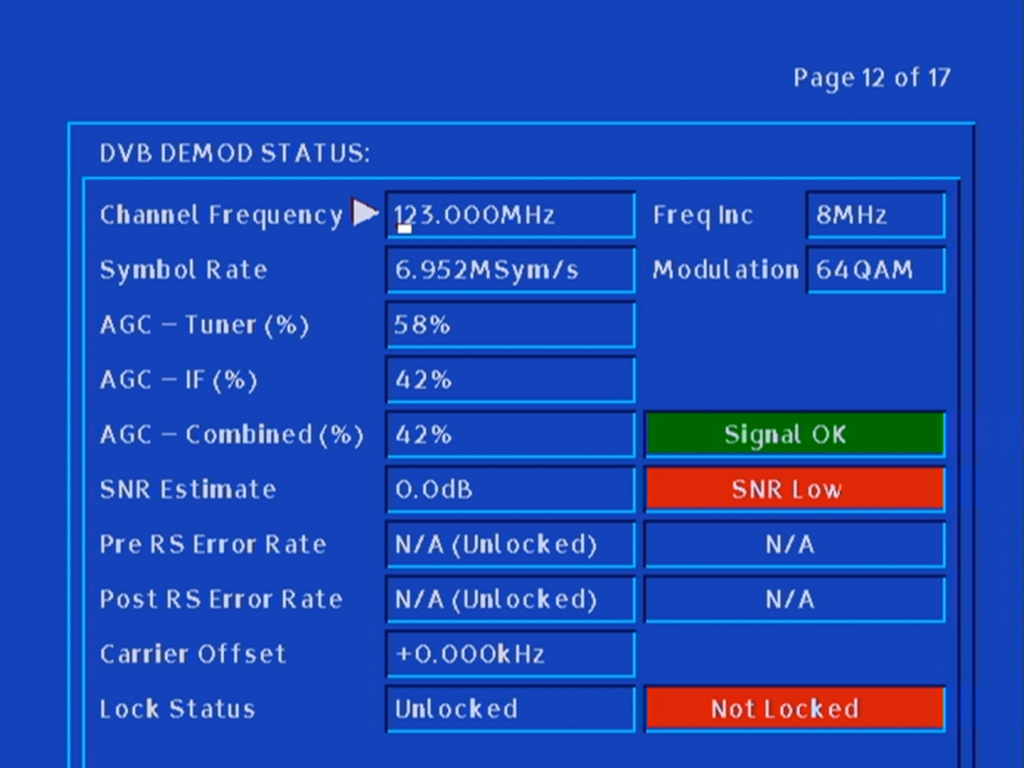
Signal information for the DVB tuner
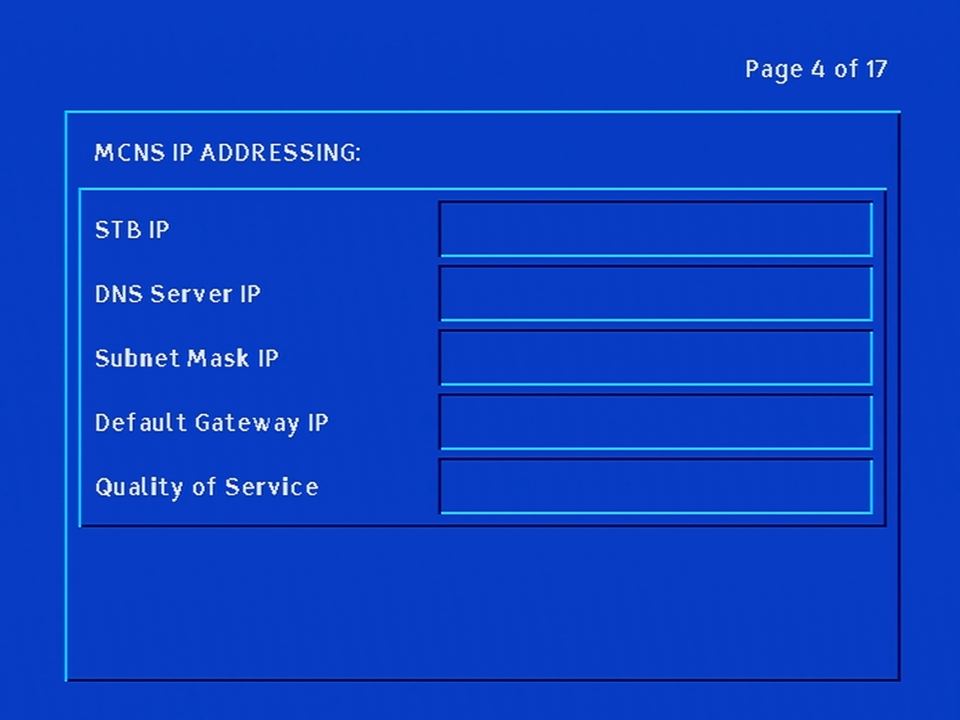
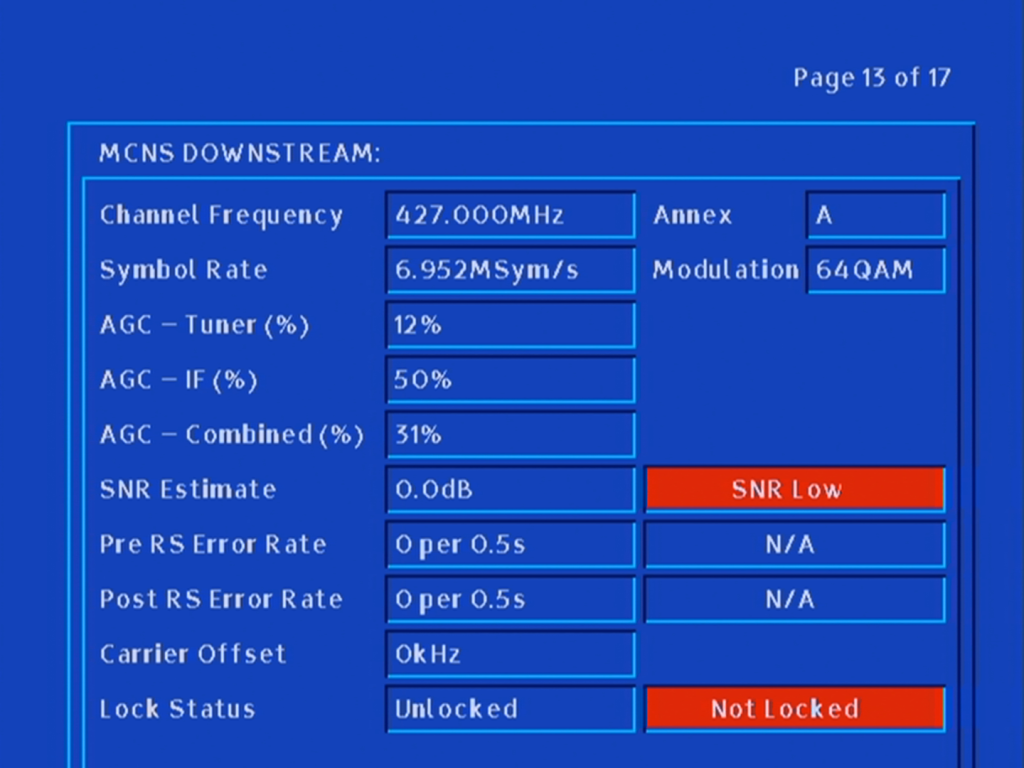
Downstream signal information for the cable modem
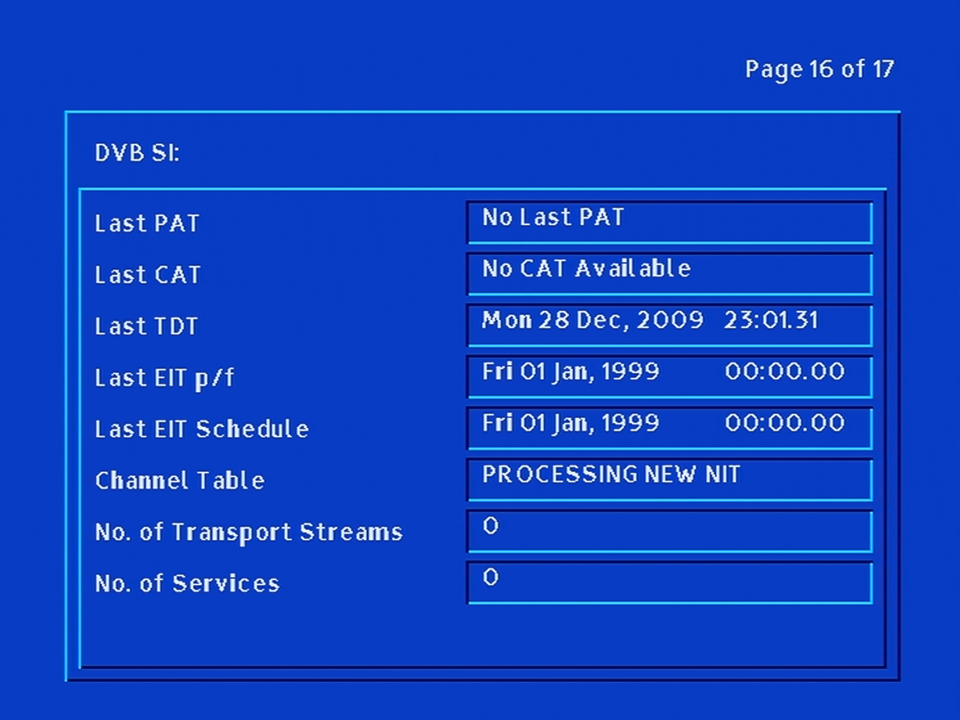
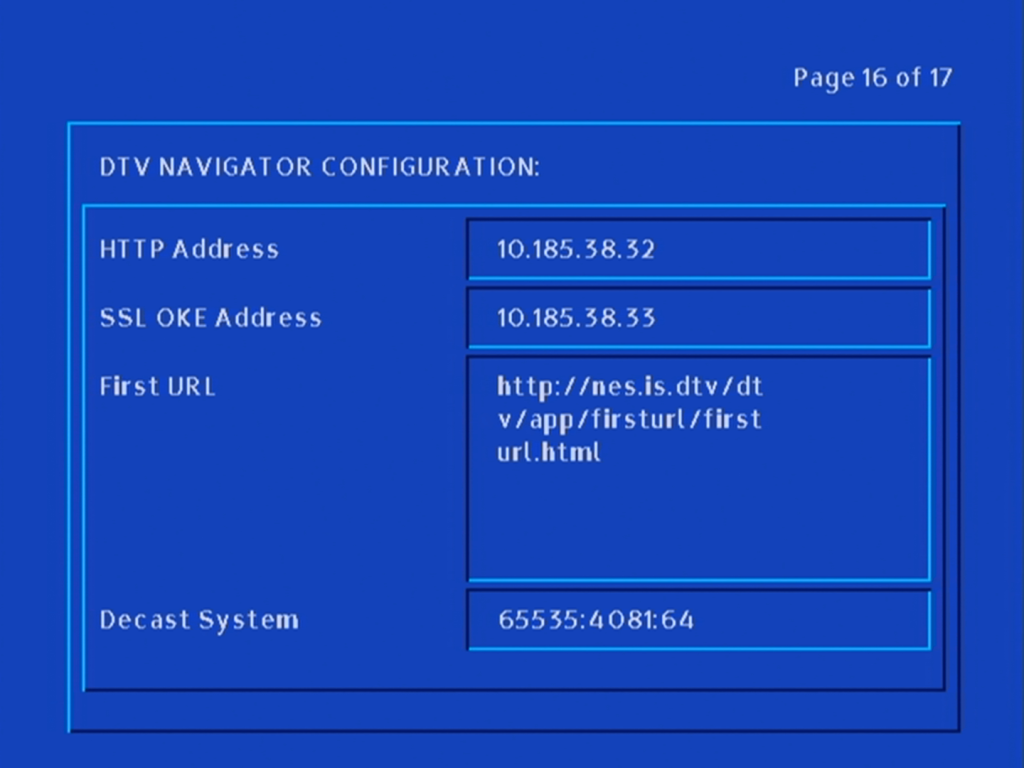
Information for the DVB Signal Information that is currently being received
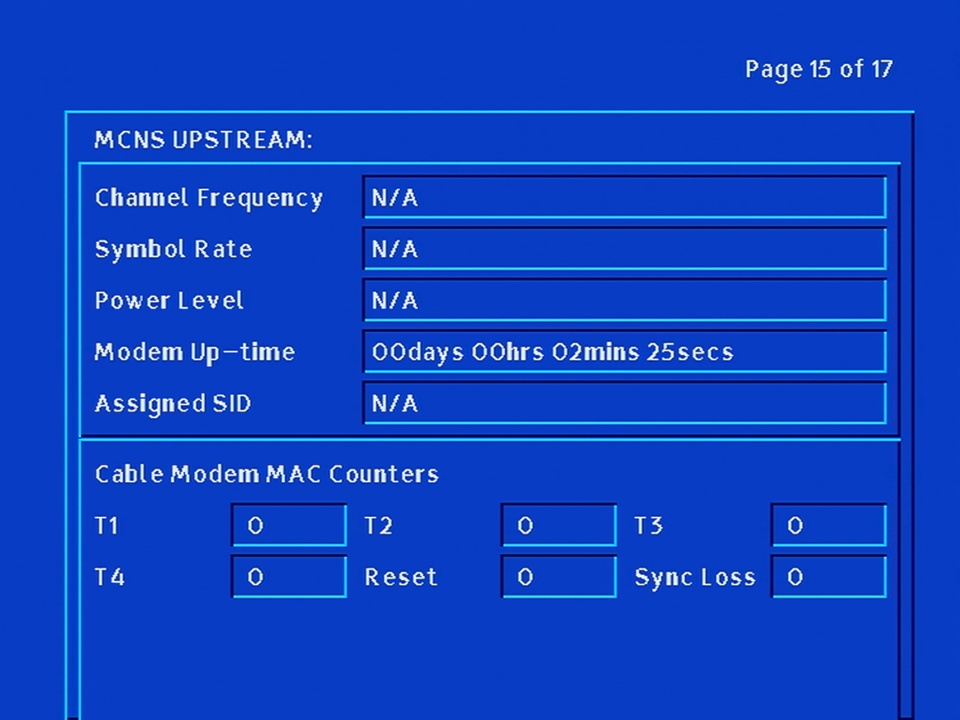
Cable modem upstream
Front LCD Display
There are three light’s to the right o the LCD display which indicate the following:
The top light indicates power is being received by the stb
The middle light indicated the return path status of the modem, this light should be steady which indicates it is connected, flashing means the modem is attempting to connect – also means interactive services are unavailable until the stb connects.
The bottom light is for the remote control, and light up when a command has been received
Message
Meaning
PACE
Appears when the stb is powered on
—-
Liberate middleware is initialising, normal part of boot up
LAIT
Wait, The stb is preparing to update
OHAY
Appears when you hold the power button down upon boot, stb waiting for a front panel command
ERAS
Erasing flash
FLAS
Flashing memory, part of the update process
GOOD
Checksum passed, last part of the update process
ERRX
Error code, where X means the error number
DigDebug
DigDebug can be used to test various aspects of the hardware and can be triggered by connecting an RS232 extender cable to the box, and booting whilst DigDebug is active. Whilst connected, PL:03 is displayed on the front LED display.
Additional tests can be completed for the various pools of DRAM used for the CPU/Decoder/Demodulator and a test pattern can be displayed.
Despite the Superhub’s remaining property of Virgin Media, when I asked about the return on the Superhub, they advised that the hub didn’t need to be sent back, most likely because they have moved into the Superhub4, and that the old hub can be disposed of.
This seems quite wasteful, since the hub works perfectly. I’m not a fan of disposing electronics needlessly if its in working order. Besides if you need an extra few ethernet ports, why not reuse the equipment you already have?
Starting from Scratch
Probably best to reset the hub back to its factory state. This can be done by holding the reset button down for 10-12 seconds, then waiting for the router to restart
Configuration
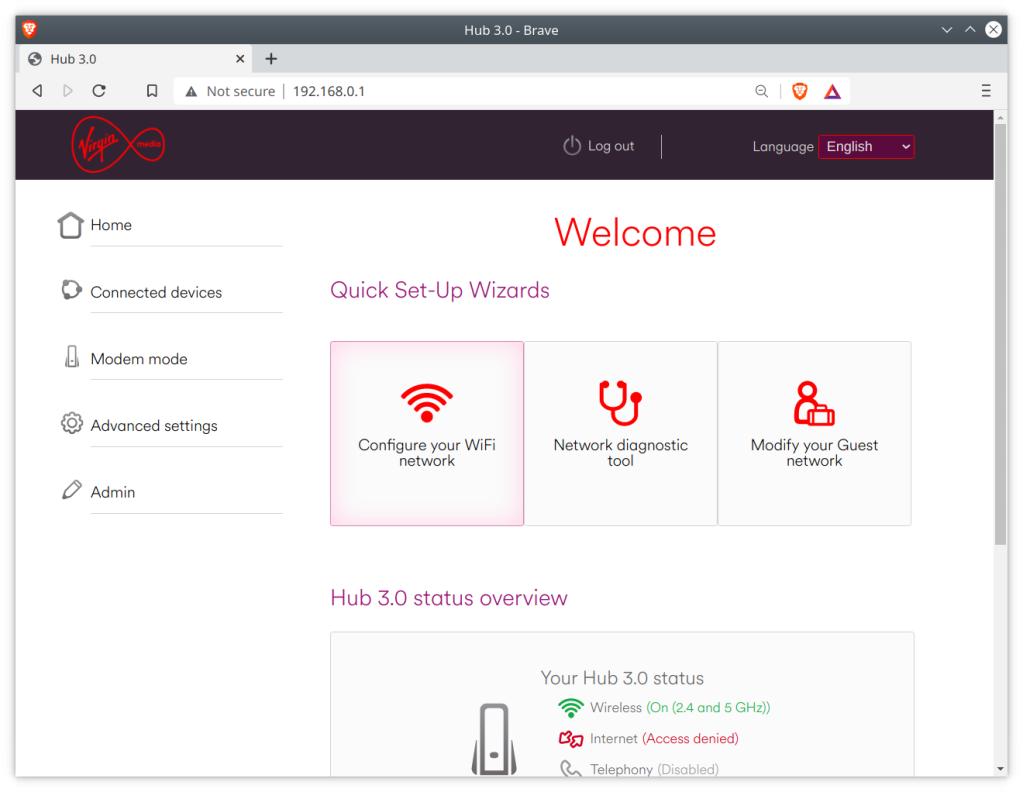
Enter 192.168.0.1 into the browser address bar to access the superhub configuration page, you will need to enter the settings password, which can be found on the underside of the superhub.
Before we make any major changes, we can configure the basic settings using the interface. Use this to change any settings relation to the Wifi configuration, as it will be harder to change later.
Disabling DHCP
Since you will be using the superhub on a network that already has a DHCP server, you will need to disable the DHCP on the superhub, since your main router will perform the DHCP duties.
What is DHCP? It is responsible for issuing and maintain the IP address on your network, which ties into NAT (Network address translation). You only need one on your network, having multiple DHCP servers is unnecessary unless you have an enterprise network. Also not to be confused with HDCP
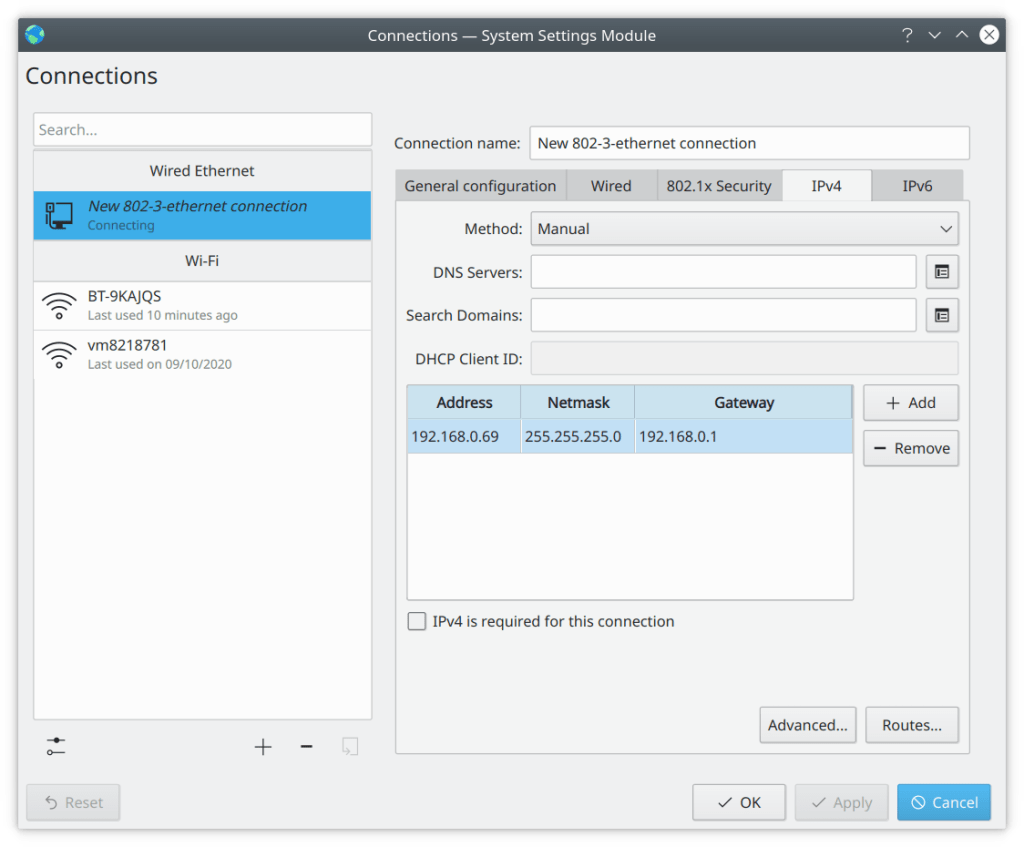
After this you will lose network connectivity with the router, this is because the super hub is no longer assigning IP address. To restore you will need to switch to a static IP temporarily whilst we configure the router. In Kubunu you can configure this in the connections panel in the system settings. For Windows there are various tutorials on how to configure a static IP.
Remember to use 192.168.0.1 for the default gateway, as for the client IP address, you can use 192.168.0.2, You might need to login to the router interface again.
Changing the gateway IP (optional)
You might not need to do this, depending on the IP configuration of your network. By default the super hub uses the address 192.168.0.1 as long as you don’t have any other devices using this address then you should be fine, but you should check first regardless.
Unfortunately with the superhub 3, if you change the default IP address to anything other than 192.168.0.1, the configuration page is no longer accessible. the router will still function as a switch or hub but you will no longer be able to edit any settings or access the configuration page. therefore before you do this, ensure the superhub is configured as you prefer as you will be unable to modify them later, unless you perform factory reset.
This also means that if you have two superhub 3’s, then you will need to do this on one of the superhubs to stop one from interfering with the others, since its a bad idea two have two devices using the same IP address, especially if one is a router/gateway.
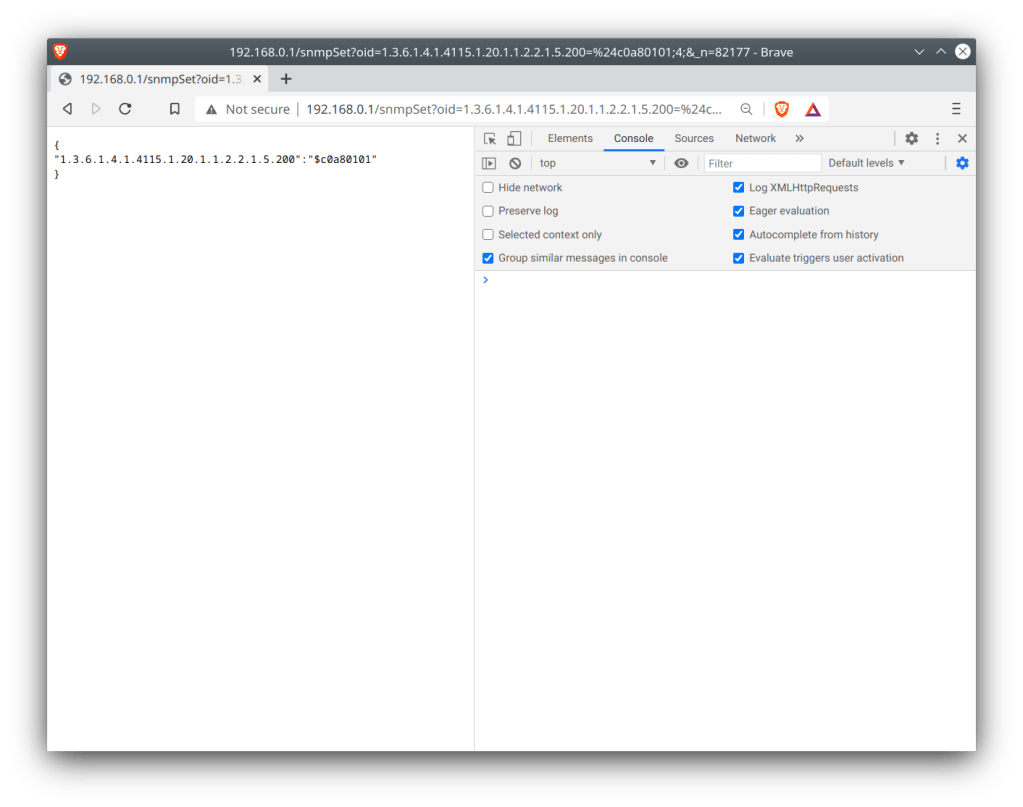
Normally you cannot change this via the default interface. We can work around this by entering commands via the address bar as outlined below.
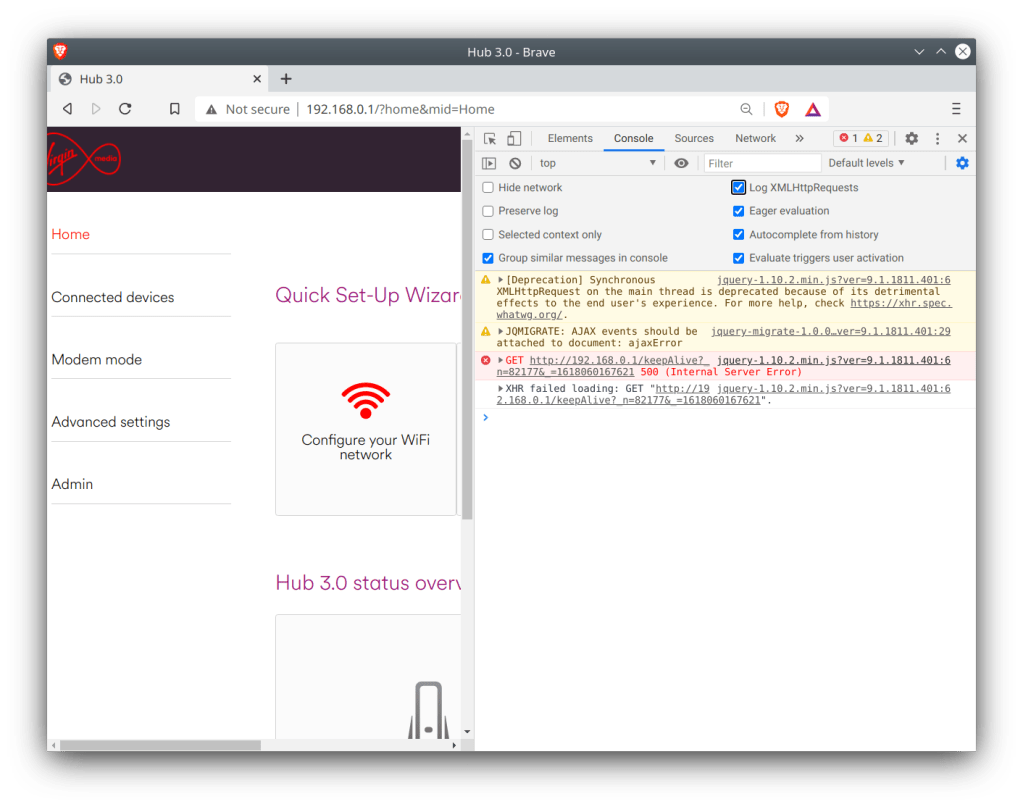
First, enable the developer window in your browser by pressing F12
For Chrome based browsers, Click Console, then enable LogXWLHttpRequests
For Mozilla based browsers, this should be enabled by default
Refresh the router page and inspect the console log
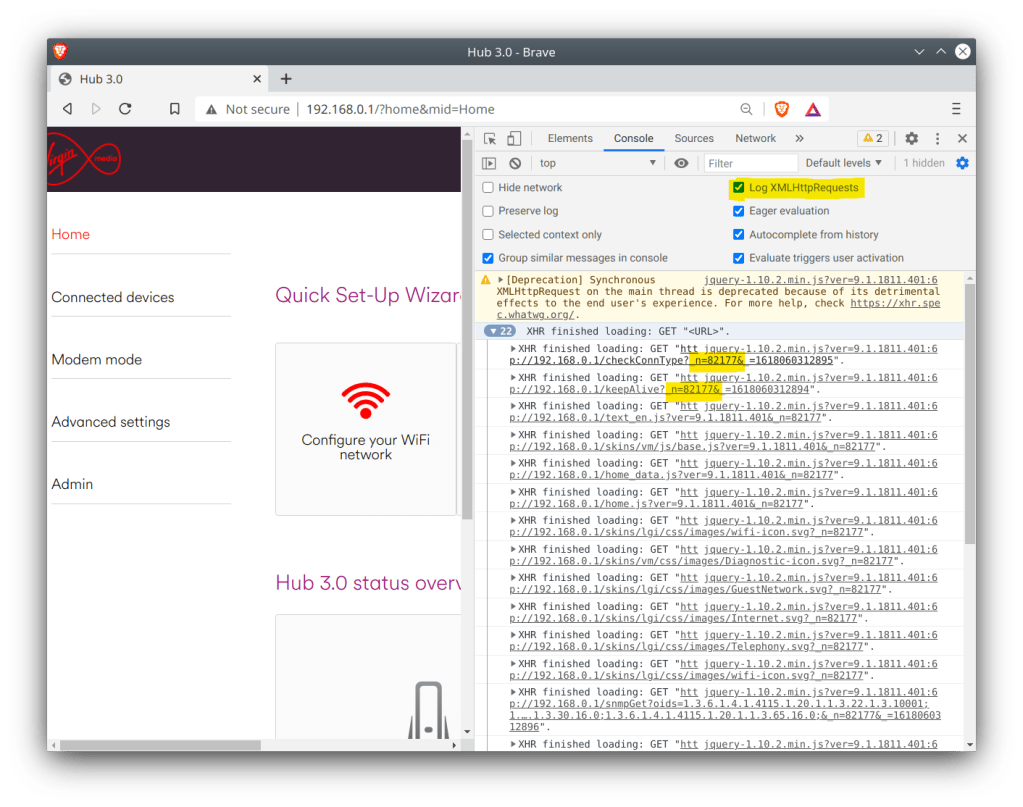
We need to get the authenticator code. This is generated when you log into the router interface and can be found highlighted below, and will begin with n=, followed by a random string of numbers, in this case mine was 82177
To change the default gateway address to 192.168.1.1, use the address below and paste it into the browser, changing the n= value at the end to the one we noted down earlier
The Superhub should shortly reboot itself after. If not, check the commands have been issued correctly, especially the last one since that applies the settings.
Does it work well?
Almost, there are a few issues with the router being in this setup.
One of which is the constantly flashing green light at the front of the hub. This is due to the router attempting to find a DOCSIS signal, even though it is technically connected to the internet, the cable modem side of things is still trying to connect via its coax connection. There’s no option to disable this so I’d advise to just tape over the light, since its never going to find a DOCSSIS signal.
Firmware updates for the Superhub are delivered via the cable network only, and the Superhub has to be authorised at the headend in order to receive the update. This means you will be stuck with t he same software currently on the router. Whilst this isn’t a huge issue, since the Superhub firmware is relatively stable, with the main issue being on the cable side of things which we are no longer using.
When Cable & Wireless launched their digital cable service, Interactive TV was the main attraction and focus for the platform.
Cable & Wireless teamed up with Liberate to deploy it’s eNavigator middleware client for their set top boxes. Liberate had already made deals with many US digital platforms for both Motorola and Scientific Atlanta networks, and had partnered with Acer & Thomson/RCA for their own set top box / internet tv devices. These allowed for the internet to be browsed on a TV itself, similar to a webTV or the Bush Internet TV. With that in mind it made sense to go with Liberate for its interactive platform, with many of the interactive being HTML based, essentially being microsites being designed to be useable on a PAL TV screen, as well as being usable on the set top box hardware itself. By using a HTML based system, it would be easy for existing web developers to adapt their websites for cable interactive TV.
The main interactive developer portal, viewed within the Cable & Wireless interactive browser. This also showcases the browser interface, note the lack of address or URL bar, since this service was designed to be a walled garden. Instead a url bar is provided on the developer portal, likely to allow developers to test their websites.
An interesting oversight is if you sent an email with a hyperlink embedded into it to a website such as Lycos or Google, you could use that link to open the browser to that page, and if its a search engine you could use that to load other websites that are not part of the service
Developer Website
Not much to say here, the developer portal provide links to documentation details the requirements and limitations of the TV internet platform. This goes into details the specifics of the Liberate eNavigatior platform.
Viewed in Internet Explorer 5
A look at the services…
Unfortunately the screenshots are of a low quality and resolution since they have been extracted from the PDF documents above but give a general idea of the scope of the service provided. Some screens have the browser banner at the top of the screen, I’m assuming these are portals to the microsites.
Another view of the interactive home screen, this may be from a later redesign
TV Internet Home
Similar to the Open… home screen, provides links to various services available
Sports Main Menu
Provides links to other sports themed websites,
Email Main Menu
Menu options are Check Email, Write Message, not sure of the third items, Drafts? Templates? Deleted?
Email Inbox
The STB had a built in email client, designed for the C&W email service
Two Way TV
Looks like a games service, hard to tell because of the resolution
RAC Breakdown
A resource for traffic information and a route planner
TravelTime
Looks like some sort of holiday broker
Travel
Provide links to holidays, not sure if this goes directly to the sites themselves?
News
News headlines, and weather from various sources.
When the consumer division of Cable & Wireless was acquired by ntl in 2000, the interactive platform continued it’s development. In 2002 ntl deployed the Liberate 1.2 middleware which bought improvements to the browser rendering engine, and the TV guide was rewritten to take advantage. ntl would later spend time developing services for the Langely platform, which was originally planned to use the PowerTV platform, but chose Liberate instead. This was done to ensure parity between the two platforms.
Connecting an old ntl box running ancient (by cable standards) software to a modern Virgin Media network. Whilst Virgin Media is the sucessor to ntl there are a few possible roadblocks to this;
VM no longer broadcast their channels in MPEG2 with the exception of a few off air slates and radio channels.
The DVB-SI that VM broadcast may not be consistent with what the software is expecting
The STB itself may be looking for something that VM are no longer transmitting
Getting the box to boot was a struggle itself, just connecting it to a cable feed is not enough since the box will get stuck on the starting up screen, I left it overnight and the box was still trying to start up
Forcing a boot (holding Up+Down and letting go once LDR appears on the display) wouldn’t work either
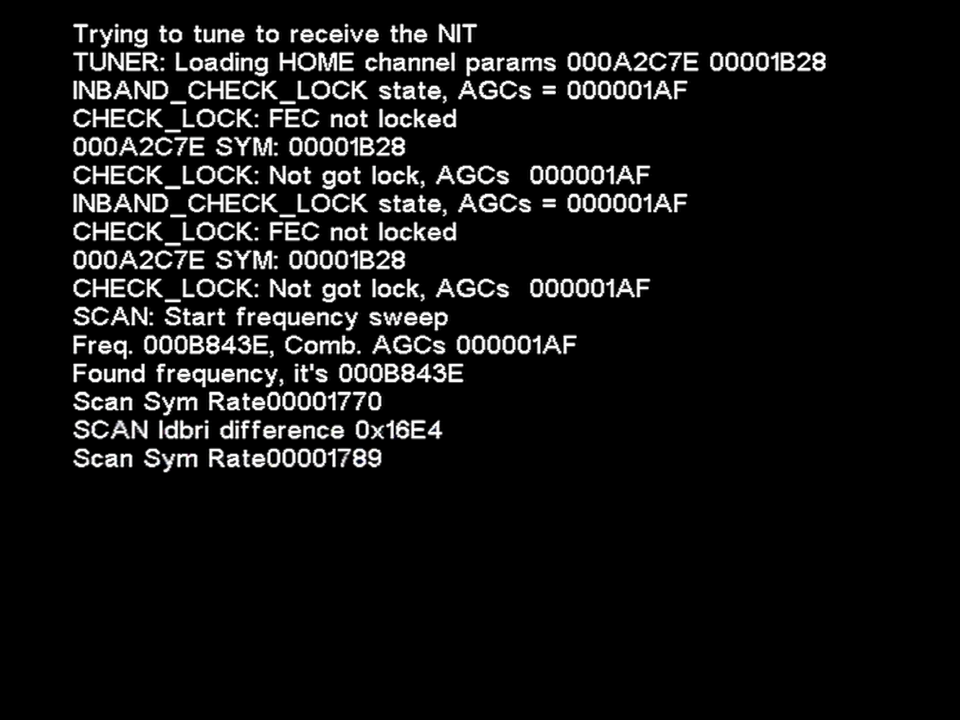
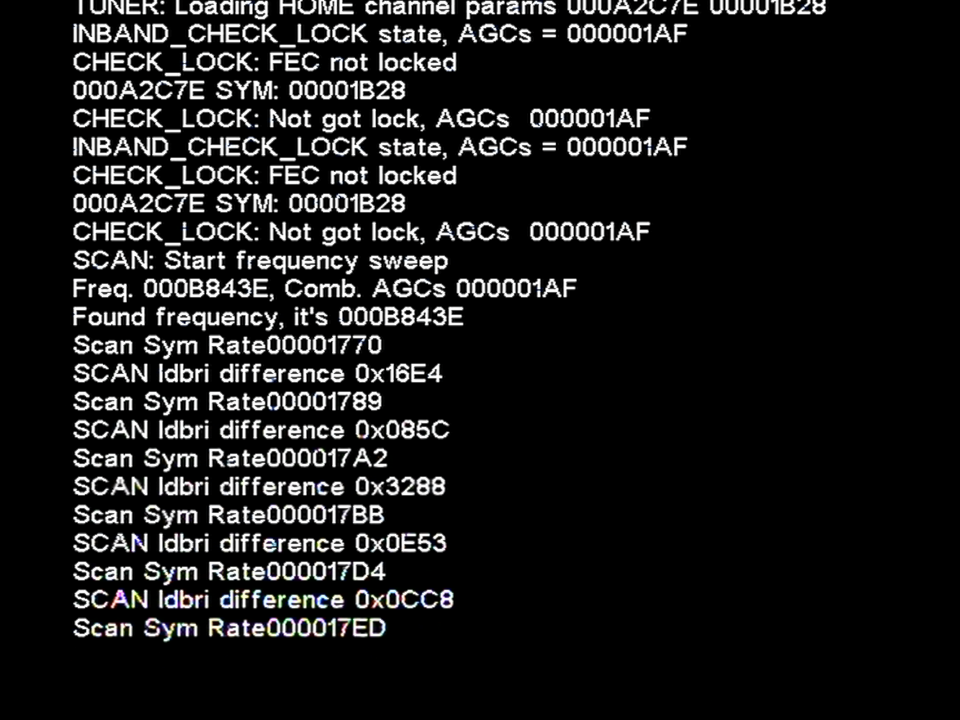
What worked in the end was to power up the STB will the cable feed disconnected, this will cause the box to display NIT on the front panel LED display. Connecting the coax feed, the box will then proceed to the start up screen and after around 5 minutes a channel will be displayed.
Well the box managed to load something, lets see what we get…
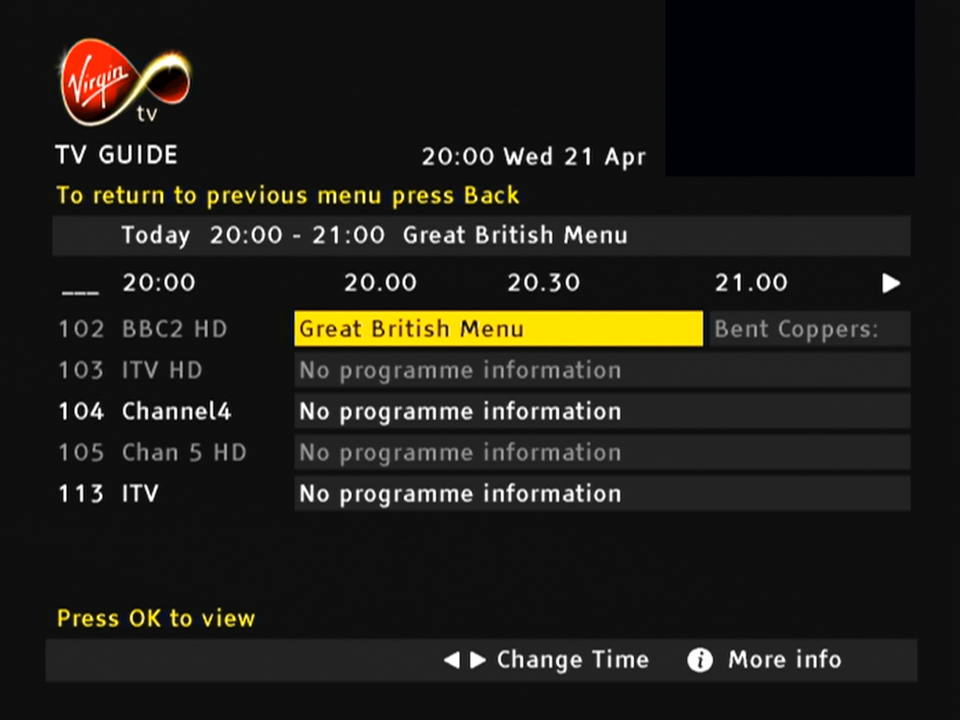
The main EPG, showing the many channels or streams Virgin broadcast
What’s disappointing is nothing can be tuned, you can select a channel but nothing will play, not even radio channels. Potentially this could be the NetID mismatch causing this , since the STB originated from a different area of the network.
Looks like software update streams for the various tivo box models currently in use with Virgin Media.
To breakdown what works and not
Channels Numbers exist but its not the order that Virgin use, the STB seems to place them consecutively in the EPG, i.e starts at 1 and goes up to 350
There are issues selecting channels over 255 in the guide, trying to select a channel number over 255 causes the box to pull a channel from the top section of the EPG, i.e selecting channel 260 causes channel 5 to get selected instead.
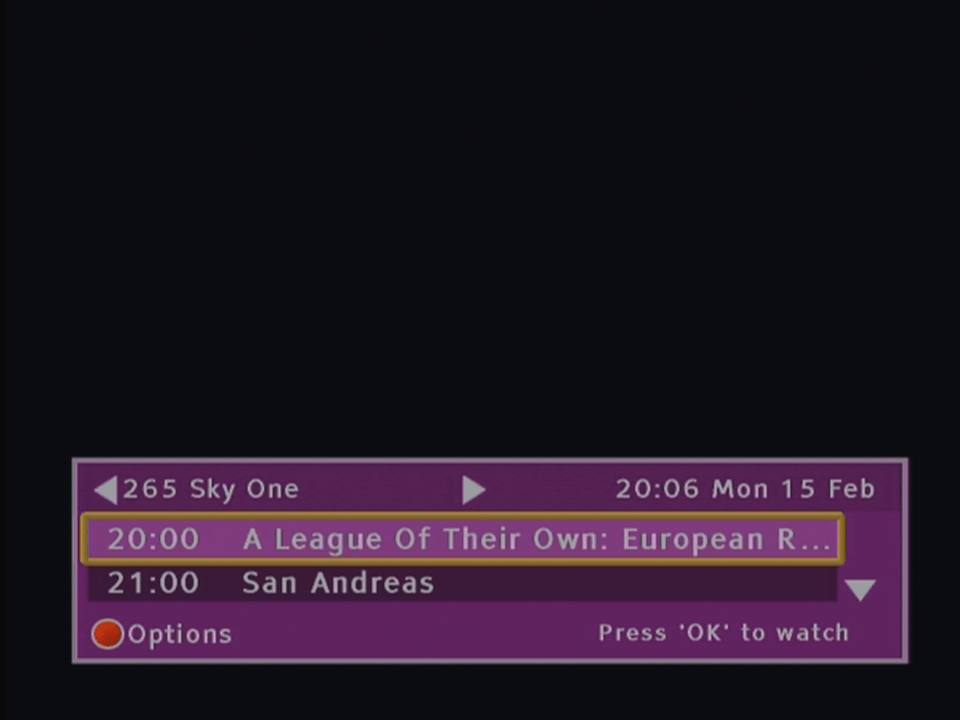
Only now and next information is loaded, no further schedule information is available
Subject search does not function
Channel genres do not work, selecting Entertainment or Sports shows no channels.
Various hidden streams and channels appear in the guide
Changing channels using the + and -, the list is out of order and the STB seems to jump between different channels.
Program reminders work and can be set
Maybe changing the Net ID will at least allow the radio channels to be opened