I wanted to see if this box themself would still work on a modern Virgin media network. I’m aware that Virgin broadcast all their channels in MPEG4 which this box cannot decode, aside from some radio channels. But I was still interested if the box would work and how it worked, especially in regards to early digital cable TV.
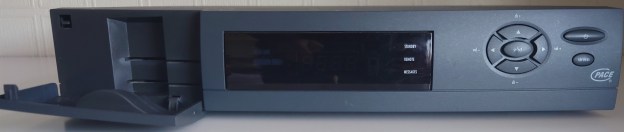
The box itself
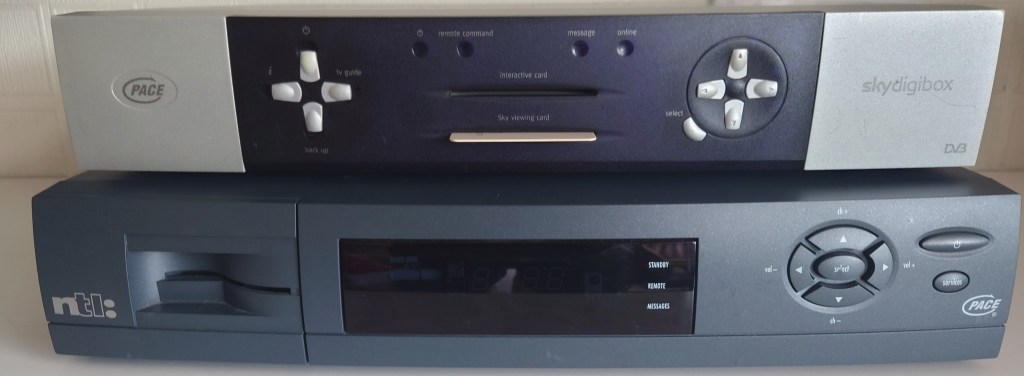
Pace Di4001 size comparison with the Pace 2500S5, a typical Sky box of the same era
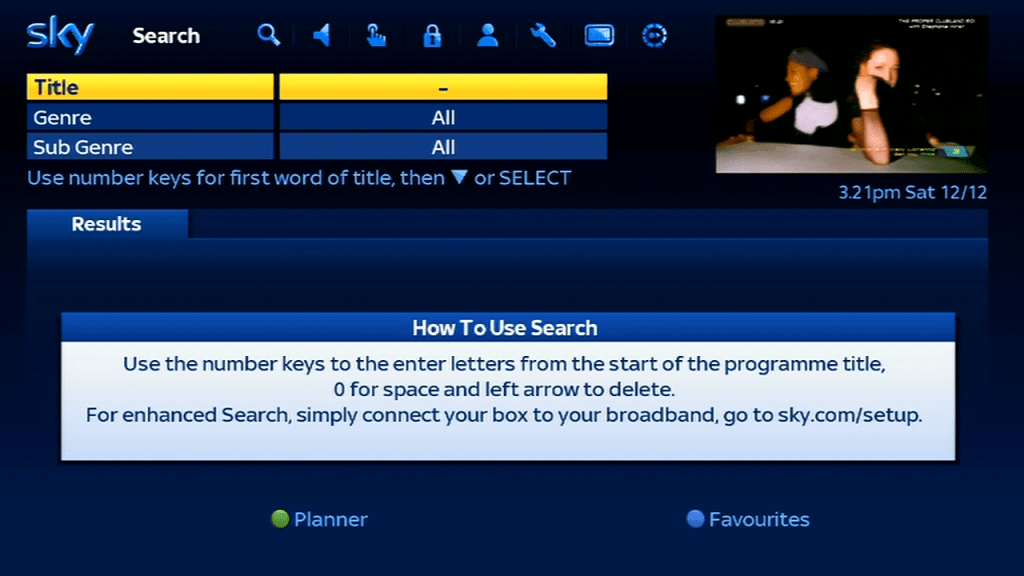
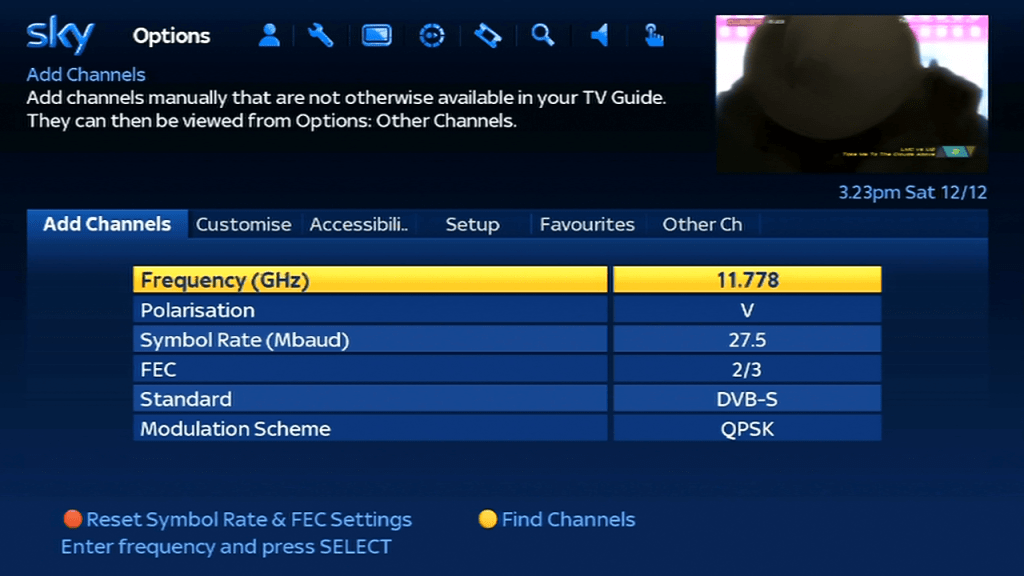
Trying to get started
So I got off to a rocky start trying to get the box to start up in the first place, since powering it on the display would show PACE followed by TUNE. I figured that i needed to enter the boxes engineering mode to reset something. This provided impossibale since after attempting to enter the engineer mode, the box would immediately show TUNE on the front panel display
i tried different combinations that I found online to get the box to work but nothing was working. Finally i stumbled on a old forum post that held the solution;
So to summarize, If your set top box wont progress past TUNE (shown on the front panel display) and you are unable to enter into the boxes engineering mode, you may need to reset the STB’s NVRAM since it may have become corrupted. This can occur when the STB has been powered off for a while, and the battery has discharged to a point where it is running under voltage. This must corrupt the NVRAM in a way it becomes unreadable to the STB
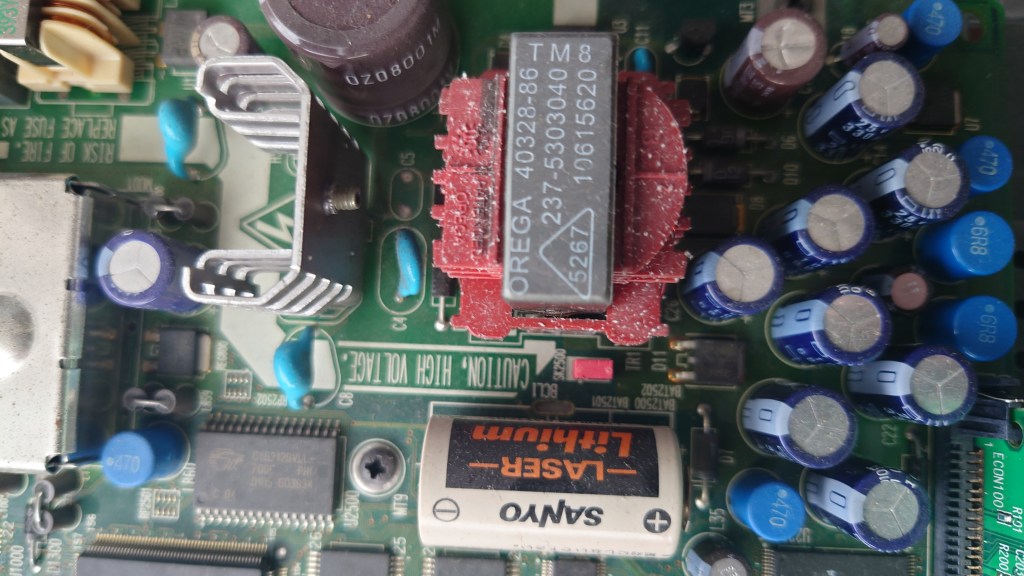
To recover, you will need to open the box, and pull a red jumper located to the right of a large white Sanyo battery. Leave the jumper out for about 5 minutes and then reconnect the jumper. Power on the STB and hold down the UP and DOWN buttons on the front of the box for 10 seconds. You should see DIAG on the front panel display and the engineering mode should appear after a few seconds.
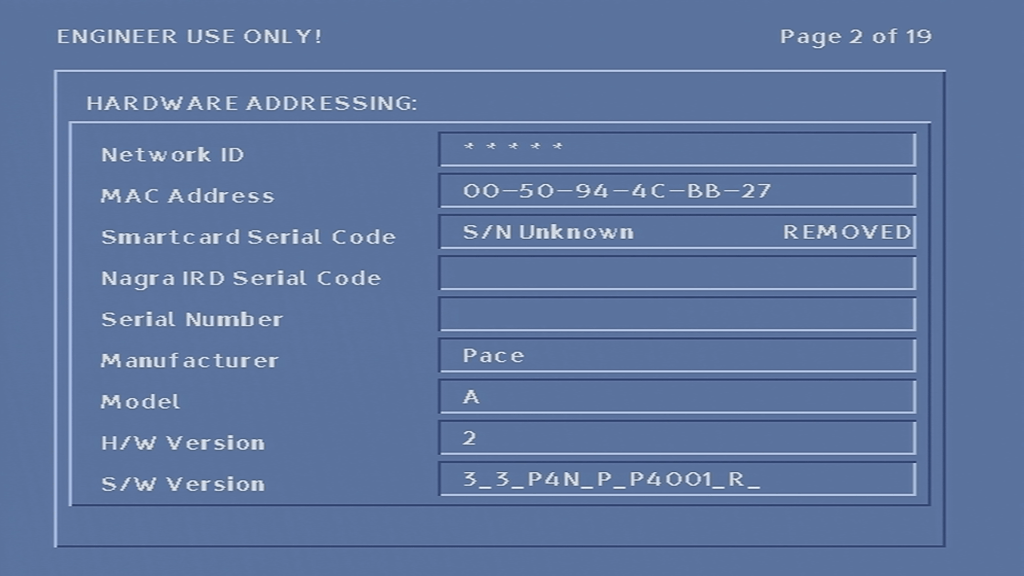
Doing this will clear the Netid of the box, which the Di4001 boxes are able to set automatically if they are in an original NTL area. Otherwise it will appear as *****
After resetting the NVRAM I was able to get to box to enter it’s engineering screen.
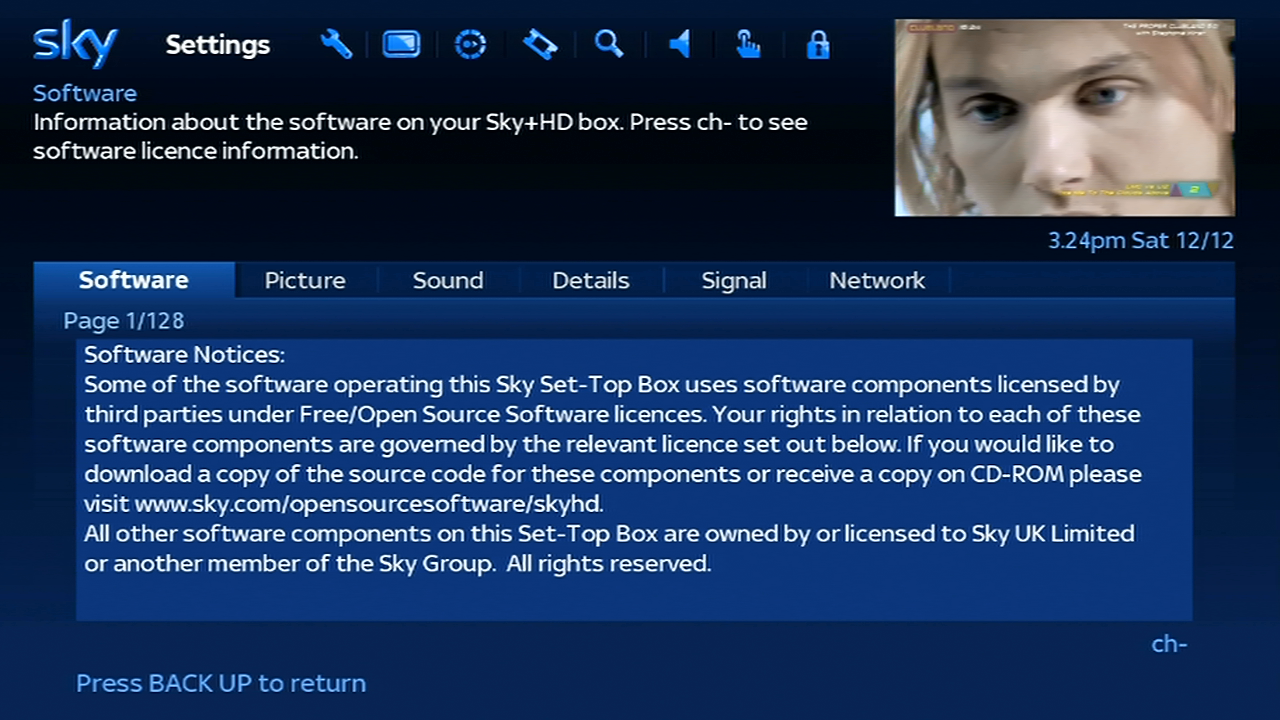
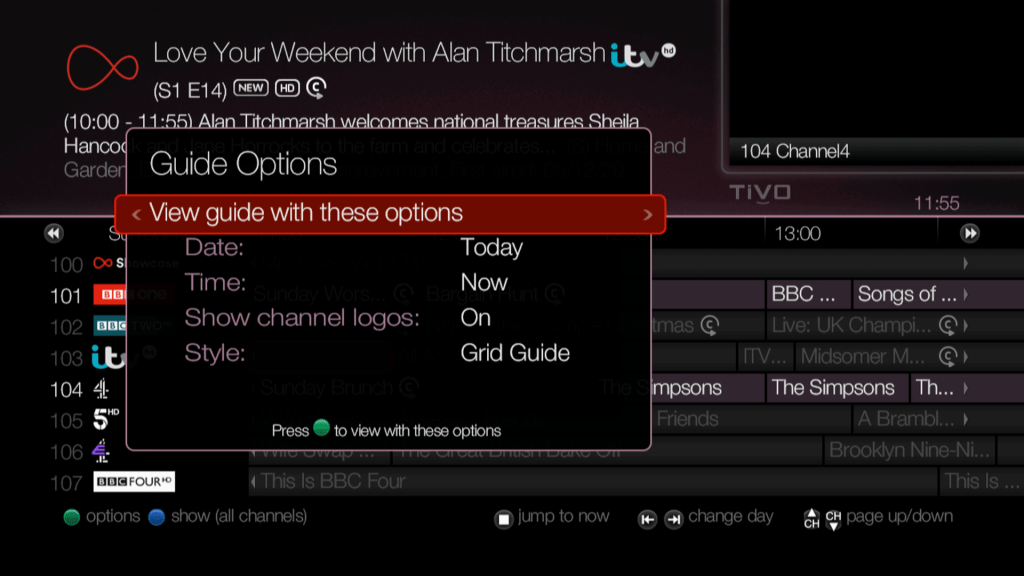
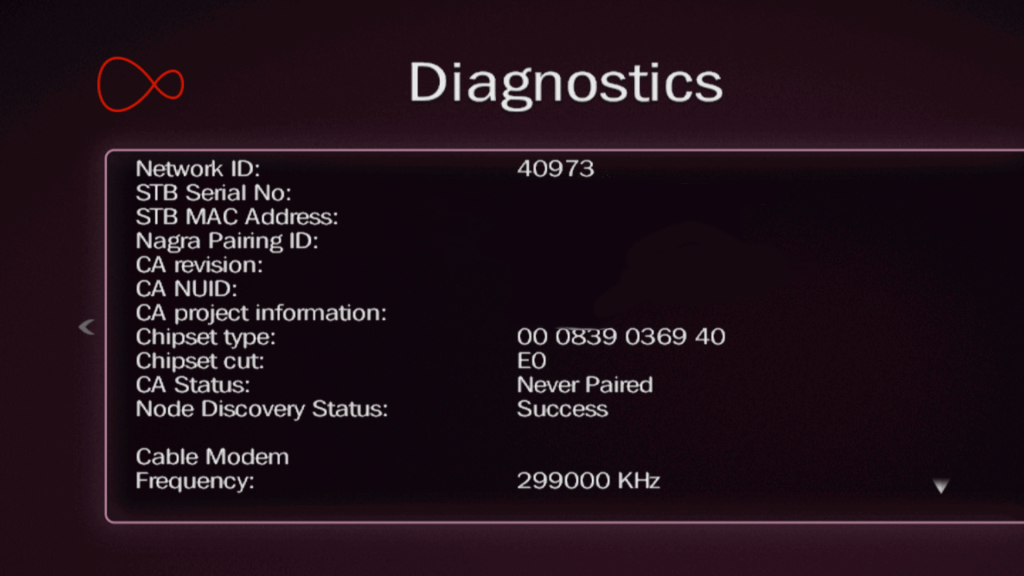
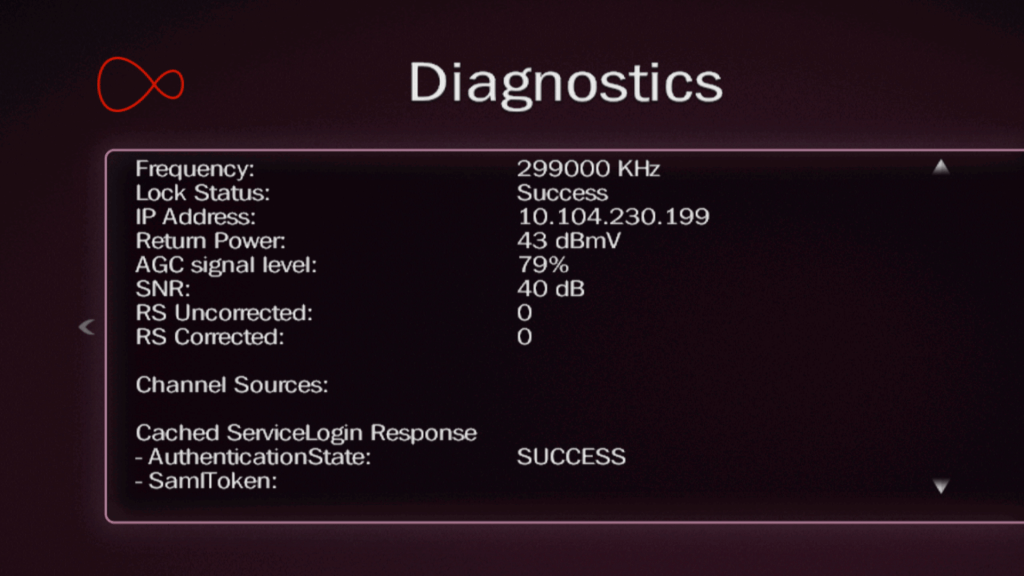
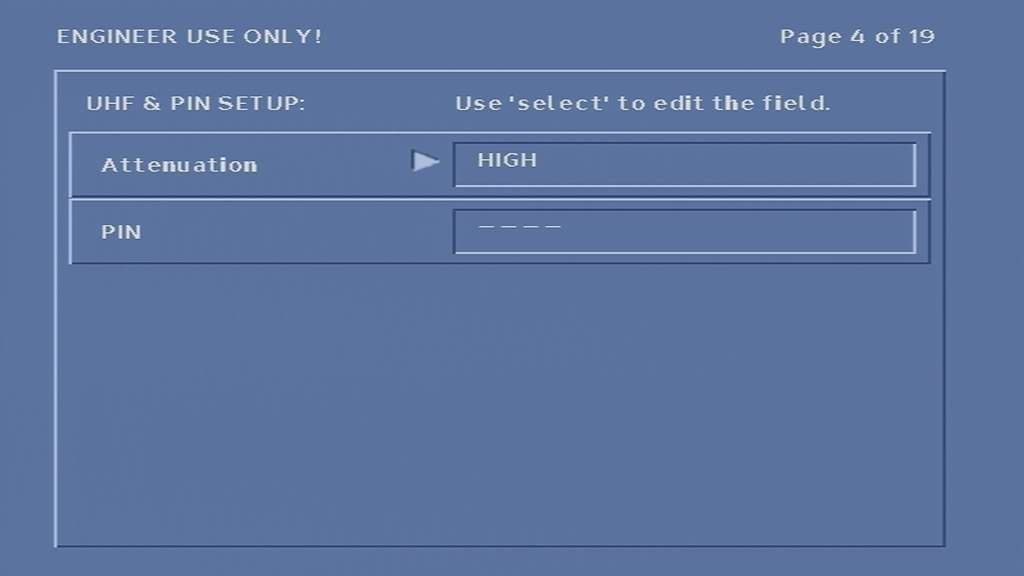
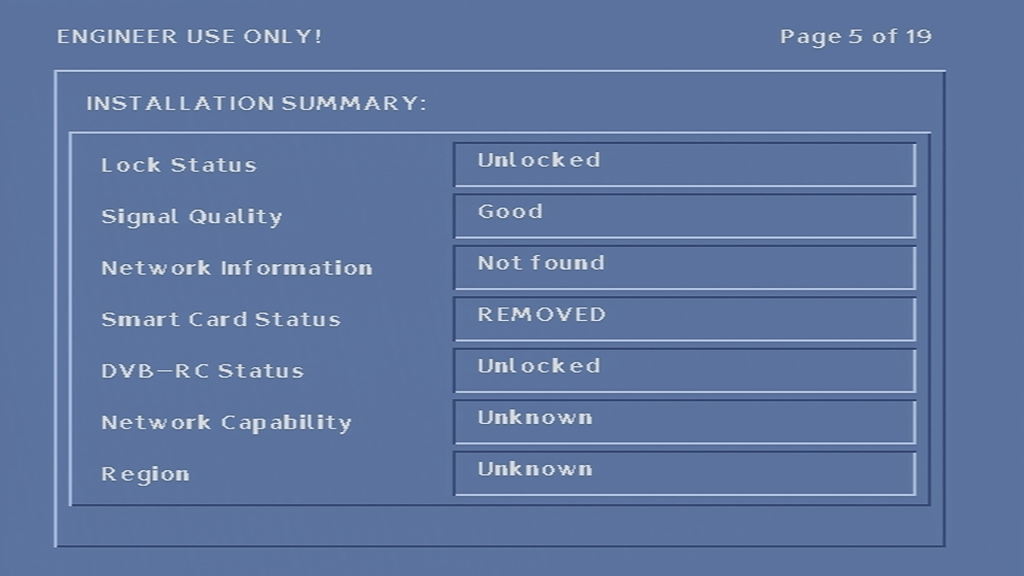
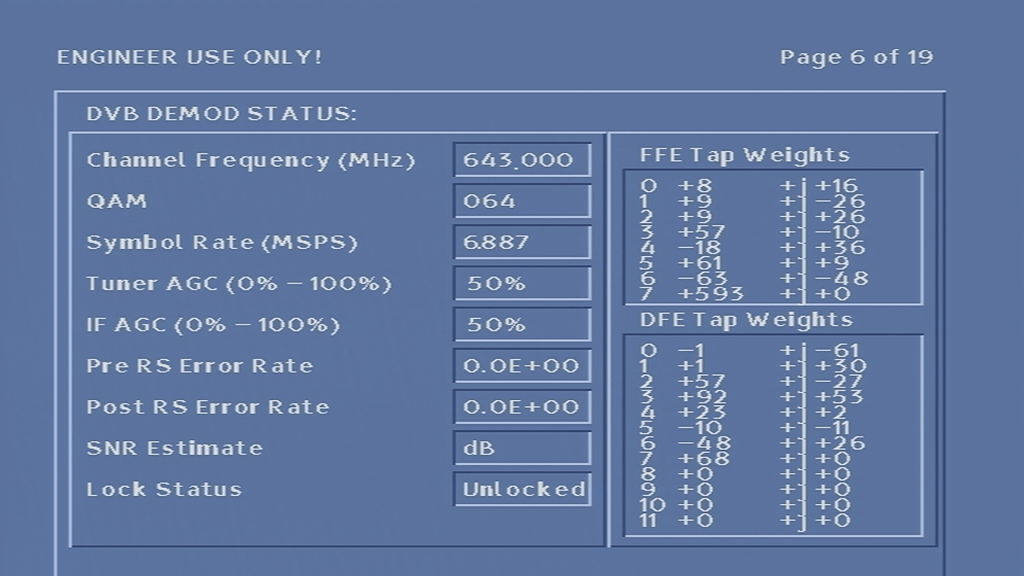
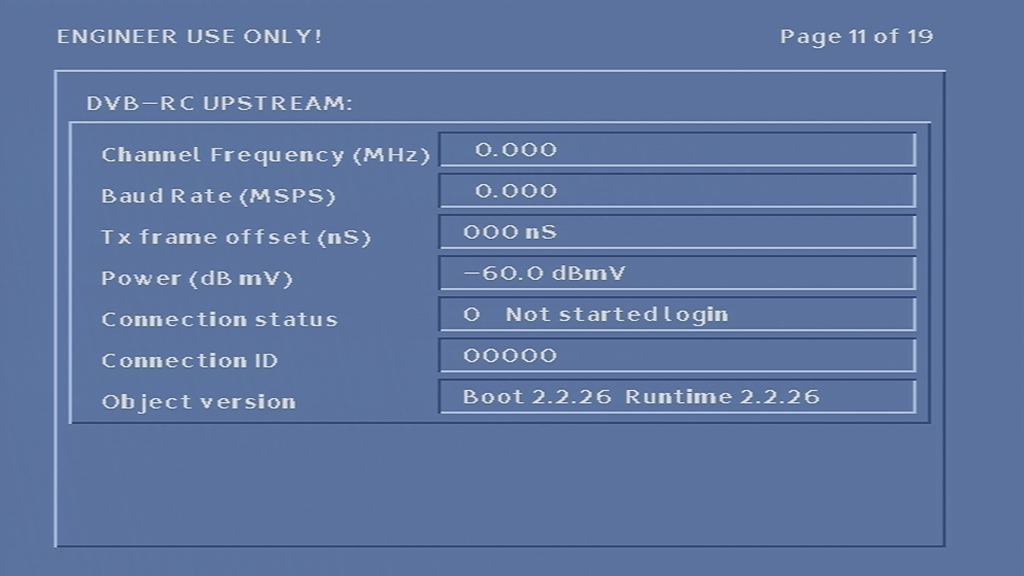
Engineer Mode
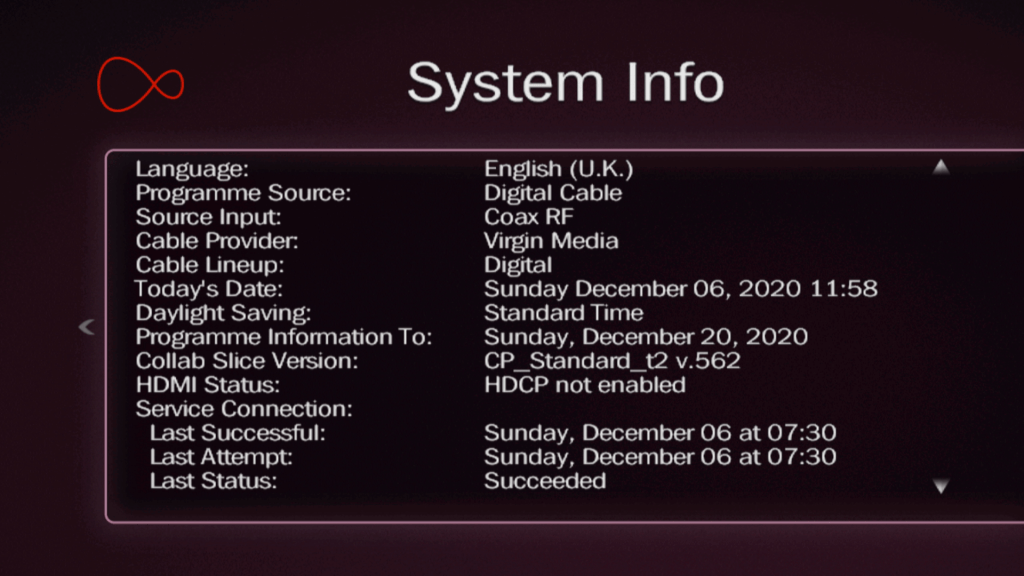
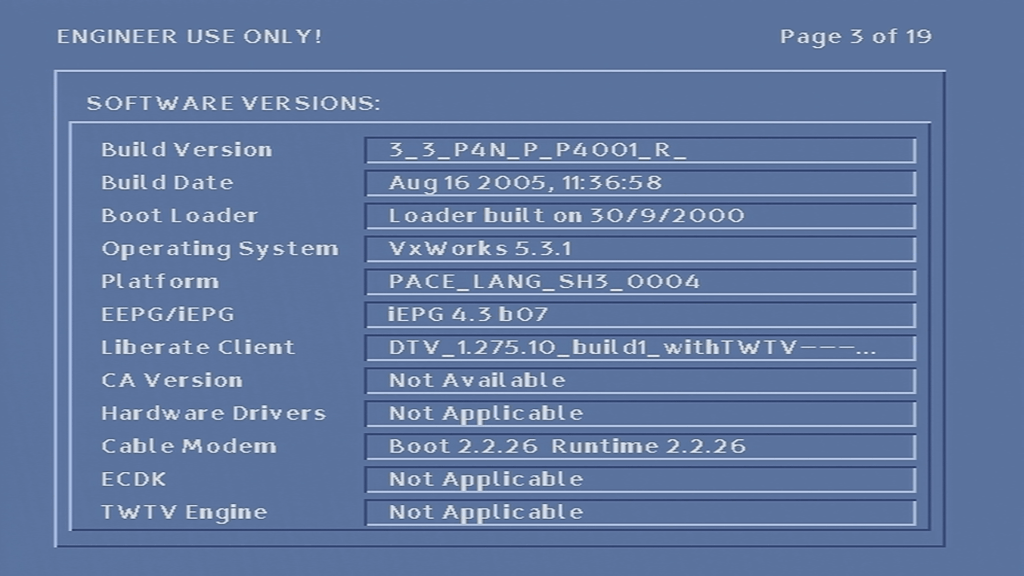
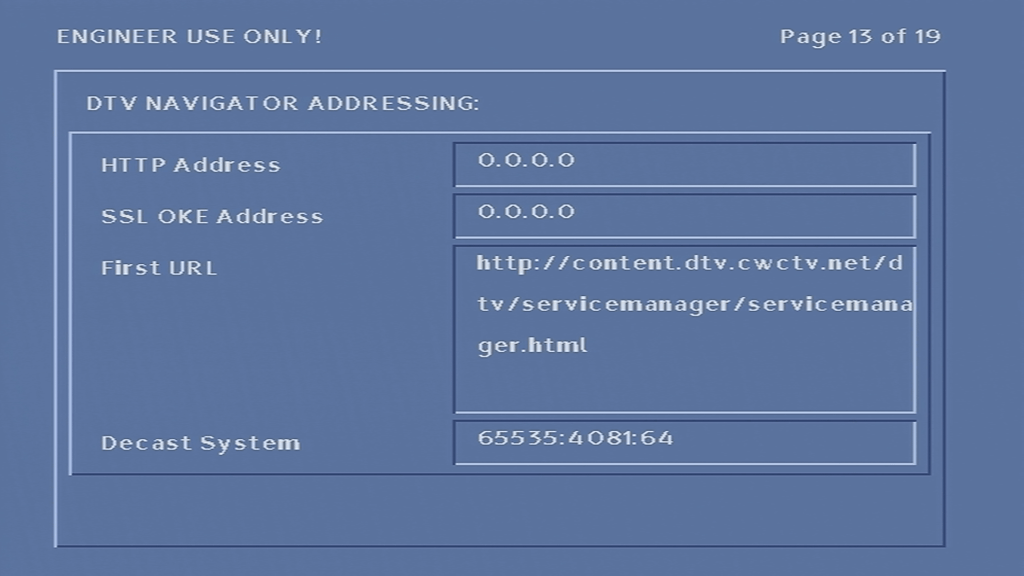
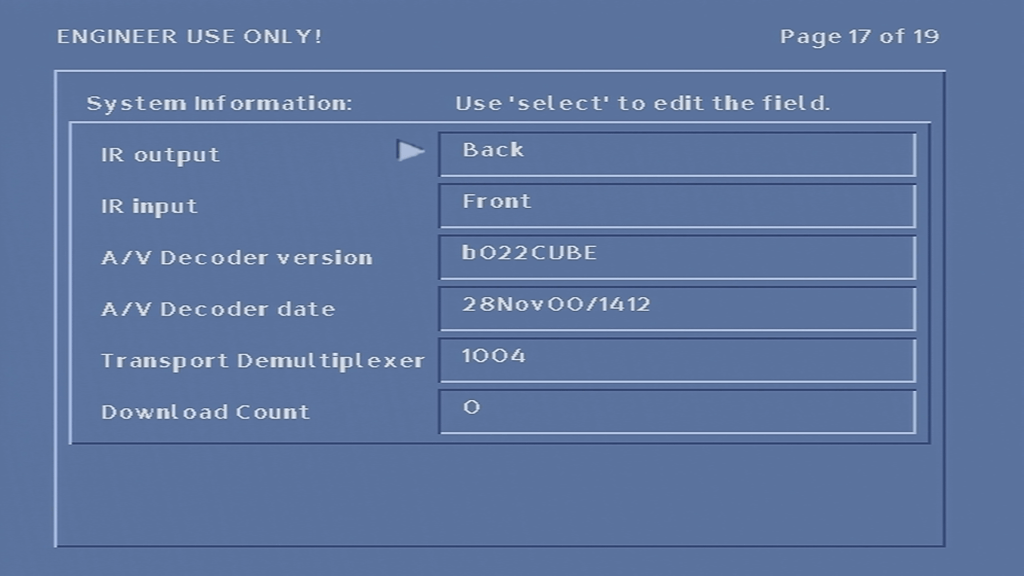
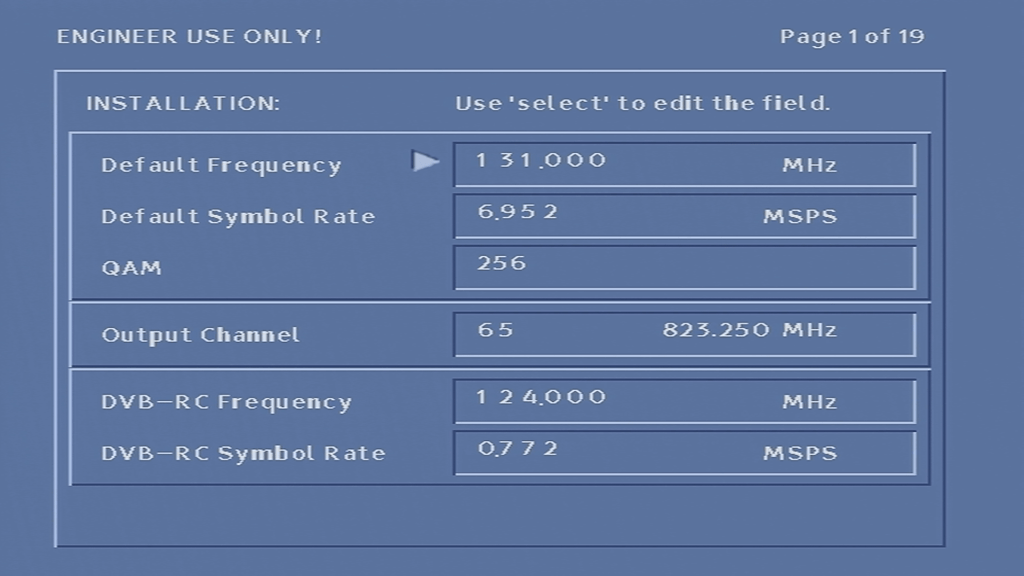
From here you can change the default frequency and symbol rate, which the box uses to look for the latest software, and possible where the ntl EPG listings are located. You can also see info relating to the software version running on the box, Memory and flash info
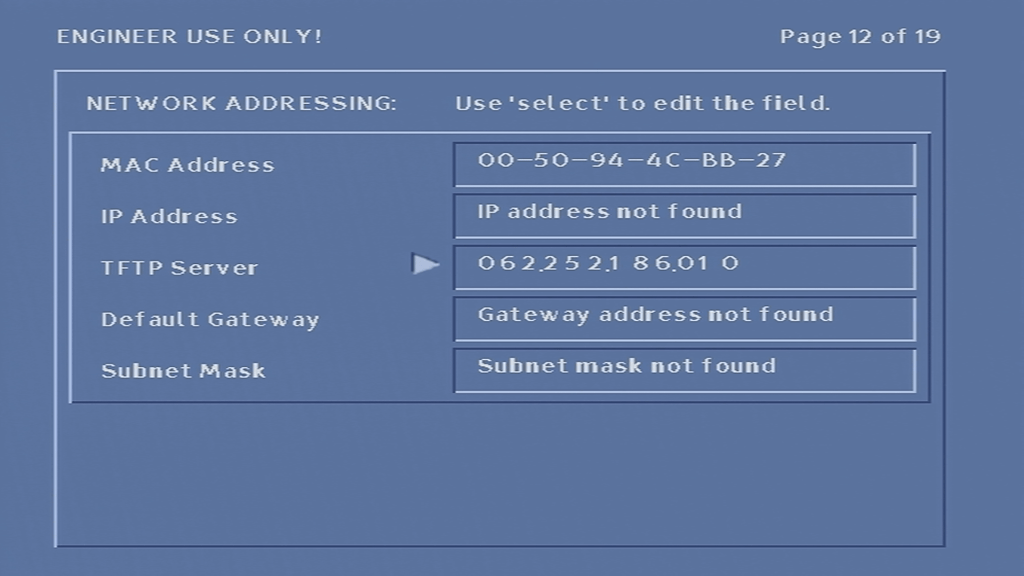

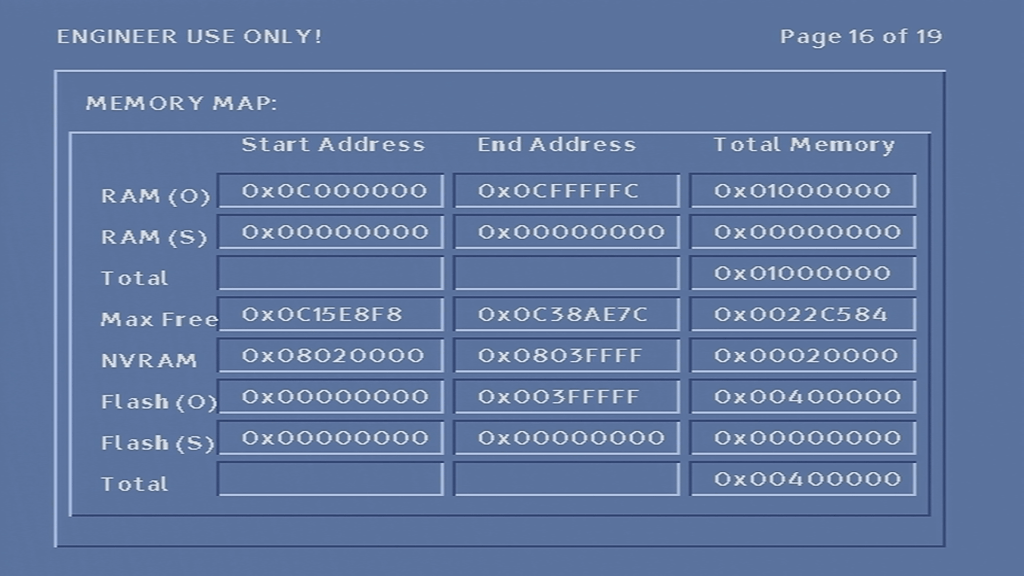

There are a few interesting items here, mainly the memory address section. from here i was able to find out the spec of the box. 0x1000000 converts to 16777216 which I would say is 16Mb of RAM. The Flash storage being 0x00400000 that converts to 4194304 which i’d say is 4Mb.
This model of box does have less Flash compared to the older revisions of the Di4001 in favor of more RAM, maybe the OS is compressed into Flash, which is then extracted upon boot into RAM, and runs from RAM like a Ramdisk. Alternatively, there may be a basic guide stored in flash, with the remaining components loaded from ntl either directly broadcast or using it’s DAVIC modem.
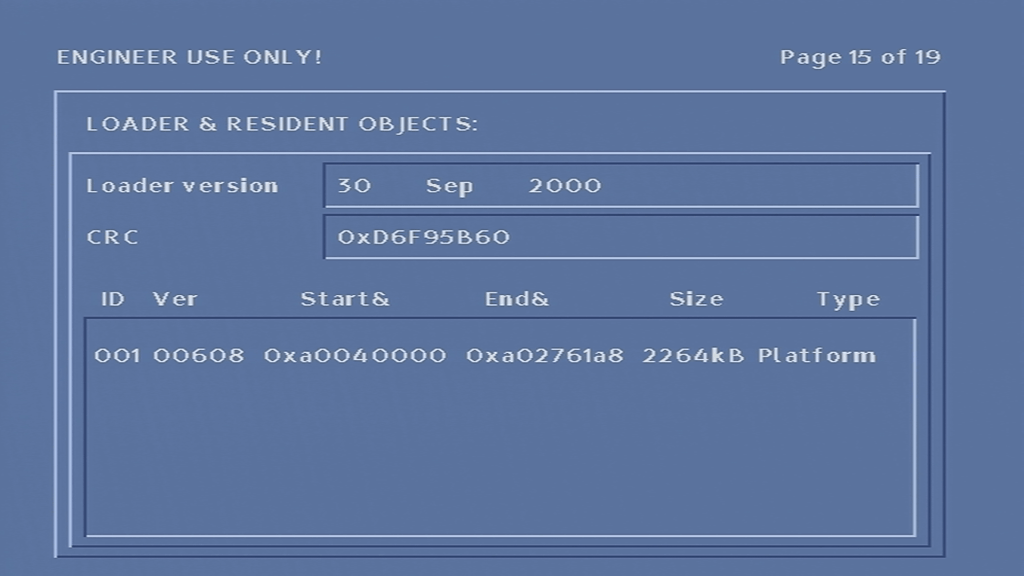
Also it appears this box is the 2A revision of the Di4001. which the boot-loader being compiled in September 2000
If you want to boot the STB without a cable feed connected, hold down the up OR down button on the front of the STB when PACE appears on the display (immediately after applying power to the box), and release until it shows boot, or after 10 seconds. This will skip the default frequency checks and will load the main TV guide interface, even without a cable feed connected.
Doing this trick allowed be to bypass the default frequency check and put the box into some sort of ‘safe mode’, this it it would load the TV guide without having any channels or listings loaded. In this mode the box is stuck on channel 0 and not all aspects of the guide can be accessed.
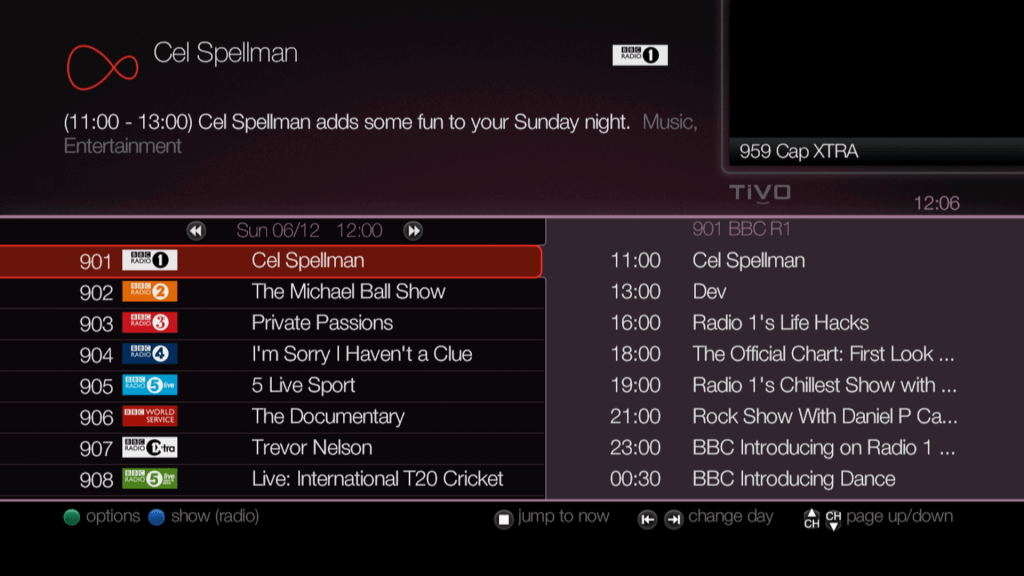
I’ll put up some screenshots of the guide software up later, if I can get the box to pick up Virgin’s tv guide…
One oddity was the services button on the front panel of the box, now you would think that it would take you to the main TV guide, however it just make the mini guide appear and disappear from the front panel there is no way to access the main TV guide screen…
Another oddity was that pressing the front panel buttons would cause the remote light to indicate, even though you were pressing the front panel buttons and not the remote.
Conclusion
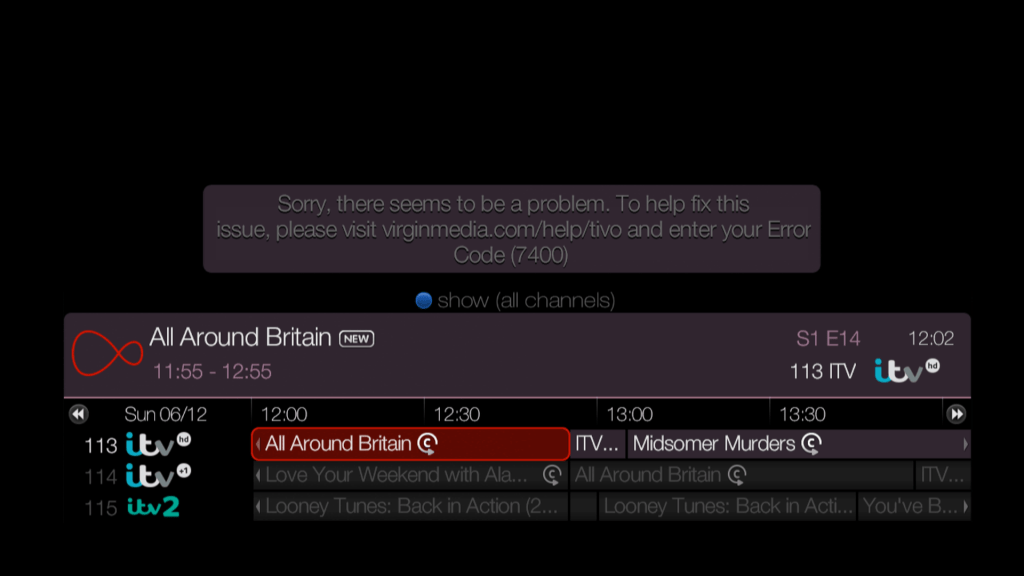
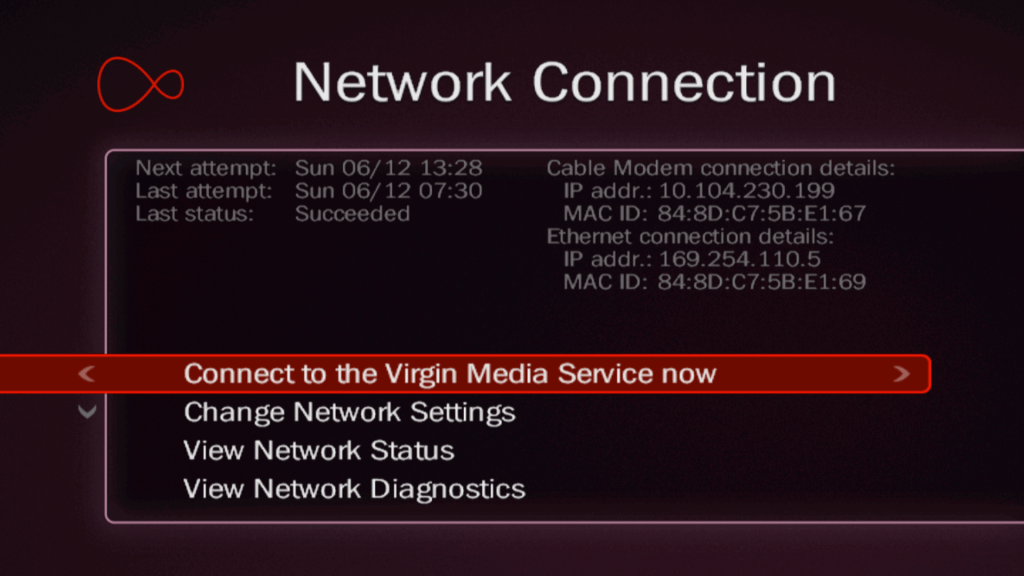
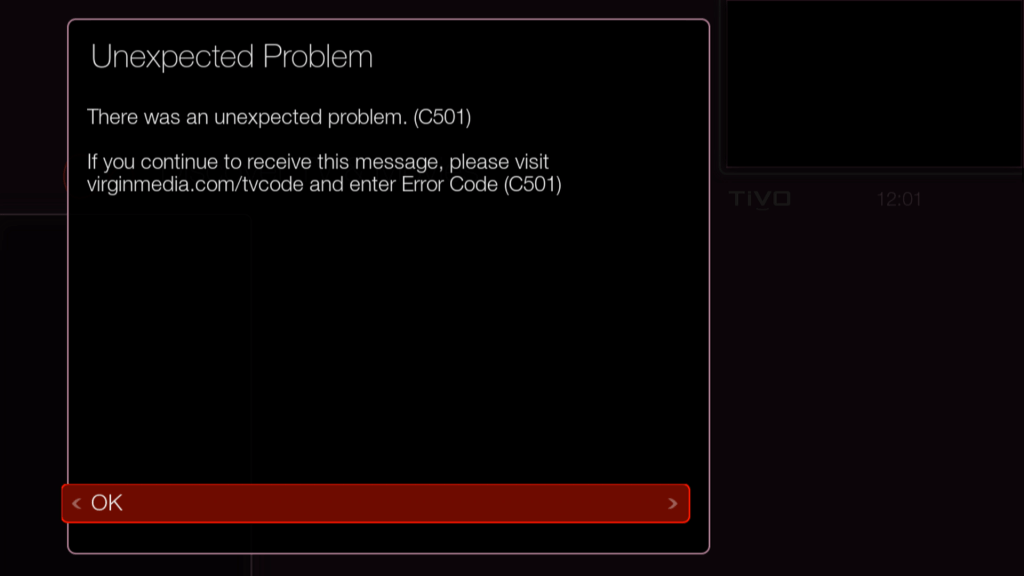
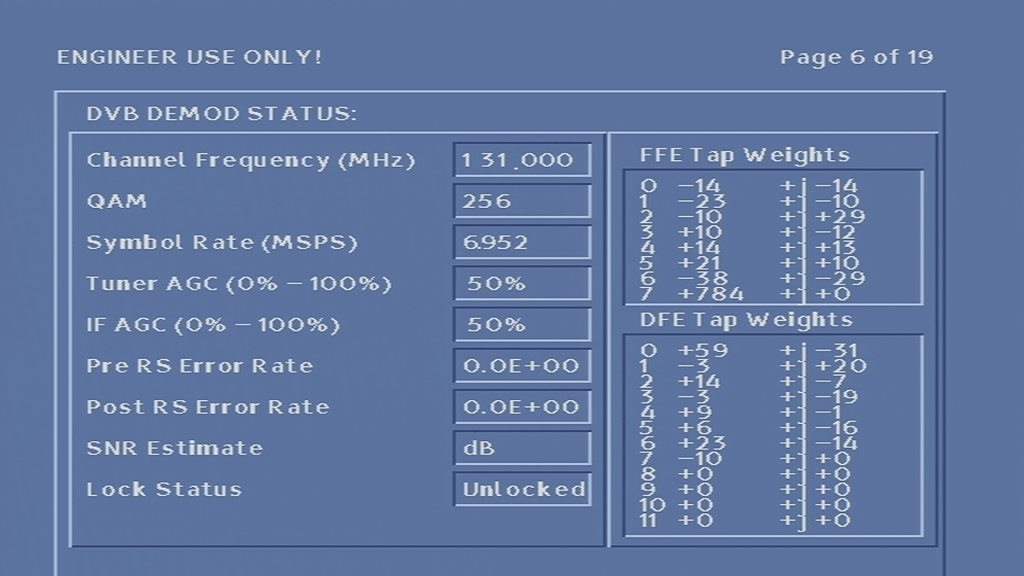
Unfortunately I was unable to get the box to tune into any frequency, never-mind booting with some sort of TV guide. At first I assumed it was because the network information Virgin Media broadcast in my area was not in a compatible format, or that the box was looking for something that Virgin have since removed from the stream, however I am now convinced that the tuner in the box is most likely faulty, since entering correct frequency’s in the engineer screen yields no change to the signal levels, even after removing and reapplying the coax cable.
Also since the box is running relatively old software (from around 2005), it’s likely the box was an ex-subscription box that was never returned to ntl, or may have had it’s flash chips modified to be read only, preventing a software update from taking place.
Lifting the lid

Compared to other set top boxes of the era this ones quite busy inside considering it’s supposed to house a digital cable receiver and a cable modem in one enclosure. Ill try my beast to break down the individual processors this box contains;
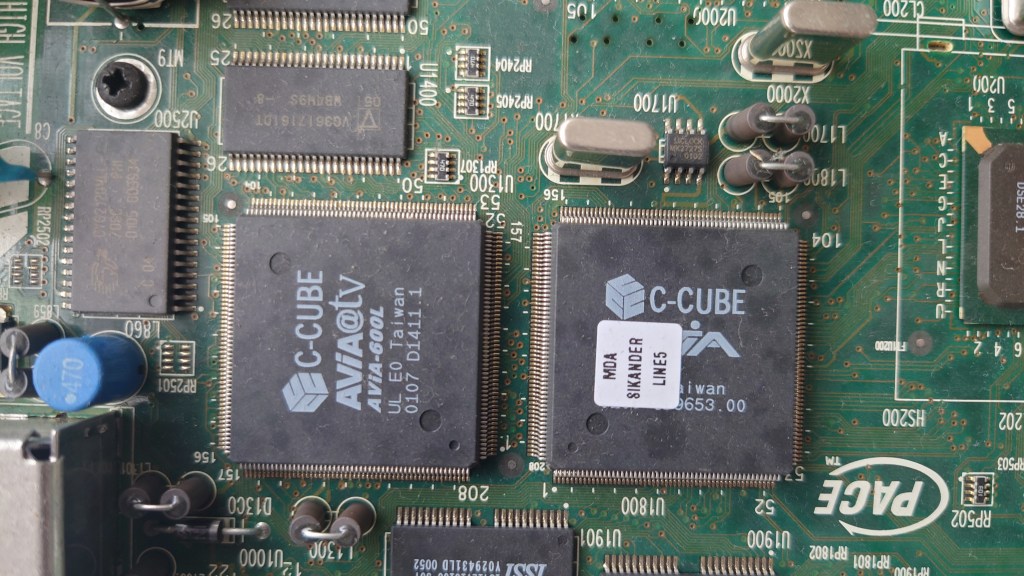
The main decoding processors, the one on the left (C-Cube 600L) is the MPEG2 decoder, not sure of the one on the right?
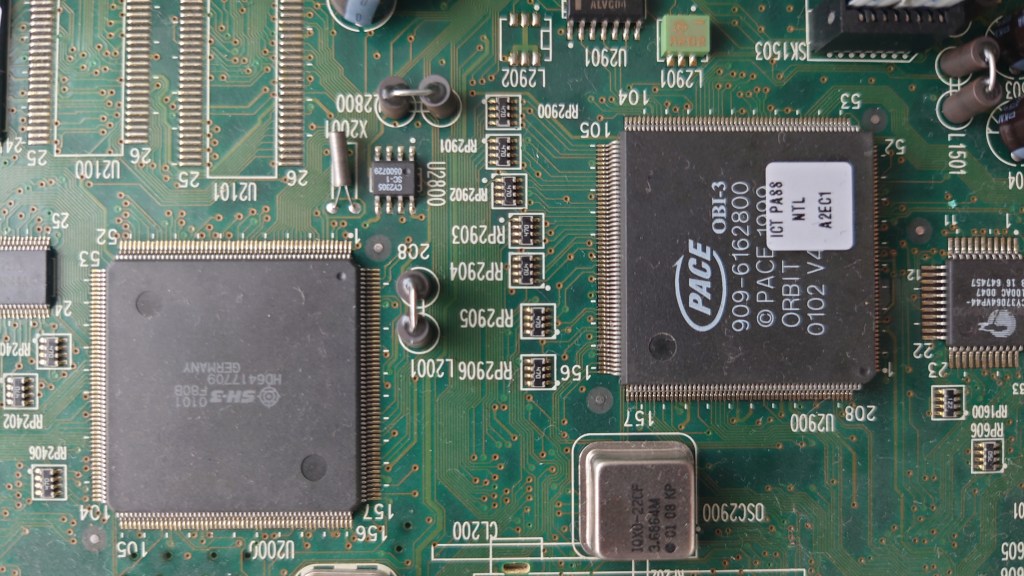
The one on the left is an Hitachi SH3 processor, if you’ve ever opened a Sega Saturn or a Dreamcast you should be familiar with the Hitachi CPU’s. The one on the right is a mystery, its branded as Pace but I cannot find and information online regarding it. I suspect its something to do with Nagravision based on the fact its near the smart card area. Maybe Pace had to licence their own Nagravision descrambler?
C-Cube Avia-inx – Handles DVB-C demuxing from the tuners, Ethernet controller, IEEE1284 controller and has a built in graphics processor. Basically like the northbridge/chipset on a pc.
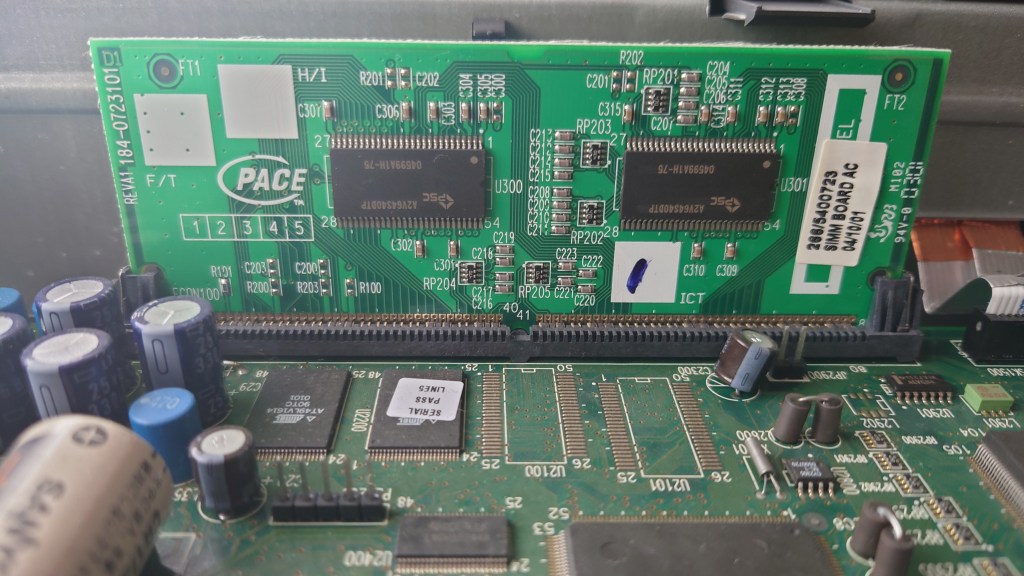
The system memory, unlike other STB’s of the era this one is designed to be upgradable but seems to be using a proprietary slot. Virgin Media could easily upgrade the memory of these units should the box be returned. This model currently has 16Mb.

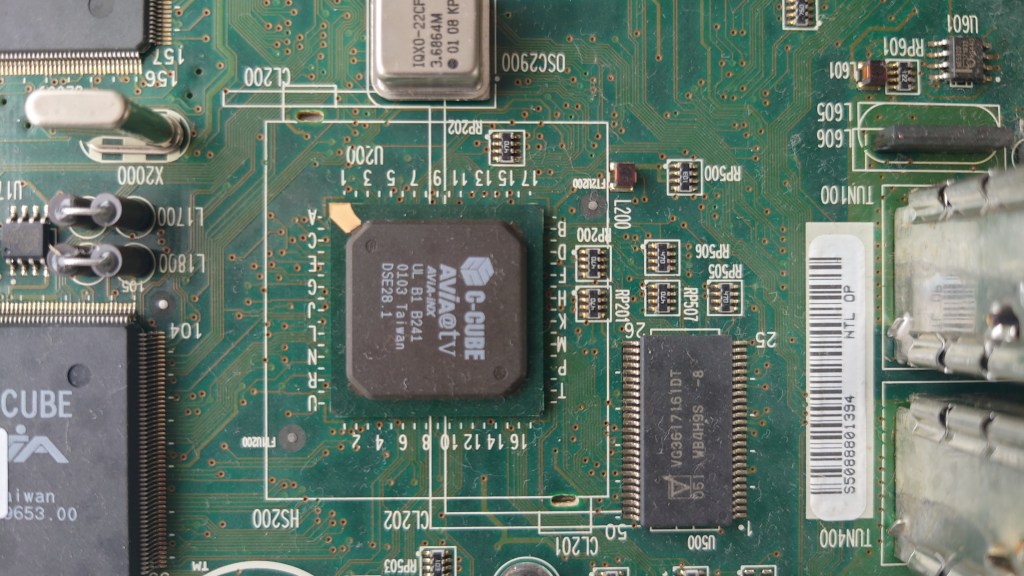
DAVIC/DVB-RC decoder, was underneath the smartcard slot so I had to get a funny angle
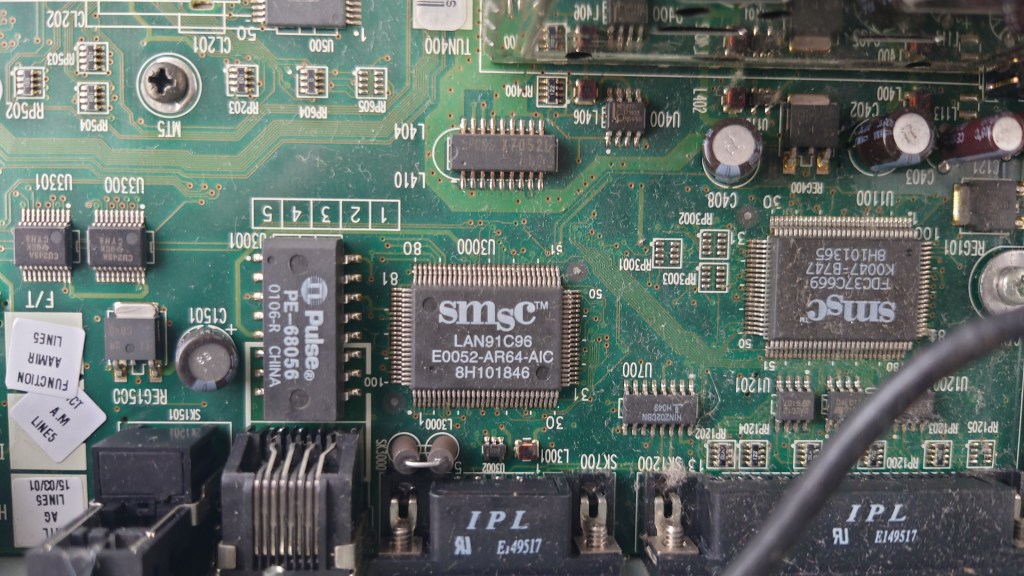
I believe these are for the onboard ethernet and serial ports
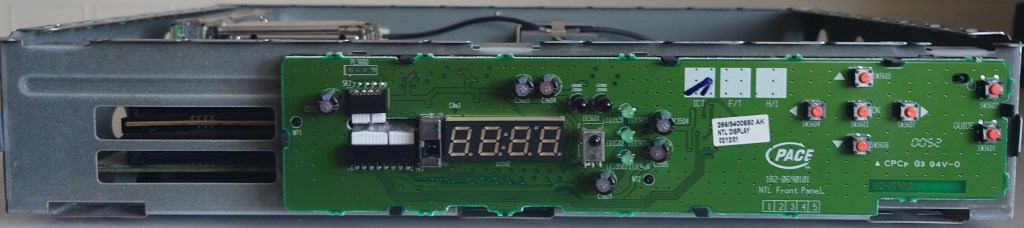
The front panel exposed, note the two IrDA sensors
Rear Panel
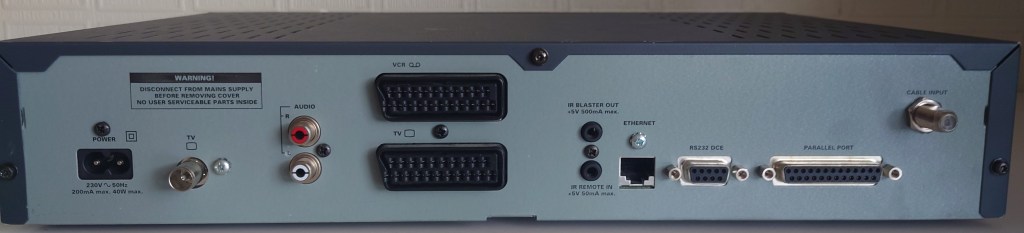
From Left – Right
- Mains Input
- RF Output
- Audio phono out
- TV and VCR Scart
- IR output and input – I think were were meant for external devices such as Tivo or VCR’s to control the STB without any dongles needed, whilst never used by ntl the box does supply power though these connectors allowing the use of red eye dongle
- Ethernet – For internet access or LAN
- RS232 – Only used for libdebug, never used by ntl externally. Could be used for external input devices like a mouse or keyboard
- IEEE1284 parallel port – never used, might be for external disk drives, printers or modems
- Cable Input