Category Archives: Uncategorized

Nvidia Shield

The unknown fourth player in the console market

Android TV Home

Nvidia Shield has been out for a while now and has become a attractive device for Android based emulation due to is relatively powerful SoC and the application support of the Android TV platform.

History

The Shield series of devices started out with the original Nvidia Shield, which was a portable Android powered device which was capable of streaming games from a desktop PC that had an Nvidia graphics card. Very similar to Sony’s remote Play for the PS3 and PSP, and later PS4 and the underrated Vita. They later evolved into the Shield tablet, and the Shield TV which is a Android TV powered streaming set top box, like the Amazon Fire TV.

Processor

The Shield and the Nintendo Switch share the same processor, the Tegra X1, and X1+ in later revisions which is a die shrink of the original processor. The processor is quite powerful, compared to other Android which rock the Cortex A53 (An in order CPU) the X1 has both the A57 and the A53 with the former being used to run common applications. Together with its Maxwell based GPU makes the Shield an attractive device to run emulators on. There are also Android TV games that are distributed on the Google Play store which will run on the Shield.

Play Store has plenty of emulators

Controller

By default the Shield Pro does not come with the Shield controller (Previous versions did) but can be purchased separately and paired. The controller itself seems to be inspired by the PlayStation Dualshock design with its symmetrical dual analogue sticks, and the face/shoulder button design. The controller also features the regular android navigation buttons to call up the home screen or the app switcher. There is also a microphone and a Nvidia button which calls the Google assistant. Vibration is also present, but I have yet to use this with emulators, it seems Nvidia are using a custom controller API which makes vibration support difficult. Remember this is an Android based device, and features like Xinput are unsupported with out third party applications.
Also shipping with the SHIELD is the remote control, which is shaped like a Toblerone, and is quite comfortable to hold. Here you can navigate Android streaming apps and adjust the volume of the TV or AV receiver if you have one. Soundbars are also supported. A nice feature is it come with a backlight that activated when motion is detected.

Emulation

Retroarch

This was the first thing I installed on the Shield, and whilst I’m familiar with how Retroarch, and Libretro in general, there are a couple of issues.
The way it detects the controller is an issue, since Retroarch will detect the Shield remote and assumes it is some sort of controller and assigns it as controller 1, whilst the Shield Controller is detected as controller 2, which prevents you from navigating the retroarch interface. Also sometimes retroarch will not detect a controller at all, the fix for this was to press the home button which would return you to the Android home screen, then open Retroarch again with the controller, which Retroarch should detect as player 1.
Retroarch can be difficult to set up, I’m not sure if this is an issue with the Android / Play Store version since I can use the PC version without these issues. There’s also an issue where retrarch does not apply changes will often resert some setting back to the default, like the BIOS location or the game save directory.

Retroarch


It’s a shame because Retroarch does have a good list of emulators that can be used and its user interface is one of the best, but the complicated set up on config file issues make it a huge turnoff.

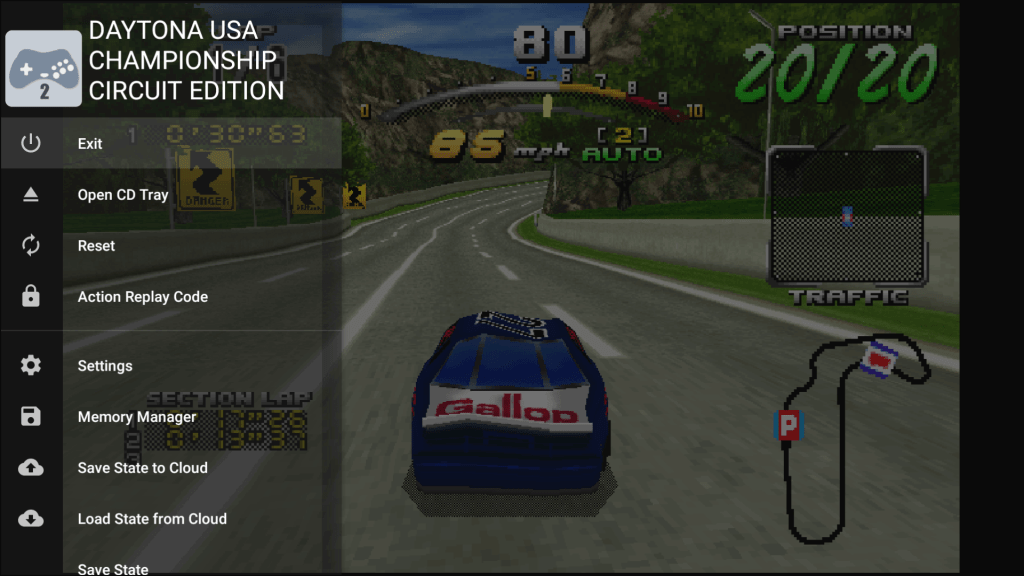
Duckstation (PlayStation)

Sideload launcher

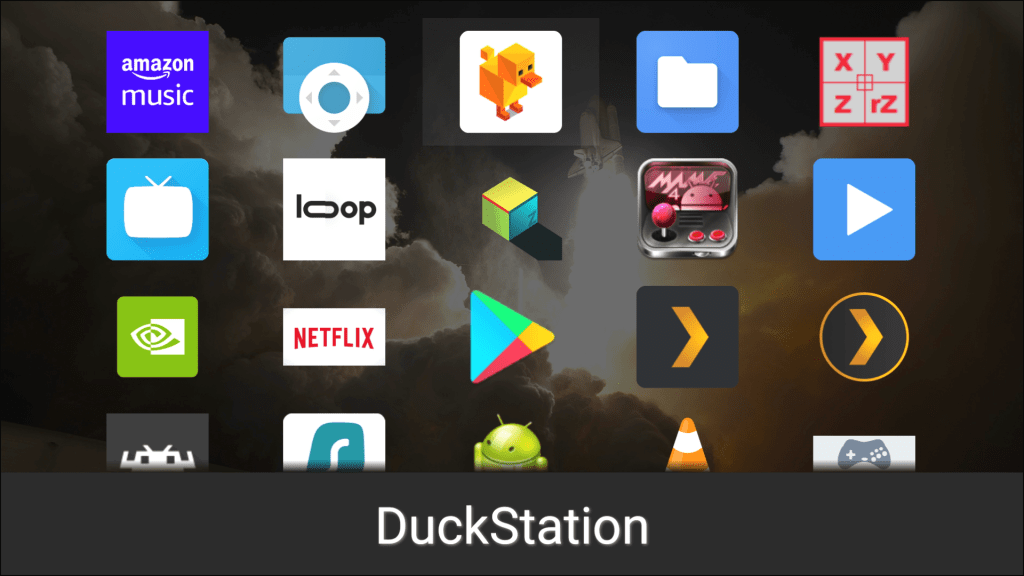
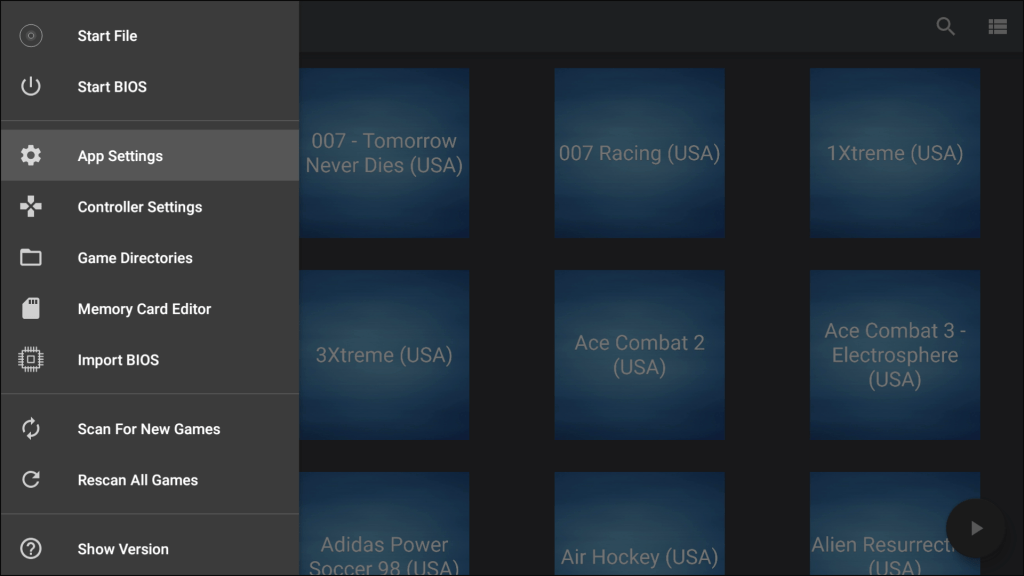
The best PlayStation emulator imo, but there is one huge issue here. Duckstation does not support Android TV officially, it will still run if you sideload the apk but the app runs like its running on a smartphone, and there are issues when navigating the interface using the controller as the emulator is expecting the touchscreen. Its perfectly usable with some compromises having to be made. Sideload launcher will need to be installed to access Duckstation.

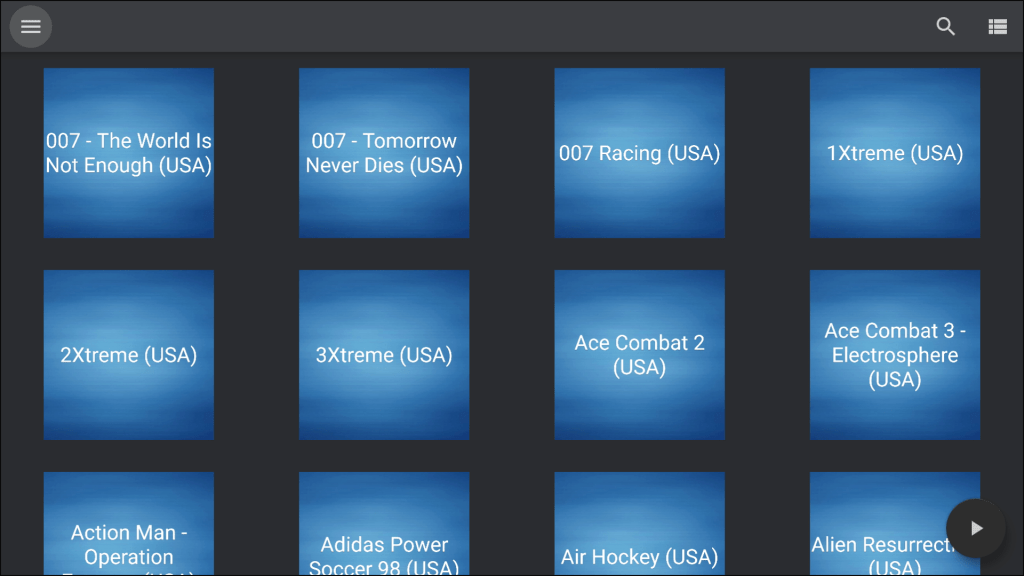
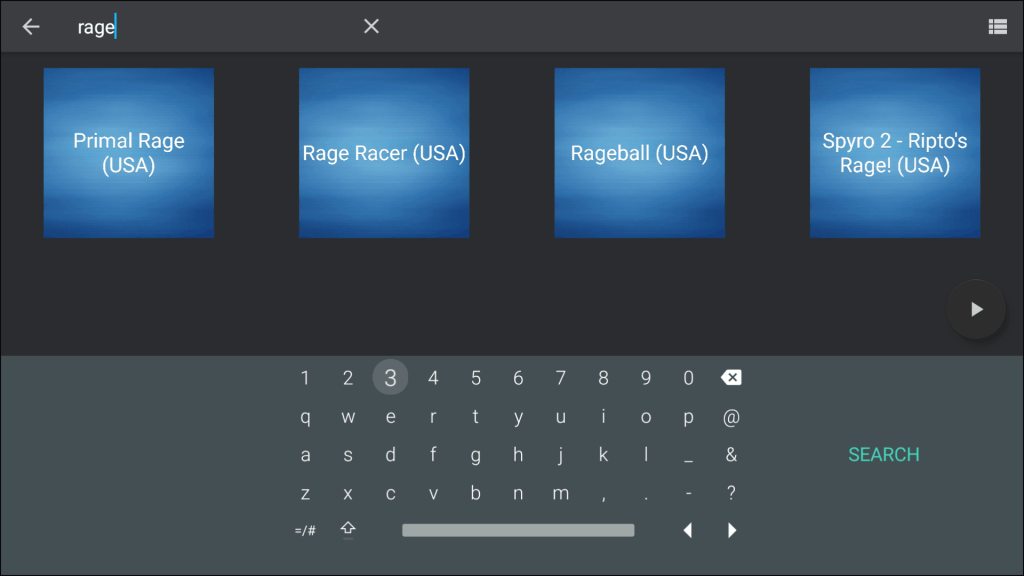
  • When scanning for roms, Duckstation will open the Android file browser for you to select a directly to locate your roms, but this app does not support input from a controller. The workaround? Use a USB or Bluetooth mouse, which allows you to control using the mouse cursor. Thankfully you only need to do this one since one you have told Duckstation where your roms are located, it will keep updating the rom browser when you add new files to that directory.
  • On screen buttons, thankfully there is an option to disable this.
  • Memory Card file management, I have yet to find a way to change the directory where Duckstation saves the memory card files, I could do this on the Xbox One version and have all my game saved stored on the external hard disk, but are inaccessible since there is no way to change the directory from what I can see.
  • Lastly just to recap what was mentioned at the start, because its not built for Android TV you have to use sideload launcher in order to open Duckstation, and you have to use the platform tools in order to sideload, along with enabling developer mode.

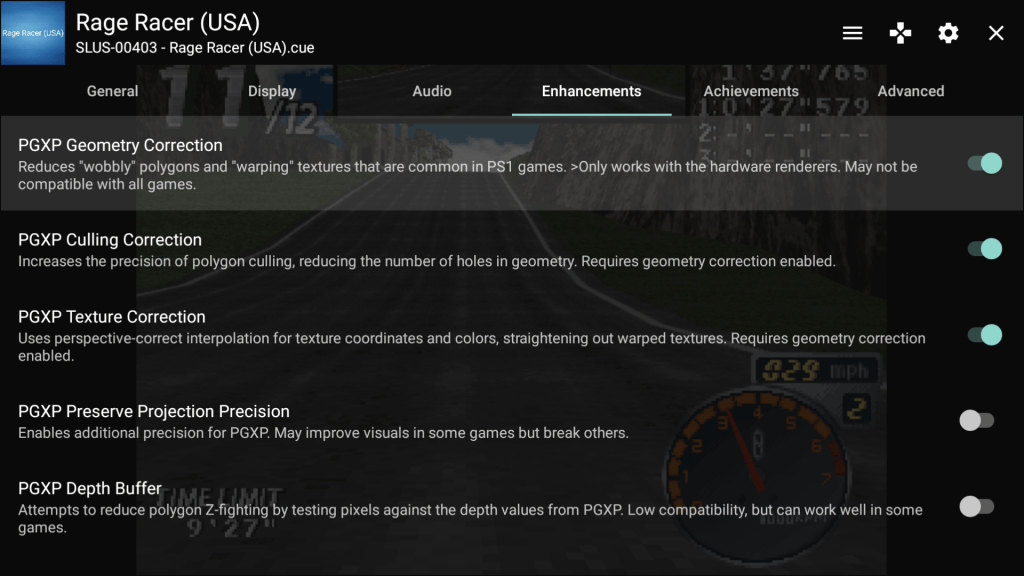
But this emulator has its merits, since it is able to offer enhancement in a simple menu structure. There are two types of settings, global/default applies the settings for all ROMS you load through Duckstation but you can also specific induvial settings for specific games that override the global settings. useful if a specific game has issues with say, enabling PXGP, you can disable that settings and that will only apply to that game only.

Grid list of roms, cover art can be set but is a manual process
  • PXGP support – Helps reduce or completely remove the polygon warping effects, can also help with the texture popping
  • Upscaling – handled in multiples depending on the games resolution, the Shield can handle 720p, with 1080p for some titles. I should mention that some games like Wipeout 3 run in a high resolution mode (around/near 640×480 compared to 320×240 for most games)
    • I should also mention the Shield being advertised with 4K upscaling capability , but this only applied to video content and not games or any app that generates its own graphics. I’m also not sure if the Shield reserves a few CUDA cores for the upscaling, as even though I have tried disabling the AI upscaling option there is little different with the graphics performance when upscaling, 720p seems to be a limit for most titles.
  • CD-ROM Speed – A faster read speed can be used to reduce loading times which was the main issue with CD-ROM based games, but can cause some games to malfunction since they may be hardcoded around the PlayStations CD drive limitations.
  • Memory Card Management: Each game can be set to have its own memory card and the emulator will create a file for that game. This fixes one of the main issues with the PlayStation, as each memory card is limited to 15 blocks per card with some games consuming multiple blocks. You no longer need to create and swap virtual memory cards as Duckstation will do this for you.
    • But you can set memory card slot 2 to be shared, and you can set certain games to use a specific memory card instead by amending which save file it uses. This is useful for PlayStation games that make use of another titles save file.
  • Overclocking – Another nice performance feature, but can break games if they were hardcoded to run at a specific speed. A must for certain games like Driver, The Shield can overclock the PSX CPU at up to 1.5x the original clock speed without suffering from frame drops. Some titles may be able to go further, depending on how they run in the emulator.

Overall Duckstation is perfectly usable, And I would recommend it over retroarch despite the issues outlined above. A lot of these can be fixed by incorporating a few of the Android TV API’s

ePSXe (PlayStation)

On Android its kind of been left to rot, since the interface isn’t very polished and there are a few emulation issues that crop up here compared to the other emulators. Overall it will work and its on the play store, so you can launch it from the Android TV interface directly, but I don’t recommend it.

M64Plus FZ Emulator (Nintendo 64)

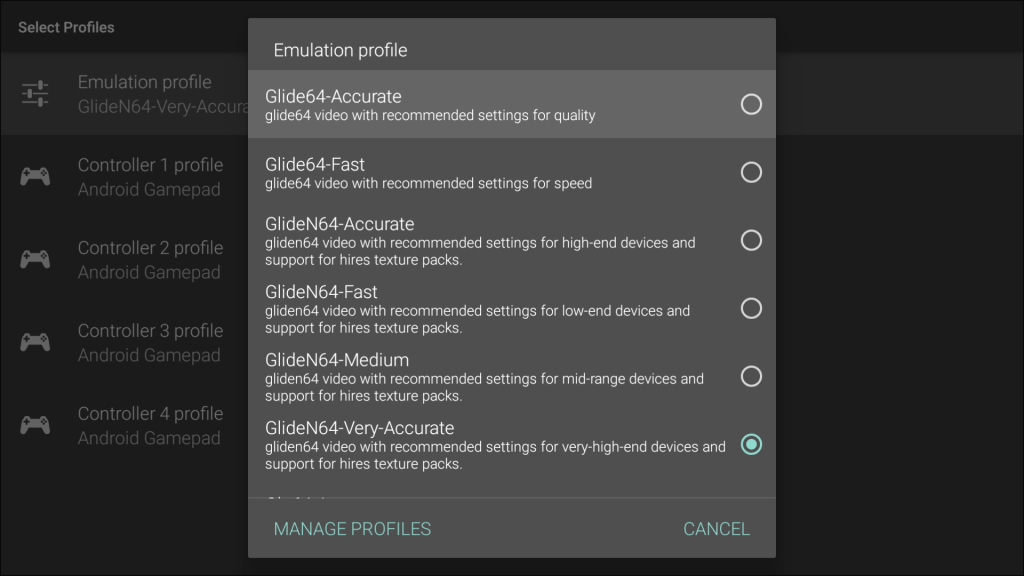
A nice emulator for Nintendo 64 titles, has support for upscaling and has a prebuilt set of plugins that can be tailored to performance or accuracy. The Shield can handle the accuracy settings rather well if your happy with 720p rendering, otherwise higher resolutions can be used if you choose the performance profile. Some of the later N64 games that used their own microcode can have considerable slowdown (Perfect Dark) so you may need to tailor the performace settings to compensate.

There is also a similar emulator known as Mupen64+AE which is an older version of the Mupen emulator, and lacks Android TV support.

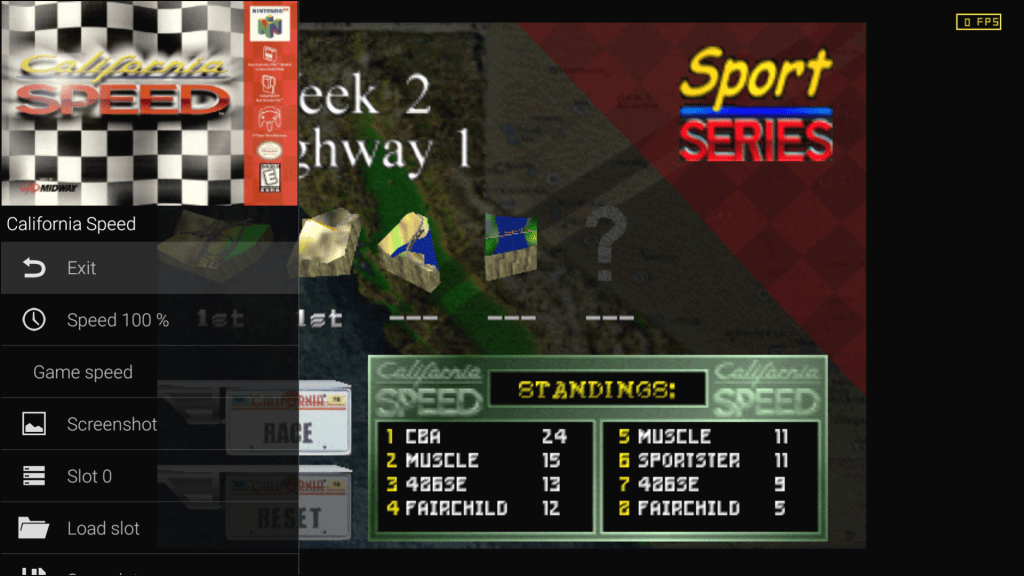
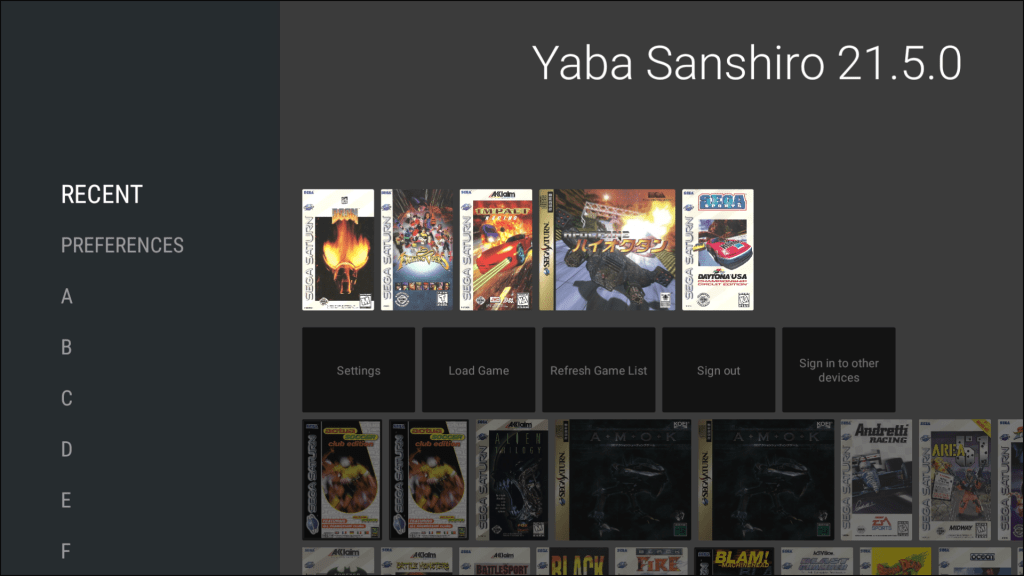
Yaba Sanshiro 2 (Sega Saturn)

Named after the mascot of the Sega Saturn, this is an Ok emulator but what lets it down is its limited compatability with certain games. Many Sega exclusives will work fine, with a few thrid party games failing to boot or suffering from issues. Thankfully these games have PlayStation/PC/3DO ports which arguably run better on those platforms, at least for 3D titles.

The user interface is noice and tegrate with the android tv launcher, showing previous played games, and will sort the games in alphabetical order which allows you to navigate and find titles more easily.
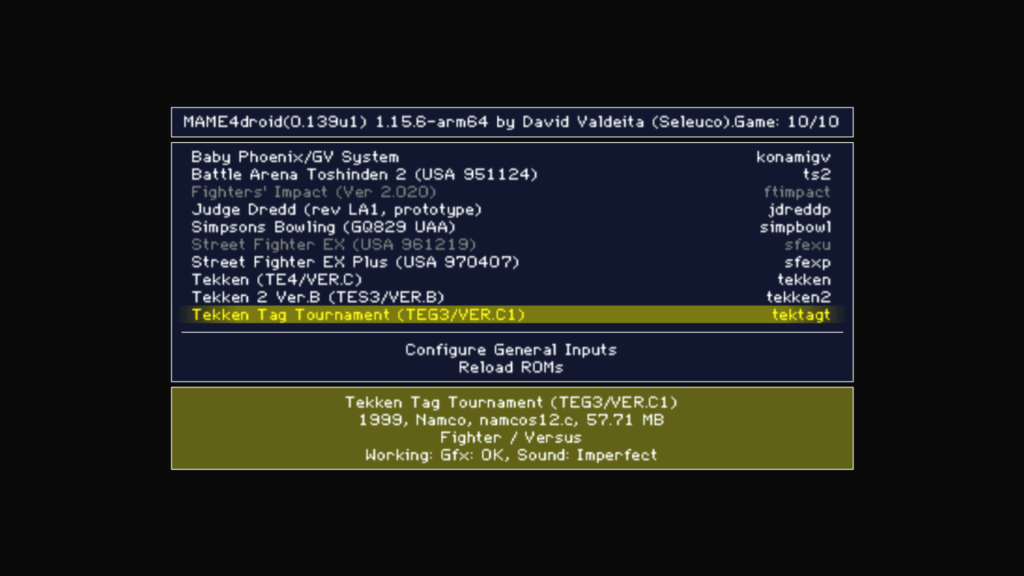
MAME4droid (Acade)

This is an Android adaption of MAME 0.139, and uses its romsets. As MAME 0.139 was relased mid 2010, it misses out on any improvements to the different machines that MAME emulates and as a result it struggles to emulate machines from the early 90s onwards, espically 3D arcade boards.

Namco System 11 games are playable but the sound emulation is poor, System 12 games struggle to run at full speed. Forget System 22 or Sega Model 2 or above, as the Shield lacks the CPU power to emulate these in the way that MAME does.

Sixth Generation

Emulators for sixth generation consoles are available like Dolphin and Redream, but due to the Shields aging hardware it is unable to reach full speed in these emulators for the majority of games. I wouldn’t recommend using the Shield for Gamecube titles, rather look to the Wii/Wii U instead which features native comparability. Dreamcast you can sort of get away with if you avoid the problematic titles, but for PS2/NGC/DC i would adisve to get an Intel NUC running either Linux or Windows with a living room friendly frontend. Retroarch can be configured to run at startup if you wish to use that.

External Hard Disks

Internally the Shield has 16Gb of flash storage, of which half is reserved for the operating system and the preinstallerd apps. The Shield Pro come with two USB3 ports for expandable storage for use with an external hard drive.


There are two ways to provision external storage on the Shield:
External storage which mounts the drive for use, as long as its formatted using a compatable file system. NTFS, FAT32 and exFAT are supported. As the name suggests, you can transfter files and access them, providing you give the application the correct permissions to do so. And you can connect and mount the drive to another computer or Android device whilst keeping the file system intact.
Device Storage formats the device using it’s own filesystem, which allows for additional Android applications to be installed to the external hard drive. This pairs the hard drive to the console itself, so you cannot use it as removable storage for use of another Android or any other device without reformatting.

However the Shield implemtation is not perfect and there are a few issues when it comes to pwer management. Android itself has no ability to spin down the hard drive without the use of additional software, unless the drives firmware has support to do this.
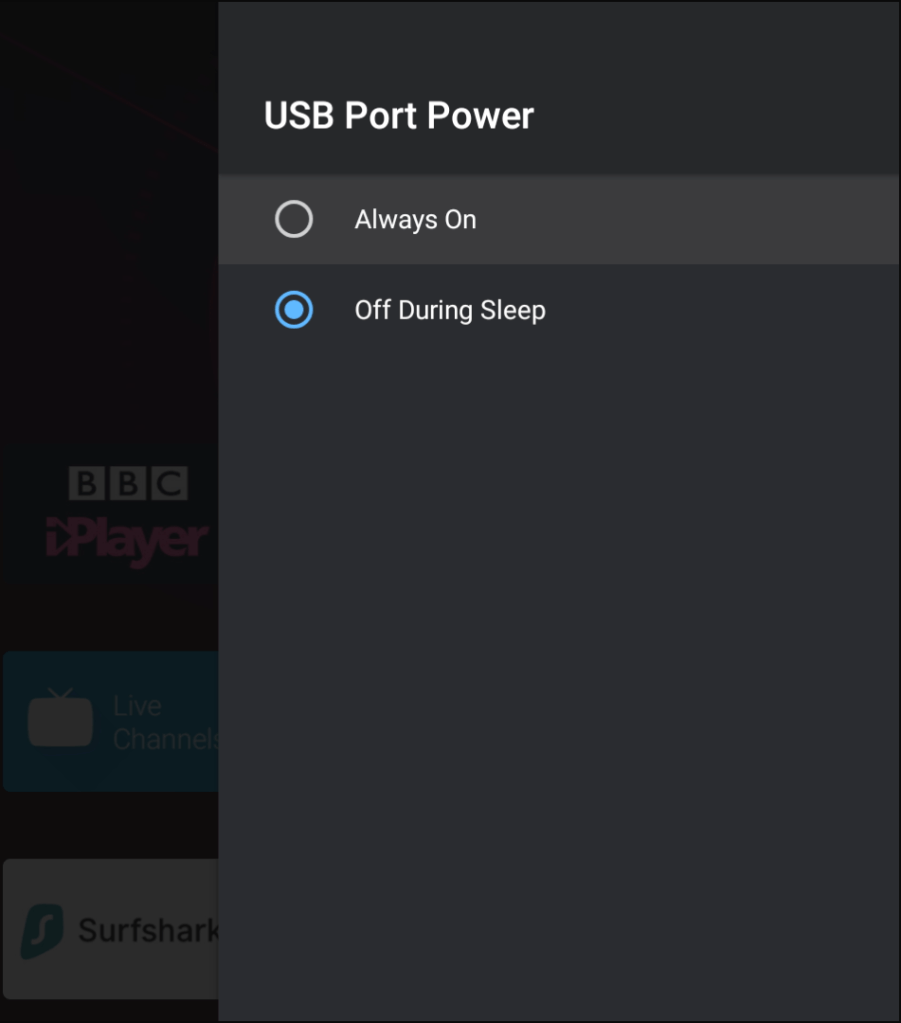
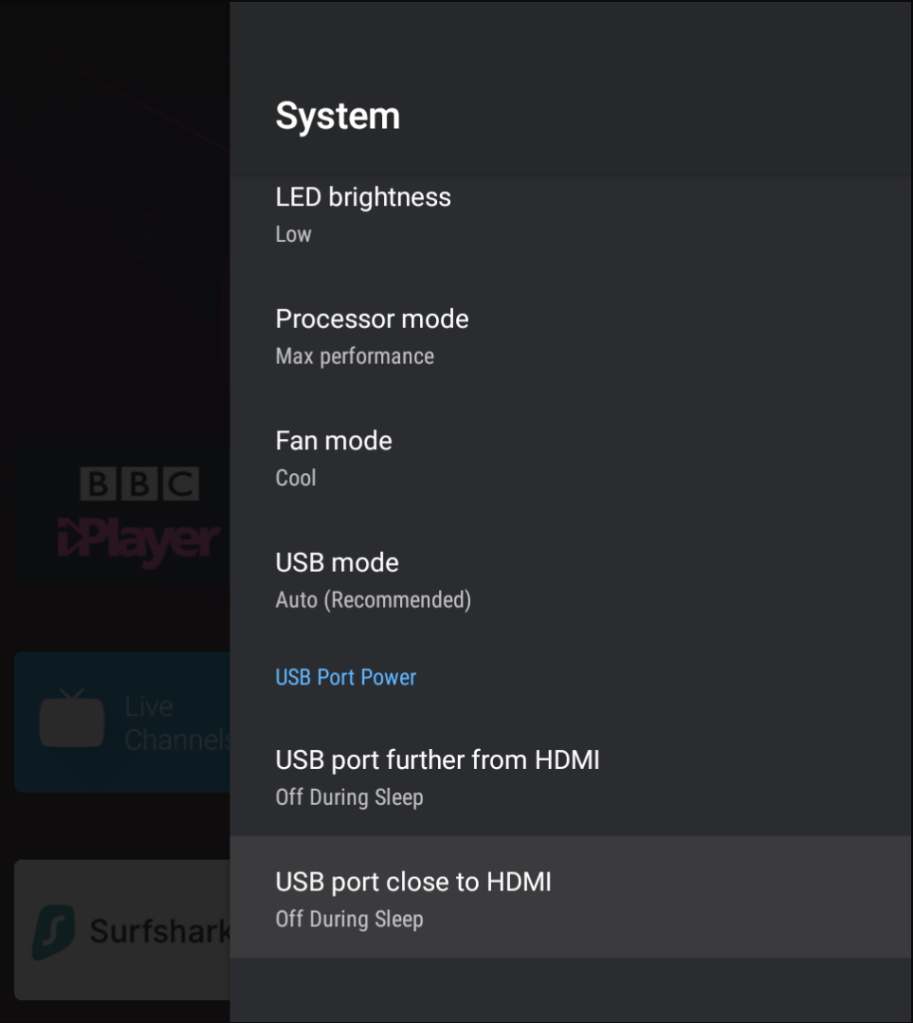
The Shield does have the option to power down the USB port when it enters sleep mode, however I found this to be rather abrupt since it will shut off the power to the drive without spinning it down first, which means it has the same effect as unplugging the drive whilst it is still spinning. This may have an affect on the life and health of the drive, since hard disks need to be spun down before they are powered off.
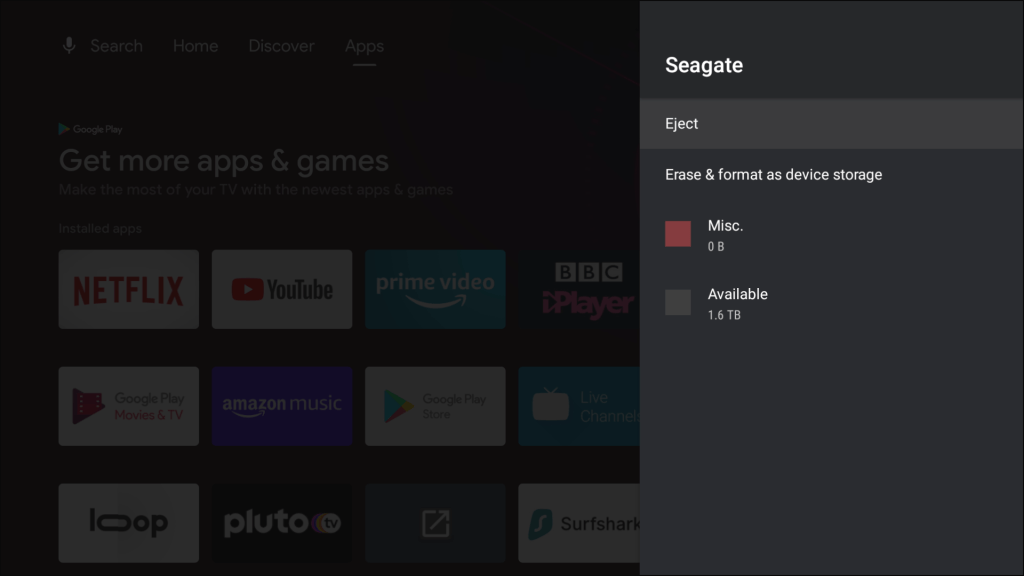
I did look into using the hard drive utilities to spin the drive down after a certain amount of time. I downloaded Seagate Tools to see what was offered but found this only allows control of the drives LED lights. Nothing in regard to the hard drives power management or sleep time.
The only other thing I can think of is if an app is keeping the drive alive by accessing it. I did hear that the photos app will routinely check any external drive for new content, and will check every 20 mins or so. I disabled these to check but found it made no difference, The drive still spins.

Alternatives

Amazon Fire TV: Fire TV set top boxes are based on the Android operating system , and Amazon sold game controllers that were compatible with the Fire TV but these have since been discontinued. Note this isn’t regarding the Fire TV stick which are quite underpowered and are designed for boomers to connect their 10 year old Bush/Alba TVs
Later Fire TV devices use the Cortex A53 which can cause issues with more demanding emulators due to the lack of performance, the second generation Fire TV cube or box are recommended.
Nexus Player: Considered to be the predecessor to the Shield, although now underpowered for most apps and emulators.
Razer Forge TV: A good alternative but sadly discontinued. The Shields is more powerful than the Forge TV and runs a later versions of android.

Non-Android
Atari VCS: Recently released in the US, although there is no confirmed Europe release date. Runs a customized Linux disto similar to Ubuntu which should allow for compatibility with Retroarch and Linux emualtors.
Apple TV: Not much experience with Apple gear, but jail braking is a possibility (Check software version before use) and game controllers can be used. However the software restrictions make this a huge turnoff.
Intel NUC: This is more of a DIY solution, but the form factor of the NUC devices makes them suited for set top box use. Windows would be the first option to install, but SteamOS would make more sense sine it has a TV based user interface as the default, and Debian based Linux distributions typically have good hardware and software emulator support. You would have to use your own controller, or use the Steam controller instead if you go with SteamOS.

Xbox One / Series: Can be a good alternative, they are easily the most powerful but install but setup can be longwinded. Two methods are avaliable, the dev mode or the whitelist. The dev mode route requires you to have a developer account with Microsoft, if you have used MSDN or Dreamspark (Or any Microsoft Higher education program) previously you may already be registered. This will allow you to sideload emulators onto the Xbox itself, but requires you to reboot into developer mode each time. Alternativly you can go the whitelist method, which will allow you to run these emulators in retail / regular mode, but the Xbox must be online and connected to Microsoft whenever those applications are used, and may be removed at any time. You must register with the developer who will have to approve your account in order to download and install the emulator. There are also some file system limitations with both methods, having everything stored on an external drive is reccomended, espeically for roms and game saves.

Adding a Hard Drive to a Dell Inspiron 5485

Introduction

This laptop comes with an onboard M2 SATA drive that has a 256GB capacity, with the provision of adding a SATA hard disk internally. Whilst you could add another SSD, I decided to reuse an old HDD I had around for some extra storage.

To prepare, make sure you have the hard disk ready that you would like to install and the SATA cable. The thickness of the SATA drive is important, as you will see later I made the mistake of installing a thicker HDD than the bay is designed for. I would also check and make sure the SATA cable is already shipped inside your laptop, since I assumed I had to purchase one separately.

Opening Up

This was a bit tricky, you have to unscrew the screws, the top three being fastened into place and are non-removable. What this means is that you unscrew then as normal but they do not come out of the case, rather they stay to prevent them from falling out.

Once the screws have been removed or loosened, you will need to pry around the edges of the laptop with either a credit or debit card or a thin plastic tip to loosen it. You may need to pry to get it to loosen, be gentle and apply even gradual pressure.

Removing the caddy

Once opened you will locate the area where the HHD will be installed, alongside the battery that will need to be removed and the socket where the SATA cable will connect to

Removing the battery

The SATA cable will need to route under the internal battery, so we have to temporary remove it, or in my case move it so we can access the area underneath There enough space where you can just place the battery on top of the motherboard whilst you install the SATA cable.

Adding the Hard Drive

Dell have provided a hard disk caddy where the drive can be installed, simply unscrew it (for screws) to take it out.

Unfortunately at this point is where I made my first mistake, since I assumed Dell did not provided you with the SATA cable and had to be purchased separated. Imagine my surprise when I took out the HDD enclosure and saw the SATA cable nestled between the plastic cover, meaning I now have two SATA cables. Well that’s £18 wasted…

Then again at least I have one spare incase anything was to happen to it. I’m pretty sure the Dell service manual mentioned you had to buy the came separately, or maybe that only applies to certain markets?

Now it is time to screw in the HDD, which is where I ran into the second issue. I noticed the SATA cable wouldn’t reach, At first I thought I had installed the HDD the wrong way round since the connector wasn’t aligning up but from looking at the hole underneath the HDD bay it seemed to fit. Upon closer inspection it seemed the hard drive I was trying to install was too tall for the enclosure and I had installed it upside down. When the hard drive is too THICC for the laptop…

Thankfully I had another hard drive lying around, a HGST that was pulled from my old PS4 when I upgraded its hard disk. This hard drive was thin enough that it would fit inside the bay.

Reassembling

A quick power on test before reassembly to ensure I didn’t fuck anything up. The laptop booted and the HDD was recognised in its BIOS EFI (Still trying to get used to that)

Motorola V547

The Motorola V547 is based upon the V500, and has a similar feature set however the V547 is slightly lighter and adds support for video capture and improves the battery life slightly. The display is capable of displaying 65k colours.

Although the device can play MP3 files, it does not have a dedicated MP3 player function, also the phone only has 5.5Mb of memory that cannot be expanded, which is very limited for a phone that supports a VGA camera and video playback, you certainly cannot use it as a music player, barley having enough storage for one MP3 song

Starting Up…

Homescreen

The four icons in a middle corresponds to the shortcuts than can be accessed using the phones directional pad buttons, and can be configured to the users preference. There is also a clock display at the bottom left, which can be set to either digital or analogue.

Unfortunately this phone has a lot of O2 branding (Phone provider in the UK), which results in a lot of O2 icons and link to online services.

Phonebook

List all contacts saved in the handset and the SIM card, when stored on the phone, additional information can be saved, you can also set a picture for the contact, save a voice name so you can speak to call the contact

Calls

Lists of received and previously dialled numbers appears here

Messages

SMS messages can be sent and view here, you can also send email’s and Multimedia messages (MMS).

Office Tools

My Service (SIM Application Toolkit)

If the SIM card inserted supports the SIM-AT, a list of applications can be accessed in the My Services menu

Calculator

A basic calculator is offered, along with a currency converter which can be configured with the exchange rate

Datebook

Basically a calander, can be set to a month or a week view. Events can be added and set to reoccur daily, weekly or on a specific date of a month. Timer events can also be set here.

Shortcuts

New shortcuts can be added to the shortcut menu, and the list can be reordered

Voice Records

A list of recorder voice notes, and the ability to create a new one. To record, there’s a voice button on the right side of the phone that needs to be held in order to record, releasing the button stops the recording, and you are limited to 50 seconds per recording.

Alarm Clock

Multiple alarms can be set, each alarm can have have a unique ringtone set

Dialling Services

Quick Dial

Chat

Simulates a threaded style view of SMS messaging, messages from the sender and recipient can be seen in one view

Games & Apps

One game comes installed here, FotoFunPack2 and Wakeboarding Unleashed

WebAccess

The web browser can be used to access WAP and HTML sites using the built in GPRS modem

Web Shortcuts

Saved pages and bookmarks, the bookmarks can be accessed here

Multimedia

Themes

Three themes are available here, Scarlet, Moto and Silver. Themes change the wallpaper and the phones colour scheme.

Camera

The handset uses a VGA camera, the viewfinder supports zoom and brightness adjustment. Annoyingly photos captured aren’t automatically saved, you have to manually select save. This ties into the phones design, since Motorola intend for you to take a and send photos without the intention of saving them, the phone having only 5Mb of memory adds weight to this theory and the fact the phones presents the option to send first, before saving.

Pictures

Images captured by the camera are saved here, along with any pictures received by an MMS message or received by Bluetooth.

Sounds

Ringtones are saved here, MP3 files are also stored here and the handset is capable of playing full length MP3 songs, but with only 5Mb of memory, you are limited to only one song, if that.

MotoMixer

Motorola’s ringtone creating application

Videos

Video clips captured with the camera can be played back ere, the phone saved in the 3gp container format

IM

Settings

Personalise

Settings like the home screen layout, which include the function of the home shortcut keys, and the left/right soft keys. The clock type can also be set here.

The main menu can be configured as either an icon grid view or a list view, and the menu order can be reordered.

There are 3 themes that can be set, Moto (Blue), Techo and Neon, themes includes the colour of the menus and the background wallpaper screen

Greeting message can be set when the phone turns on

Wallpapers that can be set, either from the built in images or a photo taken by the phones camera. Like in Windows, if an images does not match the screen resolution, you can set the scaling method to either Centre, Tile or Fit-to-screen

Screensavers are similar to wallpapers but are animated, and can be set to displayed after 1 or 2 minutes of inactivity, when the handset being open.

Ring Styles

Profiles can be set here, default ones to choose from are Loud, Soft, Vibrate, Vibrate and Ring and Silent. Pressing detail will let you customise the profile and set alert tones for various different features of the phone (Calls, IM, SMS, VoiceMail, Alarms, Data calls, etc) Ringtones are in MP3 or Midi format, and Motomixer created ringtones will also show up here.

Connection

Bluetooth settings, you can set up a handfree device and change settings like the phones Bluetooth name, set the device to be discoverable. External Sync can also be set for an external server, which allows contacts to be synchronised.

Call Divert

Call diverts can be set here

In-Call Setup

Initial Setup

Basic settings can be changed here, date and time, one touch dial, display settings like the backlight duration and backlight timeout. The device can be set back to factory default settings from here using the security code (default: either 5 or six zeros, 00000)

Phone Status

Battery meter showing how much power is remaining, also software and firmware information versions is displayed here.

Headset

Settings for auto answer after a few seconds, which can be changed, and the ability to enter voice dialling .

Car Settings

Settings for when a handsfree device are connected, and a car charger accessory

Network

View a list of available mobile networks and the bands the phone can connect to, when searching for networks, T-Mobile (Now EE) comes up in the list

Security

Configure PIN/PIN2 and the phones security codes. Call barring ca be set here.

Java Settings

Configure internet access settings for Java applications

Nec e616

Released in 2003, The e616 was one of the first generation of 3G capable phones for the Hutchinson 3 network in the UK.

NEC were not a commonly known manufacturer of handsets in the UK, the market previously dominated by Nokia, Ericsson, Motorola and Siemens at the time, with Samsung and Sony (Who’s mobile division would merge with Ericsson). In Japan they were known for their i-Mode handsets

Introduction

Apologies for the poor image quality on some of these captures, since the only way to capture was using a camera pointed to the phone screen, which can yield in some weird effects on screen.

Bootup screen, there is a lot of 3 branding within the handsets firmware, it seems the handset was produced exclusively for Hutchinson 3G and was used in their international markets also.

Home Screen

The default home screen, the calendar can be set as the background, or the wallpaper can be displayed instead. The row of icons can be accessed by pressing the middle enter key, which acts as a shortcut bar or dock to access common phone functions. Items can be added here by pressing ‘Link this’ when you are in a menu.

There is also a task manager like function, which gives the impression that this is some sort of smartphone, perhaps Symbian based?

Main Menu

Menu scheme uses a grid like layout, shortcuts can be used by the number keypad. The quick menu is used to quickly access different phone functions without having to trawl through the main menu. Taskbar lets you select and reopen running background applications, a very smartphone like feature.

Messages

3Mail looks to be a remote email service provided by 3, to be an alternative to Blackberry push email that was offered at the time. Having email on your phone was still a high end feature that many phones were not capable of, and even the ones that did have severe restrictions in what emails could be displayed. Also many webmail email providers did not support third party POP3/IMAP clients, which these phones were classed as, so email would be part of the network provider.

Text messages can be composed and sent from here, the handset supports SMS and MMS Multimedia messages. There’s an option for a video message which is really a vieo clip attached to a multimedia message.

A full text editor is provided, with support for copy and paste and predictive text. An annoying feature is typing a message using the keypad, the phone makes DTMF sounds.

The phone also supports copy and paste, a feature that is rarely seen in feature phones.

Phonebook

Contacts can be created and saved to the phone memory or the USIM card

Settings

Handset Settings

Video Calls

One of the big appeals of 3G phones was the advent of video calling, where you and the recipient could see and speak to each other in glorious CIF resolution. Here you can change the picture quality and the camera orientation mode

Screen Settings

Set a greeting message and change the power on jingle

Network setup

Here you can change the network selection, choose if you want the device to connect to 3G exclusively, and any access points settings.

Security

Dial Lock – allows you to set a passcode that is entered via the keypad when the device is opened, when enabled you can only make emergency calls unless the code is entered

Side Key lock – prevents the side volume buttons from being pressed when the device is closed

Supplementary

Misc call settings, you can change the caller ID options, divers and waiting options.

Date and Time

Clear Settings

Changes settings back to their default factory values

Multimedia centre

Access to multimedia features of the phone,

Camera

Capturing picture using the external camera. Both the front and rear camera can be used however both are limited to CIF resolution which is a bit low for this class of phone. Typically phones of this era use VGA resolution camera. Different effects can be applied. Both still images and video clips can be captured.

Record Sound

Sound can be recorded, up to 60 seconds in length and saved as an amr file

Image Viewer

View images captured by the camera, or any images downloaded

Video Player

Videos captured by the camera or downloaded videos from three can be played here, Videos are stored in the MPEG4 format.

Music Player

Capable of playing the Midi ringtones, but can also play back MP3 encoded files, either on the built in phone memory or from the memory card, just be mindful of the 5Mb transfer limit. Music can be played though the headphones or through the built in speaker.

Sound Player

Same as the music player, but for the recorder voice clips stored on the device.

Toolbox

Calendar

To Do

Add, set and remove reminders, and specify when the phone should alert you

Alarm Clock

Up to five different alarms can be set, with the option to set the reoccurrence to a selected number of days.

Notes

Similar to the Windows notepad, a text editor that lets you save up to 9 separate documents. Text is composed similar to an SMS message.

Calculator

A calculator and a converter, the calculator is capable of simple sums, but scientific operations are not supported. The converter is cable to convert currency only, and has the option to specify the rate manually.

GPS and compass

Supposedly comes with a GPS feature built in, but I wasn’t able to get it calibrated, perhaps it’s dependant on the mobile network being functional?

Call Memo

Java

The phone has the ability to run Java J2ME applications that are published and downloaded by 3. Unfortunately there seems to be no way to load the Java applications over USB or Bluetooth using the PC Software, so there’s not much to do here. I tried copying the Jad and Jar files over manually using the USB connection below but it didn’t work, seems the only way is to use the built in browser and download the games via the 3G network

External Connection

Bluetooth

This phone supports Bluetooth however it is very limited compared to other handsets, there’s no file transfer, only dial up networking and audio headset is supported.

USB

The phone can connect to a Windows PC using a USB adaptor cable, and with the appropriate software installed. Here files can be transferred to and from the phone, and contacts can be synchronised using an external application

Synchronisation

You can Sync contacts, calendar and To do lists from an external server, similar to how you can sync with Outlook or Gmail, only back in these days you had to use the Three server.

File Manager

You can explore both the phone memory and the external memory card. Internally the device has 19Mb of available memory for use, and can support up to 128Mb of external memory, using the Sony Memory Stick Duo standard. You can also format the memory card, check its filesystem for errors and view the amount of space free for use.

Files can be copied or moved, or sent via the MMS if the file size is small enough, Bluetooth cannot be used to send or receive files.

Web browser?

When Three launched their 3G service in the UK, it was designed to be a walled garden where only 3 service could be accessed using the phones internal browser, and external web access was not supported. This meant it was not possible to browse WAP sites on the handset, the browser that ships with the phone is locked down to work with Three’s services only, and from the article below was supposed to be the Netfront browser.

ACCESS’ NetFront™ Microbrowser Selected for New NEC Handsets on Hutchinson 3G Network | ACCESS (access-company.com)

ntl CR2 EPG (2001 – Bromley)

Bromley areas (former Cable&Wireless) were running this guide up until 2002, where it was replaced by Bromley CR3

Not all customers in Bromley were running this version of software, ex-Videotron customers were stuck on CR1 software due to the poor network conditions that meant the area could not support two way communication, meaning no interactive or broadband support. They received a rebranded version of CR1 but without the Liberate browser.

Now and Next bar, surprisingly its transparent

Viewing program information

Main TV Guide home screen

Main TV guide EPG, channels can be filtered according to their genre, and programmes can be filtered by the day and time slot.

Subject search, similar to the A-Z listings, allows you to find a program based on its genre

Ordering PPV events

The settings area, where favourite channels can be managed, and the picture output preferences can be changed

Interactive home screen, since this was a web page loaded from the server, it could be updated independently from the EPG. Interactive services were non functional in ex-Videotron areas (parts of London)

BBCi home screen, looks similar to the Kingston version

TV Email, each customer could have a selected amount of email address to use, and could be accessed from the TV service.

TV Internet, was the main interactive portal for other services hosted on the ntl platform

See more interactive

Vs Telewest

Telewest software looks to be an earlier build from Dec 2000, whilst the ntl is a later build from Jun 2001. notable differences is the support of subtitles

Vs Cable & Wireless

Telewest – 2002

Telewest redesigned their digital TV service in 2002, which saw the TV Guide software undergo a complete rewrite and redesign of the user interface, similar to what ntl undertook with their Bromley TV service.

Like ntl the TV guide was written entirely in Liberate TV middleware, and the entire interface is rendered using the Liberate browser. In contrast, the previous Telewest software used an EPG system developed by Pace, with the Liberate browser being added as a separate component what had to be loaded.

This meant the customer had to wait for the Liberate browser to load before they could access the interactive service, and on screen interactive prompt were not possible since the interactive stack was not running whilst the customer was watching TV.

Viewing TV on Demand listings

The Liberate middleware was upgraded to 1.2, which featured several programme and feature upgrades to the HTML browser used, one of which was the ability to use a mosaic style screen with different video feeds .As mentioned earlier, the Liberate intake now runs constantly, allowing for ‘press Red’ functionality to be used on TV channels, this was essential since Sky and ITVDigital had implemented similar interactive prompt features. These would also be instrumental for the upcoming Big Brother and Wimbledon 2002 interactive services, where customers could choose from different angles and feeds through the use of interactive, of which was not possible with Liberate 1.1 (The mosaic feature mentioned earlier)

A reminder alert for an upcoming program

Also new addition was the mini TV guide feature, where a small screen of the channel the customer was currently watching is displayed whilst the customer browses the TV guide or interactive. The exception to this is when they are browsing the On demand TV section, where the box changed to a Front Row preview channel, the reason being this was to allow the box to get up to date PPV listings rather than rely on cached data, and to do so it was necessary for the box to tune into a specific frequency that carried this data, preventing the use of mini TV.

A weird design decision since Telewest already had a functioning return path due to the internal DOCSIS modem inside the Pace box, why not use that to retrieve the PPV listings?

Adding Favourite channels

Viewing Favourite channels

Pressing reveals information on the selected program, and any program broadcast within the next 24 hours

View of the search and scan banner, known here as the Mini Guide like Sky you can view what’s on other channels

In 2003, a slight update was made to the interface layout, the Telewest Broadband branding is now in effect, and the layout is more square compared to the previous design.

ntl EPG (2001 – Langely)

The now and next banner has changed little since the previous software version

Another shot, this time from the Ireland version of ntl

The main guide interface has had a rebrand, and the main layout has been updated

Navigation for the TV guide has been made easier, a list based view is used as opposed to the grid based guide that can be found on Sky and Virgin.

A list of available channels on ntl

Viewing more information about a TV program

Help information, shows the connection status of the stb

Shows a changelog and improvements made for this version

The diary is similar in concept to the TV guide, programs that are to be broadcast in the future can be entered here, and the stb will remind you when the program is about to start

PPV movies were provided by Front Row, similar to Telewest

Front row listings

The settings page, you can change the screen settings such as the picture aspect ratio, the signal type (S-Video and Composite, with RGB being used in later STB revisions)

Early Pace Di4001 receivers outputted S-Video in place of RGB, newer models replaced this with RGB output

Message that appears when you are not subscribed to a channel or service

Interactive

Interactive was handled by a separate component known as the Liberate TV Navigator, which is the middleware used for the interactive services. The version used is 1.1, this early implementation was separate from the main Tv Guide, which mean interactive icons like the red button were not possible, since the middleware only runs when the Interactive button is pressed, this changed in later implementations, where both the TV guide and interactive functions are using the Liberate engine.

Interactive services were made available in this version, powered by Liberate TV navigator, these services were similar to the Bromley platform

Interactive home screen, these were microsites that were optimized for use on a TV

News section with different providers or channels

BBC news interactive

Unlike Ceefax, Digital text can render full JPEG and GIF images, like a web page

Pace Di4001NC

Pace Di4001NC

The Di4001NC was a cost reduced cut down version of the Di4001 series of ntl set top boxes. One of the noticeable differences is the removal of the second card slot, in favour of just a single smartcard slot for the smartcard. The second card slot was originally designed for Mondex cashcards, which never launched.

Another removal was the ethernet port, despite the box still having a built in cable modem, the IEEE1284 port has also been removed, along with the audio output

Pace Di4001NC Rear

From left to right:

  • Power Input
  • RF Out – outputs the RF modulator, does not pass through the cable signal
  • TV & VCR Scart
  • IR Input & IR Output – No official function
  • RS232 – No official function
  • Cable Input

The RF output no longer includes an internal combiner, which means you will no longer be able to tune in cable channel’s via the RF tuner. Instead only the modulated output of the set top box will remain. This was due to the intention of removing the analogue channels, and to prevent the DVB-C channels from being tuned in on modern digital TV sets.

Pace Di4001NC mainboard

Well it looks very similar to the Di4001, but on closer inspection you can see the components removed, also in this model there aren’t any stickers covering the various chips.

Pace Di4001 C-Cube AViA

From left to right;

C-Cube AViA-600L – MPEG2 Decoder

C-Cube AViA-GTX – Graphics Accelerator

C-Cube AViA-iNX – Transport Demodulator

Di4001NC

The removal of the ethernet and IEEE1284 controllers, the ethernet port seems to remain but is not wired internally.

Hitachi HD6417709

A closer look at the Broadcom DAVIC processor and the mysterious Pace chip, of which the sticker covered some of it on the previous model. At the very top you can see the main processor, which is unchanged since the previous model (Hitachi SH3)

Hitachi SH-3 HD6417709

Pace 909 6162800, ORBIT 61628

Broadcom QAMLink BCM3120KTB

Engineer Mode

To access, hold the Up/Down buttons upon bootup, and release when DIAG appears on the front panel display.

Pace Di4001NC diag screen

Default frequency settings, this would carry any software updates the STB would download upon boot up

Pace Di4001NC diag screen

Some version numbers, as well as the Network ID. This box appears to be running CR3.2

Pace Di4001NC diag screen

Further information in relation to the software versions on the STB

Pace Di4001NC diag screen

Since this revision lacks the internal combiner, you cannot control the outputted cable feed

Pace Di4001NC diag screen

Service status of the box, indicated that the signal is OK and the regional information

Pace Di4001NC diag screen

Signal information for the current frequency, this is the same frequency as the default frequency

Pace Di4001NC diag screen

Information relating to the DVB-SI, and the amount of services received

CAT – Encryption systems

PAT – Channel numbers

TDT – Updates the time & date

EIT – Event info, current program

Pace Di4001NC diag screen

Information for the inserted smartcard, the credit amount and the pairing status

Pace Di4001NC diag screen

A log of events generated by the STB

Pace Di4001NC diag screen

Signal strength status, but this time for the DAVIC tuner (also known as DVB_RC)

Pace Di4001NC diag screen

Same as above but for the upstream

Pace Di4001NC diag screen

Browser settings, for the Liberate navigator client

Pace Di4001NC diag screen

Current date and time, this cannot be set, but is retrieved from the network stream, the STB has a built in CMOS battery

Bootloader version and flash information

Pace Di4001NC diag screen

Memory information, according to these values the box has 16Mb, with 4Mb Flash

Pace Di4001NC diag screen

Information relegating to the MPEG decoders. You can also set the remote control configuration here and enabled the rear in or outputs, this has little effect since the software does not support this

Pace Di4001NC diag screen

No PPV events…

Pace Di4001NC diag screen

Flash memory information, the capacity, bad flash sectors and where the image came from.

More Information

NTL CR3 Software – Software this box runs on

Pace Di4001N – Another model/revision of an ntl box

Pace Di4000N – a STB from another ntl platform

Dell Optiplex GX1 PSU

Dell Optiplex GX1

A SSF (Small Form Factor) desktop class PC powered by the Pentium 2 processor.

Internal view of the GX1 showing the replacement PSU with adaptor

Power Supply replacement

The power supply in this desktop was well over 20 years old, and was in dire need for replacement, since the system had issues remaining stable after adding two PCI cards. Unfortunately with these old Dell Optiplex machines, changing or upgrading the PSU is not an easy task since Dell opted to use a different pinout for their ATX connector, alongside a proprietary connector than provided 3V to the mainboard. Using a regular AT power supply will damage the mainboard since the wiring is completely different, therefore an adaptor is required for a PSU replacement.

6 Pin Dell P10 AUX Connector Adapter (atxpowersupplies.com)

One downside to this adaptor is that it adds additional slack to the ATX main power cable, which was already long to begin with, this means I had to tie up the excess cable and shove it under the CD drive.

There are various other Dell models which use this type of power supply wiring, generally models from the Pentium 2 and 3 era. The website linked has a list of affected models that use this type of power supply.

Seriously! Don’t use a regular ATX power supply without this adaptor!

Operating Systems

The Optiplex GX1 had a range of officially supported operating systems to use;

Windows 98

The go to operating system for PC retro gaming. Whilst its not the most stable operating system in the world, its widespread support and popularity and to an extent charm means it deserves an install. The GX1 has native support for 98, and most likely came preloaded on most shipped systems for this model.

Windows NT 4.0

The GX1 had full driver support for NT4, since it was designed as a business class system to be used in offices, however with limited DirectX support, the games we can run on NT4 is a lot more limited comparted to 98.

IBM OS/2

The GX1 has official drivers for OS/2 Warp 4, I’ve not tried installing on this system, however I am interesting in getting it running on the system since I have only used OS/2 on virtual machines or PCem.

Red Hat 6.2

One of the officially supported GNU/Linux distro, at least going by the Dell driver support page, which offered official downloads for the GX1. I’ve not tried installing Red Hat on this system (yet)

PCI Expansion

This system has 2 PCI slots and 2 ISA slots, a maximum of three cards can be installed because the middle slot is shared between the PCI and ISA

USB 2.0

USB 2.0 4 Port 480Mbps High Speed VIA HUB PCI Controller Card Adapter PCI

A must have upgrade since the USB bus on this system is limited to the 1.1 standard, and maxes out as 12Mbps. VIA still provide Windows 98 drivers for their cards. Plus the 4 extra USB connectors are useful.

Some older motherboards can be picky in regards to the USB chipset used, apparently VIA chipsets are considered more problematic compared to NEC ones, due to the way IRQ’s are handled and reserved with different chipsets.

Which USB 2.0 cards for old motherboards \ VOGONS

Firewire 1394

Firewire 1394a Dual Port – PCI Full Height Card | eBay

Surprisingly Windows 98 supported 1394 Firewire/iLink cards, and drivers for 98 exist for this card. By adding a 1394 card, this become one of the faster interfaces on the PC, the other being the USB 2.0 PCi card. The onboard ethernet maxes out as 100Mbps.

Spare ISA Slot

Not sure what to put here, a modem? Gameport card? (useful since I have a Microsoft Sidewinder that has a Gameport)

Compact Flash Card

Could be used in the slave IDE channel with the correct adaptor, in order to add additional storage, or to install another operating system like one of the many supported OS.

Specifications

OptiPlex GX1 Midsize Managed PC Systems Reference and Installation Guide (dell.com)

Graphics

ATI Rage II – This is the main graphics adaptor built onto the mainboard. Internally it uses the AGP bus and has 4MB of VRAM with the ability to upgrade to 8MB via onboard memory upgrade.

The graphics processor, with the VRAM to the right along with the VRAM expansion slot. The white IDE looking connector to the top right is the ATI video connector and is meant to connect to an ATI MPEG2 decoder.

This graphics card support the ATI CIF 3D API, which was ATI’s graphics library used with some early 3D titles before the widespread adoption of DirectX. Games such as Wipeout, Tomb Raider used this API. This API was only supported on Windows 95 and 98, it had no support for Windows NT, also later ATI drivers versions remove the CIF support.

Chipset

Intel 82440BX

Memory

There are 3 SDRAM slots available, with one slot populated with a 64MB module, and an extra 64MB module was added to the GX1 to bring the memory up to 128MB. According to the Dell documentation, the system can handle a maximum of 768MB of memory.

Desktop

ATi RAGE utility, showing information about the onboard graphics

wipEout

Oh my… lets try a different resolution

Ah that’s better, Wipeout running at 640×480

South Park

South Park had a PC port, in addition to the console PSone and N64 releases, running in a higher resolutions with Anti-Aliasing

Driver

ATI CIF

I plan on looking at further ATI CIF powered games, in addition to Wipeout listed above (Driver/South Park are DirectX games)

A full list of CIF supporting games is available here

Using ntl CR3 Guide on Virgin Media 2021

Previously I connected a former ntl box (Pace Di4000N) running an old outdated version of its guide software to a modern Virgin media network in attempt to see what would happen, the result was it could load the TV guide listings somewhat (now & next) but the channels would be out of order. There was also no chance of receiving any channels, since the NetID didn’t match my area.

ntl bromly CR3 on modern Virgin Media

I came across an ntl: Langely box (Pace Di4001NC) which still had an older build of its software installed, which was later build than the Di4000 box described above. It can take a few boot attempts to get it to load the TV channels, sometimes it gets stuck on the loading screen.

Well it defaults onto channel 321 upon bootup

Attempting to browse TV listings via the TV Guide browser, some listings do come through whilst others seem to be missing

At least program synopsis works somewhat

From what I’ve researched, ntl used a proprietary iEPG system for its listings, which may have used the regular DVB SI for program listings, with the iEPG handling the extra stuff that the regular DVB-SI didn’t cover. This could apply to channel genres and maybe the numbers themselves

Adding events to the diary, which is similar to the personal planner in Sky Guide

Information for a future event

A list of channels, ntl CR3 had the ability to reorder the channel list to the user preference, a feature that was lost when it was replaced by the Virgin Media UK2 software. (UK1 in some areas)

Further list of channels, These are not in EPG order, rather the box assigns them channel numbers by itself

List of channels using the favourite channels feature

And finally some system and technical information

Still no channels come though, likely due to the Network ID being incorrect, and with the Di4001 boxes, they were designed to set their own Network ID. In practice however it seems to cycle through the different Network ID’s that Virgin Media use, perhaps the box was not designed to handle multiple Network ID’s?